First time re:Invent attendee. First impressions.

The conferences I typically attend are Cisco Live (CLUS) and Enterprise Connect (EC). Occasionally, I manage to get into CCW if the dates overlap, but CLUS and EC are my primary focus, and I’ve probably attended them for over 10 years.

This year, as a company, we decided it made sense to check out AWS re:Invent. Our AWS practice has become a significant part of our business—especially around Amazon Connect—so this seemed like the perfect time. Below are some takeaways and things I’d love to see improved.

The Good:

  1. The Scale of the Event:

    • The sheer size of re:Invent was staggering. The largest conference I’ve attended previously had around 30,000 attendees, but this one was estimated to have 60,000. That’s insane! Yet, everything was well-organized—there was always someone nearby to guide you, and while it felt overwhelming, it was controlled chaos.
  2. Session Content:

    • Overall, the session content was pretty good. I had some gripes about certain topics, but the workshops (labs) ran incredibly smoothly. It was fantastic to spin up a fresh AWS account, have prebuilt resources, and dive into the learning tasks. I absolutely loved working through the labs.
  3. Networking:

    • The networking opportunities were excellent. I got to reconnect in person and meet many new, interesting people—customers, AWS partners, and AWS employees alike. The amount of engagement opportunities was impressive.
  4. The Weather:

    • While I didn’t spend much time outdoors, the weather was perfect. Unlike previous visits, I didn’t have to go back to my room for a midday shower.

The Bad:

  1. Vegas:

    • Need I say more?
  2. Finding Sessions:

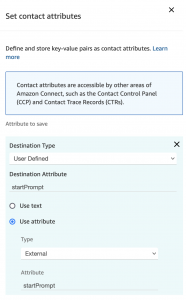
    • Searching for sessions was frustrating. For example, looking up “Amazon Connect” workshops in the catalog led to unrelated results like a Direct Connect workshop as the first hit, with an actual Amazon Connect workshop showing up fifth. Surely Q can help improve this?
  3. Session Locations:

    • Sessions were scattered across multiple hotels, making it nearly impossible to attend all the ones I wanted. On Monday, there were four non-overlapping sessions I wanted to attend, but they were spread across three hotels with a maximum of 30 minutes between them. Even at top speed, attending three was a stretch. While replays help, not all sessions are recorded.
  4. Workshop Access:

    • Considering the logistical challenges, I wish workshops posted their URLs so attendees could complete them later. Even better would be a centralized way to find these directly on https://workshops.aws.
  5. Meals:

    • The mobile app didn’t provide menu information ahead of time, making it difficult to decide whether to grab a boxed lunch. It would also have been great to have boxed lunch stations outside the main meal areas to save time when rushing between hotels.
  6. Conference Cost:

    • Attending re:Invent is pricey. All-in, you’re looking at around $5,000 at least, though you might be able to cut it down to $3,500 if you’re frugal. Still, the tickets alone are the most expensive I’ve seen for a conference.
  7. December Timing:

    • While the weather was nice, December is a tough time for conferences. Many attendees have just come off Thanksgiving travel, head to this event, and then face more travel in 1–2 weeks for the holidays.

The Mobile App:

  1. Session Search:

    • The app was great at finding sessions but struggled with everything else. For example, while Amazon Q did an okay job recommending sessions, it couldn’t tell me where to pick up my badge at the airport or what was being served for lunch each day.
  2. Performance:

    • The app was slow to load. Despite having a phone that’s less than a year old, it felt like the app was loading for the first time every time I opened it. You’d think AWS could prioritize app traffic on their Wi-Fi or use a local CDN.

    Final Thoughts:

    Overall, I’d attend AWS re:Invent again, but I’m not sure it would be a yearly event for me. The cost and scheduling challenges make it a less-than-ideal fit for an annual commitment.

    ~david

    Basics of Amazon Connect Views and Routing Transfers with Agent Proficiencies

    This post is going to cover a few disparate things as well as present a customer scenario we were trying to solve for. The post will focus on the specifics I struggled with in hopes it helps others. The highlights of what is covered in this post are:

    • Displaying an attribute in the Agent Workspace with a view.
    • Building a form view and passing data between two views.
      • Getting your view data into a flow and updating contact attributes based on view form input.
    • How to route queue transfers when working with proficiencies.

    The use case: Customer has agents across the United States and calls are handled based on two things: caller’s time zone and the caller’s state. The caller chooses their time zone and state in the IVR and we then queue the call to the time zone that is chosen and set a proficiency of state based on the caller’s second selection. Proficiencies allow us to not have to create a queue for every permutation of time zone and state.

    What happens if the caller chose the wrong state in the IVR? One solution is to ask the agent or the caller to go through the IVR again and choose the right destination, however experience wise this is just not ideal and there’s a lot of room for errors. Another possible solution is to create 50 queues, one per state and configure 50 quick connects. However, think about the impact this will have on your routing profiles. We’re not talking just 50 routing profiles as some agents could handle multiple states. We’re talking potentially as many routing profiles as you have agents. This is just not scalable and a management nightmare. One more option is to create a custom CCP. Now this is probably the most elegant solution, but also the one with the most amount of overhead and if your customer doesn’t already have a custom CCP it opens a whole new can of worms you will want to avoid.

    I had a feeling that views would help here, but I had only done half of an AWS workshop about them in the past and felt like the presentation was too advanced and I was mostly lost. I also posted in LinkedIn in hopes I was missing something with how proficiencies worked and got some good ideas. Here’s how it was solved using views/step by step guides.

    First let’s look at the queues:

    Screenshot 2024-08-28 at 9.12.55 AM

    Second, let’s look at the inbound flow that sets the queue. You get the time zone and set it a few attributes and use one of the attributes to set the working queue (shown above).

    Screenshot 2024-08-28 at 9.12.26 AM

    Third, let’s get the state and set the routing criteria where we’ll set State >= 1 for the type of agent we want the call to go to. You can see my State attribute, remember this as it’s important.

    Screenshot 2024-08-28 at 9.14.46 AM

    Now, let’s look at what an agent will look like to get a specific type of call. We need to set the state or states they are proficient in.

    Screenshot 2024-08-28 at 10.45.43 AM

    So far we’ve not done anything new. We’ve selected the queue and routing criteria we configured a routing profile (not shown) and set our agent proficiencies. This will get a call to the Pacific Time Zone queue for an agent that can handle California (CA) calls.

    Views

    The issue we have now is how do we let the agent transfer the call to another state (e.g. Oregon (OR)? First, let’s build a view to set the transfer destination.

    Screenshot 2024-08-28 at 10.49.27 AM

    This view has the pieces that are important.

    • Attribute Bar: Will dynamically show the state that was selected in the IVR.
    • Dropdown: Holds every possible state an agent could transfer to and has a name of StateDropdown.
    • Button: Click action triggers the event flow to move forward and update attributes and sends the agent to a confirmation view.

    The confirmation view:

    Screenshot 2024-08-28 at 10.54.18 AM

    This view has a single text box where the contents will be dynamically set.

    Event Flow

    We have to two views we need to allow the agent to specify where the call needs to be transferred to. Now we need to make a few updates. The first thing is to create a new flow which will serve as the event flow when the call arrives to the agent and will render the views in the agent’s workspace.

    Screenshot 2024-08-28 at 10.57.37 AM

    The event flow is pretty simple. Make sure you enable logging so you can see what’s going on in CloudWatch. Next you choose your Set Transfer view and in the input pass the JSON string below to set the attribute bar to show the IVR selected state. Remember, you want this attribute set on related contacts to make sure it’s available on the inbound contact. This is very important.

    {“Attributes”:[{“Value”:”$.Attributes.State”}]}

    After the agent sets the transfer destination we want to set a new contact attribute called AgentTransfer which will hold the new State. Next, we’ll show the confirmation view letting the agent know the transfer can happen now and we’ll show the agent what state they selected in the drop down. In the show view blow you’ll pass the JSON string below.

    {“Attributes”:[{“Value”:”You call is ready to be transferred to $.Views.ViewResultData.StateDropdown.0″}]}

    Now in the inbound flow we need to set an event flow to trigger the view workflow.

    Screenshot 2024-08-28 at 11.17.15 AM

    Now to test the inbound side. Below is my agent workspace receiving a call for Pacific Time Zone queue for State = CA.

    Screenshot 2024-08-28 at 11.23.58 AM

    My agent now wants to transfer the call to Oregon and uses the drop down.

    Screenshot 2024-08-28 at 11.29.04 AM

    Agent sees a confirmation that the call is ready to be transferred.

    Screenshot 2024-08-28 at 11.27.58 AM

    At that point the agent can use the appropriate quick connect to transfer the call.

    Screenshot 2024-08-28 at 11.51.34 AM

    One last piece, in the transfer flow we need to update the routing criteria to go to the new state. We can easily do that by checking that we have a value in AgentTransfer attribute.

    Screenshot 2024-08-28 at 11.53.50 AM

    And updating the routing criteria dynamically base on this same attribute.

    Screenshot 2024-08-28 at 11.54.09 AM

    Your call is now queued for an agent who handles OR calls.

    I hope this was helpful, I spent a few hours trying to wrap my head around passing data to the view and getting data out of the view to update attributes. This was the biggest learning from all this and solved the use case without having to create a custom CCP or build any extra queues or routing profiles.

    ~david

    Amazon Connect Quota Visibility

    Not being able to see what your applied quota settings were has been a huge sore spot with Connect. We’ve resorted to keeping track of quotas on a spreadsheet and having AWS support provide updated numbers every 6 months. However, this is not scalable and generally a pain. I was very please when the following announcement was made, which states:

    You can now view applied quota values for resources within each of your Amazon Connect instances using AWS Service Quotas. …

    I immediately went to one of our Connect instances and was very disappointed at first. Because, the way AWS decided to present the applied quota as it’s not obvious. If you go to the Service Quotas > AWS Services> Amazon Connect. You see all applicable quotas for Connect. In this case let’s focus on Quick Connects. Notice that the “Applied quota value” is still the default.

    Amazon Connect Service Quotas

    Amazon Connect Service Quotas

    If you click on the actual quota. You will still see the default at the top, but at the bottom right you’ll see the true applied number.

    Quick Connects Per Instance Service Quota

    Quick Connects Per Instance Service Quota

    I’m happy this is here, but I wish AWS would just go the extra mile and not require us to click on the actual quote to see the true number. I’ve not validated this via the CLI, but I am hopeful it’s more obvious there.

    ~david

    How does Amazon Connect CCP Agent Login and Logout Work

    I didn’t think a call center platform could make the topic of an agent login and logout interesting, but Amazon Connect has figured out a way to make me question my sanity with the design decision they have made.

    We are going to do a deep dive into some of the uniqueness and outright strange behavior the CCP has when it comes to agent login and logout. This assumes you’re running the out of the box CCP, which means zero customization. Additionally, we’re going to be looking at 5 different screens at the same time to get an overall picture of what is going on and it’s impact to reporting. We will be looking at the Amazon Connect Dashboard, CCP, Real Time Agent reporting, Login/Logout report and Agent activity audit report.

    Login to CCP

    There are two ways that agents could login to CCP. The first is by logging into the Connect Dashboard (htts://<your-instance>.my.connect.aws/) then having agents launch CCP from there here’s what you need to know. The second way is to go to the CCP directly (https://<your-instance>.my.connect.aws/ccp-v2). Let’s walk through the first method step by step and see some of the reporting implications.

    Step 1: A dashboard login:

    • Will show up in the Login/Logout report.
    • Will not show up in the Real Time Agent report.
    • Will not show up in the Agent activity audit report.

    Why is this important? From the Dashboard to taking a call center call, the agent still needs to launch CCP and go into the Available state. I would argue that a better metric of login would be when the agent launches the CCP and not just logs into the Dashboard. The documentation for the Login/Logout report state this:

    The Login/Logout report displays the login and logout information for the users in your contact center (for example, agents, managers, and administrators).

    So the documentation is aligned with the behavior you see, but I would argue that, when it comes to agents, this report is misleading as an agent still has a few steps to follow before they are ready to take a call. Now, if you open the Agent activity audit report you will not see any data either which makes sense based on the Login/Logout report. Thankfully, both reports line up. Now, let’s get our agent from the Dashboard to CCP. By default the CCP should be in the Offline state.

    Step 2: Launch CCP and:

    • The Login/Logout report doesn’t change as this is based on the Dashboard login.
    • You still will NOT show up in the Real Time Agent report.
    • You still will NOT show up in the Agent activity audit report.

    Our agent has logged in to the Dashboard, launched CCP and is in an Offline state, but we’re still not seeing anything outside of the Login/Logout report. I would have expected the Real Time Agent report to show me the state of the agent, but that’s not happening. What’s even more infuriating is that if the agent changes states and then goes back to Offline, the Real Time Agent metrics have data about my agent. So why is Offline after login any different than going from one state to Offline state? To be fair, the agent will drop off from the statistics in about 3 minutes, however I think AWS should change this behavior and by default show any agent who is logged in and Offline to make things more consistent.

    Logout of CCP

    You would think that logout would be much easier, but there are still a few gotchas on this. The biggest thing to remember is that just closing the CCP window will not log you out. Another thing to consider is that a CCP logout will put you in Offline first then log you out. This is important to note if you have custom states you want to use for logout. However, if you are in the Dashboard and you launched the CCP and you logout from the Dashboard it will not properly log you out of the CCP. The CCP will eventually give you a login screen, but:

    • Real Time Agent metrics will still show you in the last state you were in.
    • Login/Logout report will show you logged out.
    • Agent Activity audit will still show you in the last state you were in.

    Make it Better

    Here are what I believe to be some simple suggestions to make this experience better. I hope that someone at AWS takes some of these and puts them in the next sprint.

    1. Offline state shows up in Real Time Agent metrics.
    2. The Routing Profile allows for configuring the default agent state upon login. This will put agents in any state when they first login.
    3. Dashboard or CCP logout behave the same way and reflect correctly across all reports.

    Login and Logout at a Glance

    Action Real Time Agent Login/Logout Report Agent Activity Audit
    CCP Launch No Data Login time recorded either from Dashboard or CCP login No Data
    CCP State Change State Data No Change State Data
    Dashboard Logout Previous State Continues Logout time recorded No Data
    CCP Logout Offline for about 3 minutes then stats disappear. Logout time recorded Offline State

    ~david

    Transcribe Your Audio Files To Migrate to Amazon Connect

    This is an update to an earlier post covering the same thing now with updated code.

    As we are working our way out of Cisco UCCE to Amazon Connect we find ourselves needing to transcribe thousands of prompts. I wanted to revisit this piece of code to ensure it is still working. If you want to use this and are starting from scratch here are the steps you need to take:

    – Install Studio Code
    – Install Python 3.9
    – Create the folder where you will keep your project.
    – Create a virtual environment.
    – Activate your virtual environment.
    – pip install python-dotenv, boto3, pandas
    – *Remove the profile_name or update it.
    – Update the .env file with the region you’ll be using.

    You can find the full source code here.

    The script works like this: It creates an S3 bucket, grabs the first file, checks if the file is in S3 and uploads it, creates a transcription job, waits for the transcription to complete, grabs the results, writes a CSV. I’ve tried to catch as many potential errors as possible, but I’m sure there are some lingering. Expect the transcription to take around 1 minute per file. Assuming normal IVR prompts.

    AWS Transcribe* I have many AWS profiles, which might not the be case for others. If you only have a single profile change this line session = boto3.session.Session(profile_name=’MyProfile’) to session = boto3.session.Session()

    I hope this helps others.

    ~david

    Contact Flow Block

    Amazon Connect Contact Flow Editor Frustrations and Annoyances

    The last few weeks have given me an opportunity to dig deeper into the AWS’s Amazon Connect solution. The purpose of this post will be to document some of my frustrations with the contact flow editor which I believe should be easy to fix. There are a few more frustrations which I don’t believe are easy, so I’ll save those for another post.

    In the Contact flows screen there are a few things I would love to see. Firsts, make the Name, Type, and Description columns sortable. When there’s a very long list of flows this allows to quickly see specific groupings of flows together. Second, add an action menu at the end of the row which allows for a quick way to publish, duplicate, or delete a flow. This simple menu would save at least 2 extra clicks and covers some of the common actions one takes once inside the editor.

    Amazon Connect Contact Flows Screen

    Amazon Connect Contact Flows Screen

    Let’s click on a specific contact flow and take it from the top down. Perhaps the most important thing here would be an auto save or confirmation that you might lose your changes if you try to navigate away from the editor screen. It’s very common that you have to go find a queue or prompt ARN, as they are not available in the editor, so if you browse away from the editor without saving you’ve lost your progress.

    In an ideal world you would be able to easily switch from flow to flow without having to go back to the main contact flows screen. A drop down next to the flow name to quickly switch between flows would be great. This is specially useful when you want to copy and paste blocks between flows.

    Contact Flow Editor Top Bar

    Contact Flow Editor Top Bar

    I’ve covered this one before, but it fits nicely with this post. You can save a flow or publish a flow and you can do both by using the publish button. However, the confirmation notification that you performed one or the other doesn’t confirm which one you did. This is minor annoyance as you can then move your eyes from the far left of the screen where the notification is found to the top right of your screen to see the Latest button label which will tell you the status of your current flow. It would be nice if the notification confirmed which action you took, I find myself  savings when I meant to publish and it always takes me a second to confirm which one I did.

    Screen Shot 2021-06-23 at 6.07.16 AM

    The workspace or the big white area with a grid where you place your blocks is the next focus. It’s nice to have infinite room to the right and bottom, but it would be nice if the same would be applied to the top and left. As your flow has more and more branching you find yourself scrolling further and further down, it would be nice if by default your start of the flow would be centered by default.

    Remembering the zoom level or setting a default zoom level per flow will save a few clicks. As the flows gets bigger you start having to zoom in and out a lot more. When the flow is rather large, there’s very little reason why the default zoom level is the same as a flow which only has a few blocks. Below is the default view of two different flows. While this default view is useful for smaller flows, for bigger flows it’s not as useful and you immediately have to scroll around or zoom out to get to where you want to go faster.

    Default View of Two Different Flows

    Default View of Two Different Flows

    One of the great things about contact flows is how many things you can do dynamically. However, you first have to bring in a lot of that data over to the flow. You do this with a Set contact attributes block. However, as you add more attributes it starts to become harder to find the right attribute you want to reference. Adding a way to sort or collapse every attribute details would make it much easier to find the attribute you’re looking for. This is specially important as the editor doesn’t tell you what attributes have already been defined. If that was the case this point might not be as important. Imagine having to scroll through a dozen of the aqua blocks below, having to  read each name to get to the one you want. Painful!

    Amazon Connect Set Contact Attribute

    Amazon Connect Set Contact Attribute

    And finally, my biggest annoyance: block details. Block details are the configuration options each block has. You can get to them by clicking the top dark gray bar of any block.

    Contact Flow Block

    Contact Flow Block

    There are two annoyances here. First, you can’t click on the workspace to close the block details. Even if you didn’t make a change you have to move your mouse to the far bottom left or right to click the cancel/x buttons. Heck, let me use the escape key to get out of there. So often I just need to see the configuration without making changes and having to cancel out every time takes unnecessary steps.

    Contact Flow Configuration Details

    Contact Flow Configuration Details

    And finally, do not show me the details of a block that has nothing for me to configure. If by mistake I clicked on the gray bar of a terminate block. There’s nothing of value that this screen adds. Others might find the link to the documentation helpful, but I don’t. This annoyance would be lessen if I could quickly  escape from this screen, but since I’m being held captive by it and there’s no useful information displayed it just makes my blood boil.

    Terminate Block Details

    Terminate Block Details

    I hope this post is not taken as me saying that Amazon Connect is not a good solution, far from it. This post is out there in hopes that someone at AWS who has the power to make things better sees what I believe are common frustrations.

    ~david

    Revisiting Initial Observations of Amazon Connect

    Back in 2018 I made a series of posts detailing some of the good things and not so great things about Amazon Connect. Now that I’ve spent a few weeks getting reacquainted with the product I want to revisit one particular post (Initial Observations of Amazon Connect) and provide some update. While I love and am passionate about Cisco’s contact center offerings, I tried to check my bias as much as possible while working through this.

    First, let’s cover some of the things I labeled as strange and provide an update:

    • Can’t change agent state while reserved or talking. Update: Has not changed.
    • If you use a desk phone, you can’t reject the call. Update: Has not changed.
    • Changes take about a minute or two to propagate and there’s no notification if your changes are live or not. Update: Has not changed.
    • If you create a new agent and then login as that agent using the same browser as before your admin session will be moved over to the new agent credentials. Painful when trying to test permissions on agents. Update: Has not changed. However, this is not an Amazon Connect issue as much as a browser caching and using multiple tabs issues.
    • You can’t re-route a connector by clicking on the start point, you must first delete the existing line and then create your new connector. Update: This has changed! You can re-route connectors by just clicking on the arrow.

    Second, here are the things I said made no sense back in 2018 and their update:

    • Every step should have a Lambda invocation option. This would make the scripting a lot cleaner. Update: Has not changed.
    • If you reject a call and you’re the only agent you’re automatically set back to ready. Queue must be drained before last agent can change states out of available. Update: This has changed! You’re able to change to a non-routable state after you reject a call.
    • No default routing? I disabled the only queue and calls just dropped when I tried to route to that queue. You would think that the system would force some sort of default routing option just in case you make a mistake. Update: Has not changed. It is on the flow designer to account for queues being disabled.
    • Contact flow editor, no easy way to get back to all your contact flows. Update: Has not changed.
    • Agent auto accept takes about 12 seconds to trigger using soft-phone, this would impact agent stats and I really don’t see the point of having this feature if it’s going to take this long to connect an agent. Due to some limitation, I can’t re-rest.
    • When you save or publish a contact flow you get the same message “Contact flow saved successfully!” Different message for publish would be nice. Update: Has not changed. Seems to be such an easy change and would make the development of scripts so much easier.
    • No easy way to move the whole script. Work area should have infinite scroll to all sides. Update: I’ll give it a half change. While you still can’t select all blocks, you can zoom out and hold the control click and select the whole script or part of the script and move it. The fact that the script is still anchored to the top left corner still presents some challenges when you try to move things around.
    • You can’t select multiple nodes and move them, you must move one by one. Update: This has changed! Holding the control key allows you to select multiple nodes.
    • Flows don’t auto save drafts, if for some reason you don’t remember to save you’re SOL. Update: Has not changed.
    • How draft flows and published flows are handled is confusing. Not very user friendly. Update: Has not changed. While I’ve gotten more accustomed to it, it’s still could be a bit more intuitive.
    • Checking contact attributes doesn’t offer a NULL or NOT NULL condition check. Update: Has not changed.
    • When a connector goes behind a flow node, you can’t delete the connector. Update: I’ve not been able to reproduce this so I believe this has changed and the editor is better at automatically placing the lines.
    • No way to duplicate nodes. You must configure a new node from scratch every time. Update: This has changed! Holding the control key while you click a block allows you to copy it. This is probably the biggest change for me!

    Amazon is pushing out tremendous new features and capabilities around Connect, but there are still some pretty glaring gaps which I believe could be easily solved. I will say the speed to develop and integrate feel unlimited, but once you get beyond the basics you need a good handle on code and AWS security and infrastructure to make your vision a reality.

    ~david

    AWS CLI Success

    AWS CLI with SSL and Multiple AWS Instances

    I’m ramping up to start a new Amazon Connect project and similar to what I did in the past I wanted to capture as many useful tidbits as I run into in the hopes that they will both help me remember things and help others doing similar things. In this blog we’re going to talk about setting up the AWS CLI when you have multiple AWS instances and are using SSO.

    First, let’s cover why you would want to configure the AWS CLI. Many of us who have been in the contact center world for a long time either do no programming or very little programming. The programming we do is generally around solving very specific repetitive tasks or something very niche. However, with the race to the cloud and providers such as Amazon Connect and Twilio you will have to do some programming in order to truly leverage your CC platform. The AWS CLI allows that. Even if you feel that you will never do any programming or are opposed to it, the CLI allows for much faster access to AWS services. Once you get familiar with it you’ll realize that using the CLI allows you to understand your AWS configuration much better. You don’t have to know every command, but you’ll start with a few favorites and take it from there.

    I’m setting this up on both Windows  and macOS and will try to call out the differences were possible.

    To start, make sure you install AWS CLI version 2. If you have version 1 uninstall it before installing version 2. If you don’t have the latest version make sure you update it.  The documentation linked above works great on both Windows and macOS. Once it’s installed you want to validate it’s working by running the command in bold:

    dmacias@MBP ~ % aws –version
    aws-cli/2.2.8 Python/3.8.8 Darwin/20.3.0 exe/x86_64 prompt/off

    Next, let’s configure your access. Remember that in this case our AWS account is SSO enabled and we are dealing with multiple instances so we’re going to setup our CLI to provide access using SSO and to use named profiles to get to each instance. First we’re going through the automatic configuration then we’ll go through the manual configuration to validate that everything is configured correctly.

    Automatic Configuration

    There are a few things you need to taken in to account. Your SSO URL must end in /start and your region must support SSO. Remember that this region could be different than your default region where you’re spinning up your resources. Finally, choose a profile name that is easy to remember. I generally go with instance name and role type when there are multiple of either.

    dmacias@MBP ~ % aws configure sso
    SSO start URL [None]: https://mysso.awsapps.com/start
    SSO Region [None]: us-east-2
    Attempting to automatically open the SSO authorization page in your default browser.
    If the browser does not open or you wish to use a different device to authorize this request, open the following URL:

    https://device.sso.us-east-2.amazonaws.com/

    Then enter the code:

    DIVAD-YEAH
    There are 2 AWS accounts available to you.
    Using the account ID 3382948573928
    The only role available to you is: AdministratorAccess
    Using the role name “AdministratorAccess”
    CLI default client Region [us-east-1]: us-west-2
    CLI default output format [JSON]: json
    CLI profile name [AdministratorAccess-3382948573928]: dev-profile

    To use this profile, specify the profile name using –profile, as shown:

    aws s3 ls –profile dev-profile

    If SSO fails and you get an “Invalid_grant Invalid grant provided” error check your SSO region. You more than likely have the wrong one.

    AWS CLI SSO Error

    AWS CLI SSO Error

    What you want to see to know everything is good is this.

    AWS CLI Success

    AWS CLI Success

    Manual Configuration

    You can repeat the above steps for any other instances and roles you want to configure. To validate the configuration or make changes to what is already configured you can run the same command above or you can open the AWS CLI config file located in macOS ~/.aws/config or in Windows %UserProfile%/.aws/config. Below you’ll see two different profiles configured.

    [profile dev-profile]
    sso_start_url = https://mysso.awsapps.com/start
    sso_region = us-east-2
    sso_account_id = 3382948573928
    sso_role_name = AdministratorAccess
    region = us-west-2
    output = json
    [profile stage-profile]
    sso_start_url = https://mysso.awsapps.com/start
    sso_region = us-east-2
    sso_account_id = 2834343234234234
    sso_role_name = AdministratorAccess
    region = us-east-2
    output = json

    Now to ensure your profiles work as expected run a command. In this case I want to see all the S3 buckets configured and that I have access to.

    dmacias@MBP ~ % aws s3 ls –profile dev-profile
    2021-05-01 01:23:42 amazon-connect-123a3dam9834

    Finally, if you want to logout you can run

    dmacias@MBP ~ % aws sso logout

    Then to log back in or to change profiles you do this

    dmacias@MBP ~ % aws sso login –profile dev-profile

    ~david

    Microsoft and Nuance a Brilliant Play for Redmond

    Bloomberg reports that Microsoft “is in advanced talks” to purchase Nuance. I’ve not been able to stop thinking of this move and I’ll be the first to admit that it surprised me, but the more I think about it and the more I talk to others in the industry this is an absolutely brilliant move. Here are my crystal ball predictions:

    The patent play: Nuance comes with over 2000 patents. This is a huge cache which will no doubt be useful for the upcoming AI wars. This will be a huge boosts to Microsoft’s already huge R&D commitment in this space.

    This hospital bill is brought to you by Microsoft: Nuance makes the majority of their money from the healthcare sector. We’re not talking just dictations or document management, we’re talking EHR, billing, and diagnosis software. Windows and Office are already prevalent in the healthcare space, this puts MS in the heart (get it?) of hospital operations and processes.

    Cortana, it was the best of times it was the worst of times: Did you know that Windows 10 was Cortana’s big debut in the desktop space? Yeah neither did anyone else. Cortana began in 2014 as a direct competition to Alexa which was released the year before. At the time Microsoft was beginning to make some heavy bets in to the mobile space with Windows mobile. Well it’s a decade later and Windows mobile is dead, Cortana’s OS integration has been neutered and I’ve never seen another human being speak to their Windows PC. I believe this is going to change that with a huge marketing push of some college student dictating their final paper to their Microsoft Surface device while getting a manicure.

    Where we’re going we don’t need passwords: Nuance comes with perhaps one of the oldest if not best speech biometrics software. Imagine joining a Microsoft Teams meetings where you call in and start speaking and you’re authenticated immediately. Or allow for “signatures” based solely on your voice. Verification and authentication continue to be huge and the rise of better and better “deep fake” technology will allow for some sort of trust verification service with Nuance biometrics in the middle of it.

    (Part 1) We’re taking our ball and going home: This one is near and dear to me heart. If a Cisco call center customer wanted to have speech recognition or text to speech there was only one name in town. Nuance. This has changed a bit in the last few years with the introduction of LumenVox as an additional option. And this has changed even further in the last 18 months with Cisco supporting Google’s DialogFlow, but Nuance still reigns supreme. I can see MS increasing the pricing of an already very expensive product making it prohibitive for some call centers to run their software.

    (Part 2) I can see clearly now the rain is gone: Did you know that Azure stands for the color blue of a cloudless sky? Microsoft will be able to create a very defensible moat around their Azure offerings by being the only provider to have the latest and greatest Nuance services. In addition, some telephony cloud provider, who are already battling Amazon and who white label Nuance products as part of their offering, might be forced to either consume more Azure resources to get better pricing or completely get priced out from this technology and watch the competition pass them by. This sets the stage for Microsoft to be in the driver’s seat of what UC or CC provider you might choose next if you have an already deep Nuance integration or if your call center must use Nuance.


    Amazon Connect CCP (Agent Desktop) Walkthrough

    I was talking to a few people about Connect and we were focusing on the agent desktop. For someone who is coming from Cisco Finesse, CCP is a big departure and I couldn’t find a good resource which showed all the out of the box functionality in a concise way. So, here it is. Everything you need to know about straight out of the box CCP.

    CCP Highlights

    • 100% web-based.
    • Uses WebRTC and Opus audio codec.

    Login Screen

    • Can be integrated to SSO.
    • Allows for password self-service.

    image

    Initial Screen

    • Will set you to whatever state you last had before you logged off or killed the client.
    • Transfer buttons are semi context aware (more on this later).
    • Agent status/state menu.
    • Log out is not a state, but a separate button.
    • Ability to get calls via a hard phone/PSTN instead of over the web.
    • Ability to download agent side logs (JSON format) from first login to right now.
    • Multi-lingual support 8 languages.

    imageimageimageimageimage

    Call Screen

    • Agent whisper of queue name.
    • ANI of caller.
    • Transfer numbers based on queue name.
    • Can transfer to another queue, another agent, or external. Can even transfer to yourself which makes no sense.
    • Multi line support.
    • Can make outbound calls manually.

    12

    image3image

    ~david