Cisco Courtesy Callback (CCB) and CCE Hours of Operations

A project from last year requested that CCB not be provided if the expected wait time (EWT) was longer than how long this group was going to be open. The other requirements was to try and do it without using a custom element so they could better support the application if I was no longer around. There were two challenges with this request. First, getting the hours of operations. Second, parsing through that data to figure out if the EWT would be greater than close time or not. This blog will not provide the whole solution, but it should give you enough to be able to piece things together to fit your needs.

Getting the Hours of Operations

Assuming you’re running Contact Center Enterprise (UCCE/PCCE)  12.x, Cisco has an API to get the business hours using a GET request to https://{CCEAdminFQDN}/unifiedconfig/config/businesshour/ and using basic authentication you can see this:
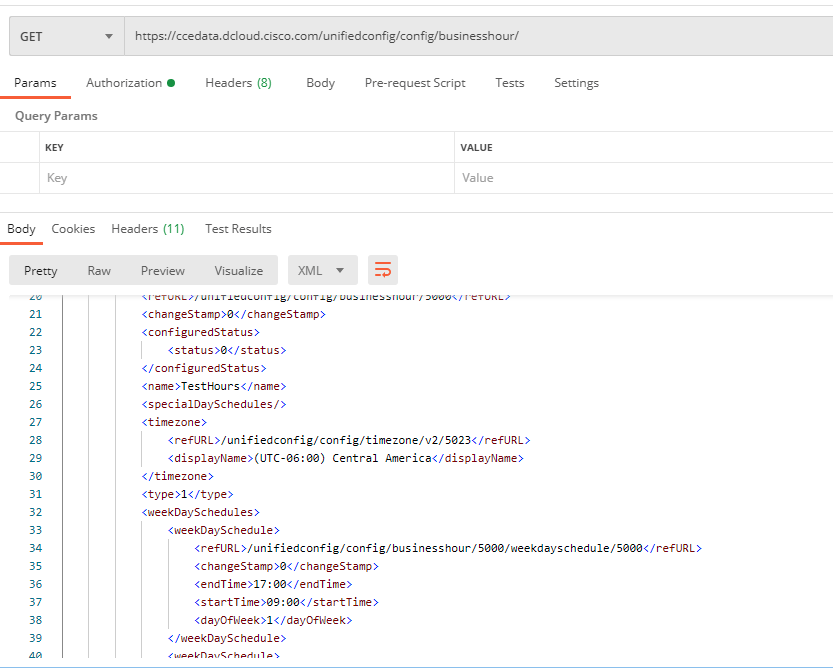
GET Request Business Hours

GET Request Business Hours

Let’s take a closer look at the payload. Let’s focus on the two parts that are marked with ###.

</pre>
<?xml version="1.0" encoding="UTF-8" standalone="yes"?>
<businessHour>
<refURL>/unifiedconfig/config/businesshour/5000</refURL>
<changeStamp>0</changeStamp>
<configuredStatus>
<status>0</status>
</configuredStatus>
<name>TestHours</name>
<runTimeStatus>1</runTimeStatus>
<runTimeStatusReason>Week Day open reason</runTimeStatusReason>
<specialDaySchedules/>
<timezone>
<refURL>/unifiedconfig/config/timezone/v2/5023</refURL>
<displayName>(UTC-06:00) Central America</displayName>
</timezone>
<type>1</type>
<weekDaySchedules>
<weekDaySchedule>
<refURL>/unifiedconfig/config/businesshour/5000/weekdayschedule/5000</refURL>
<changeStamp>0</changeStamp>
<endTime>17:00</endTime>
<startTime>09:00</startTime>
<dayOfWeek>1</dayOfWeek>
</weekDaySchedule>
<weekDaySchedule>
<refURL>/unifiedconfig/config/businesshour/5000/weekdayschedule/5001</refURL>
<changeStamp>0</changeStamp>
<endTime>17:00</endTime>
<startTime>09:00</startTime>
<dayOfWeek>2</dayOfWeek>
</weekDaySchedule>
<weekDaySchedule>
<refURL>/unifiedconfig/config/businesshour/5000/weekdayschedule/5002</refURL>
<changeStamp>0</changeStamp>
<endTime>17:00</endTime>
<startTime>09:00</startTime>
<dayOfWeek>3</dayOfWeek>
</weekDaySchedule>
<weekDaySchedule>
<refURL>/unifiedconfig/config/businesshour/5000/weekdayschedule/5003</refURL>
<changeStamp>0</changeStamp>
<endTime>17:00</endTime>
<startTime>09:00</startTime>
<dayOfWeek>4</dayOfWeek>
</weekDaySchedule>
<weekDaySchedule>
<refURL>/unifiedconfig/config/businesshour/5000/weekdayschedule/5004</refURL>
<changeStamp>0</changeStamp>
<endTime>17:00</endTime>
<startTime>09:00</startTime>
<dayOfWeek>5</dayOfWeek>
</weekDaySchedule>
</weekDaySchedules>
</businessHour>
<pre>
The runTimeStatus tells us if the Business Hours are currently opened or closed and the next part tells us what the hours of operations are for each day. Based on your use case you an just use the runTimeStatus to make a decision to offer CCB, but if you need to check if EWT is greater than close time, then we need to do a bit of extra work.
Parsing Through the Data
First, using an action element you first need to convert the XML into an array:
&lt;/pre&gt;&lt;pre&gt;importPackage(com.audium.server.cvpUtil)
var xml = {Data.Element.RESTGetBH.response_body}
var path = ""
var dow, dowPath, endTimePath
var endTimeArr=["00:00","00:00","00:00","00:00","00:00","00:00","00:00"]

for(var ctr=1; ctr&amp;amp;lt;=7;ctr++)
{
dowPath="/businessHour/weekDaySchedules/weekDaySchedule["+ctr+"]/dayOfWeek"
dow = XpathUtil.eval(xml,dowPath)

endTimePath = "/businessHour/weekDaySchedules/weekDaySchedule["+ctr+"]/endTime"
endTimeArr[dow]=XpathUtil.eval(xml,endTimePath )
}

print("\nendTimeArr=" + endTimeArr)

endTimeString = endTimeArr.join(";")
print("\nendTimeString=" + endTimeString)

endTimeString

Next, we need to parse what time we close today. Notice that we pass today’s day from ICM:

&lt;/pre&gt;&lt;pre&gt;var arr = {LocalVar.LocalEndArrayString}.split(";")
var dow={LocalVar.dayOfWeekBH}
var time = arr[dow]
print("\nendTime=" + time)
time

Finally, we need to calculate in seconds what time we close:


var closeTime = {LocalVar.todayClose};

var hours = closeTime.substring(0,2);
var minutes = closeTime.substring(closeTime.length-2, closeTime.length);
closeTimeInSeconds = Number(hours)*3600+Number(minutes)*60;

At this point we have an array containing all the close hours, we have what time we closed today, and finally we have how many seconds from midnight we’re going to close. Now you can make some calculations to figure out if you should offer CCB or not.
~david

VMware Fusion 12 and Big Sur

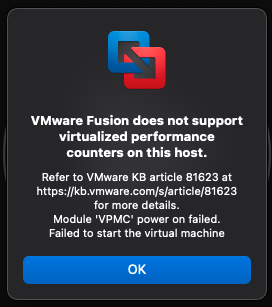
As many people are slowly upgrading to the latest MacOS version, Big Sur, there are a few of us who are running into some compatibility issues. For me the only one that has given me some grief is VMWare Fusion. Many in my industry run multiple VMs to be able to connect to various customer or just to be able to use some of the Cisco tools which do not support any other operation system other than Cisco. There are two issues which I needed to fix in order to get one of my VMs back. First, the error below “VMware Fusion does not support virtualized performance counters on this host.” This error prevented the VM from booting up.

VMware Fusion Performance Counters Error

VMware Fusion Performance Counters Error

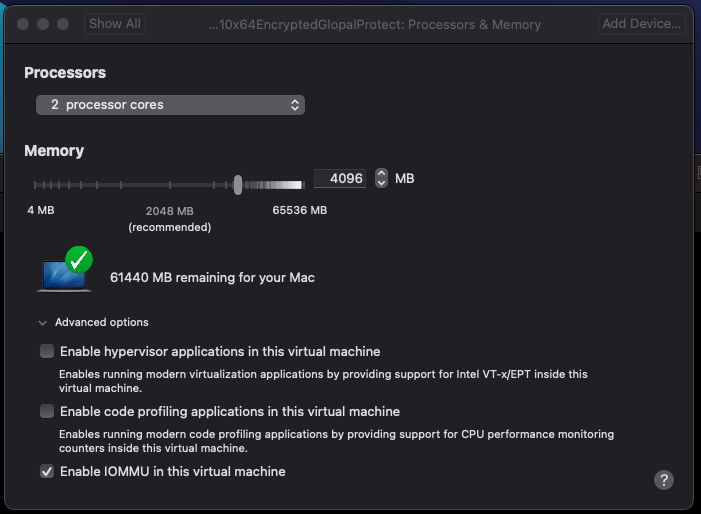
This can be resolved by going to Settings > Processor & Memory > Advanced options and unchecking “Enable code profiling applications…”

VMware Fusion Processor & Memory Settings

VMware Fusion Processor & Memory Settings

The second error was “You are running this virtual machine with side channel mitigations enabled.” This error could be ignored and didn’t seem to affect the VM at all, but it was still annoying. This kb had all I needed to get that message out of the way.

~david


Extending Your Call Center’s Life

While the CCaaS providers want you to think that everyone is fleeing to the cloud and the traditional on premise CC providers want you to think that the shift is very slow, the truth is somewhere in the middle. One thing we can be sure of is that all of our on premise customers are doing this:

4g04ry

Every vendor is playing defend and take over. The days of an Avaya IVR with a Cisco ACD are starting to go the way of the dinosaur. Really no one is interested in playing reach out and integrate, but this is where the most value is present and where I think we, as consultants, should be focusing our energy. Let’s look at a couple of scenarios where reach out and integrate make sense.

Scenario 1: You’re on an old ACD which, while still supported, your only upgrade path is to go cloud as the vendor has stopped on-premise development. You are not sold on going cloud and are considering replacing your current platform with another on premise solution.

Scenario 2: There is a worldwide state of emergency, let’s pretend a pandemic is happening, and you need to spin up small clusters of call centers quickly to handle increased demand due to new customer requests. You’re projecting that these call centers and agents might only be online for a maximum of a year so you want to avoid having to purchase perpetual licenses and new hardware to handle these new capacity long term.

Scenario 3: Business is absolutely booming and the two server solution you love has reached capacity. The only way to scale is to go to a completely different solution, but you absolutely love your current system and you don’t have enough data to make a decision to replace your system or not.

We are seeing a lot of requests coming in which fit the above 3 scenarios and we have spent a lot of time figuring out what the perfect reach out and extend strategy is for each request.  I would love to hear what other scenarios or interesting pairing others have run into or are currently working on. I’ll be posting more about one interested pairing we’ve made and the solution we’ve developed to increase the life of our customer’s call center.

~david

Do virtual agents need virtual breaks?

If you’ve been paying attention to the contact center world you would have noticed the rise of virtual agents. The term is a bit broad and confusing to be honest, but here’s my take on it. Virtual agents are just a rebranding of self service with a lot more personality and capabilities. For example, you could always make a payment online, but before the flow was:

  • For account information press 1. “1”
  • Please enter your account number. “1234”
  • To hear your balance press 1. “1”
  • To make a payment press 1. “1”

Now with virtual agents the flow is a lot more flexible:

  • What would you like to do? “I want to a pay my account.”
  • What’s your account number? “1234”
  • Would you like to pay your account in full? “yes”

Now with the rise of virtual agent services you can use speech, TTS, send out an SMS, process a credit card and integrate with a backend all within the same platform and under the same cost. The rise of these agents aligns perfectly with the proliferation of AI services such as DialogFlow, AWS Comprehend, and even MindMeld (RIP) which have removed a lot of the complexity in delving in to AI/Machine Learning. Additionally, the XaaS model where you don’t have to buy the cow, care for it, feed it. All you do is rent it when you want some milk.

The other huge benefit a lot of these virtual agents tout is the ability to be multichannel out of the box. You no longer have to build parallel logic for voice and SMS. You now have a single place for all your logic and can go to Facebook messenger or WhatsApp. While this is partially true, the customer experience across different channels does need to change and the reality is that you should be building semi-parallel logic depending on your channel.

Ultimately, I’ve started dabbling in this space and got my Inference certification. I’m looking forward to getting more and more exposure with this technology and get a deeper understanding how it really augments the contact center world I know and love.

~david


WireShark RTP Player

Troubleshoot RTP issues with WireShark when using Jabber or IP Communicator

This was an interesting one that I wanted to document. We have our agents and supervisors on either VDI Jabber or Windows Jabber or CIPC and we could not get silent monitoring to work. When the supervisor activated it everything looks correct, but there was no audio for the supervisor while the agent and caller had no issues. Supervisor could then barge in to the call and audio would work just fine. Here are the steps we took to troubleshoot this.

  1. Get the IP addresses of the agent and supervisor device. Then get a packet capture of both end points while performing silent monitoring.
  2. Using this filter get all the packets coming from the other device to your computer: ip.addr == {other parties IP}. You should see a good bit of UDP packets. At this point if you don’t see any packets coming from the other endpoint you know that more than likely the network or far end device configuration is at fault as your device didn’t send or receive any RTP.
Wireshark Packet Capture

Wireshark Packet Capture

3. Click click on any of the packets Decode As… Set Current to RTP.

WireShark Decode Packets

WireShark Decode Packets

4. All your previous UDP packets should now be RTP packets.

WireShark Decoded Packets as RTP

WireShark Decoded Packets as RTP

5. Go to Telephony > RTP Streams and Analyze the stream that is detected. You will then be able to Play Streams to confirm you get the expected audio.

WireShark RTP Stream Analysis

WireShark RTP Stream Analysis

6. Confirm audio stream is correct.

WireShark RTP Player

WireShark RTP Player

At this point we’ve confirmed our device is getting RTP, but our soft phone isn’t playing it. So a likely culprit could be the Windows firewall. Using your favorite text editor go to c:\Windows\System32\LogFiles\Firewall and open domainfw.log and publicfw.log. What you want to look for is the IP of the other device and see if you see any drops.

2020-01-01 12:03:48 DROP UDP {RemoteIP} {LocalIP} 17488 24576 200 – – – – – – – RECEIVE

If you look at the port this was received on you’ll notice that it is the RTP range Cisco recommends to have open. So at this point you can disable the firewall, which I don’t recommend, or create a new firewall rule and add UDP ports 16384-32767 as allowed.

~david

Windows ODBC Data Source Success

Windows ODBC Connection to CVP Reporting Database

This one took me a good bit of hours and googling with very little results. I wanted to post this for posterity and for anyone else out there trying to do the same thing. The end goal is to create a Windows ODBC Data Source connection to your Cisco CVP Reporting database.

First, a bit of a recap. Cisco’s CVP Reporting server utilizes IBM’s Informix database. It’s been like that for many years and to be honest it’s both great and terrible. It’s great because you don’t have to pay (directly) for a license to run the database. And horrible because it feels like Informix is just one step above using an sqlite database. Informix is used in Cisco CommunicationsManager (UCM), Contact Center Express (UCCX), Unity Connections (UCxN), and of course CVP Reporting.

On to the main course.

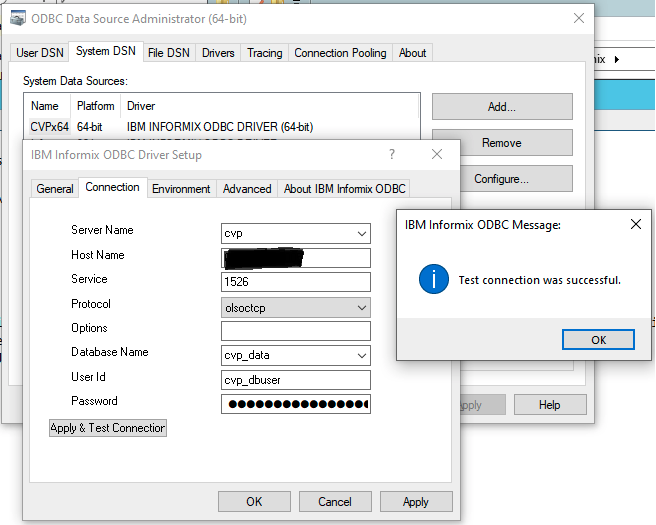
  1. You must obtain a free IBM account and go to this link. You must choose the SDK option and download the Informix Client SDK Developer Edition.
    • If you want to do this with ODBC x64 then download clientsdk.4.10.FC14.windows64.zip
    • For the x32 version download clientsdk.4.10.TC14.zip.
  2. Install either download, you can install them both too. They both work independently or side by side. Then reboot your computer.
  3. From there you must go to your CVP Reporting server and find your onconfig file. It should be in c:\db\Informix\etc. Open the file and find the following two lines. Make note of the values you see.
    • DBSERVERNAME
    • NETTYPE
  4. Open ODBC Data Source Administrator on your local machine. Go to System DSN > Add…
  5. Choose IBM Informix ODBC Driver > Finish.
  6. General > Data Source Name > Give it any name
  7. Connection > Server Name > The value of DBSERVERNAME in the onconfig file.
    1. Host Name: IP, FQDN, or hostname of server
    2. Service: 1526
    3. Protocol: The value of NETTYPE in the onconfig file.
    4. Database Name: cvp_data
    5. User Id: Generally cvp_dbuser but you an connect with any valid user.
    6. Password: Your password.
  8. Environment > Client Locale > EN_US.UTF8
    • Database Locale: EN_US.UTF8 If you can’t set this value, hit apply to close the ODBC properties and then set this property.
  9. Go back to the Connection tab and Apply & Test Connection and give it a minute or two and you should see:
Windows ODBC Data Source Success

Windows ODBC Data Source Success

Hope this helps.

~david

2020 Cisco Forums Profile

It’s nice to be recognized

I got a nice surprise in my inbox today. An email from Cisco letting me know that I was the first ever winner of the English Community Developer of the Month. Per Cisco the Community Spotlight Awards:

… recognizes members whose significant contributions designate leadership and commitment to their peers within their respective communities, including the Cisco Learning Network (CLN) and Cisco Community. Spotlight Awards Program is designed to recognize and thank individuals who help make our communities the premier online destination for Cisco enthusiasts.

I get a cool badge to show off too.

2020 Cisco Forums Profile

2020 Cisco Forums Profile

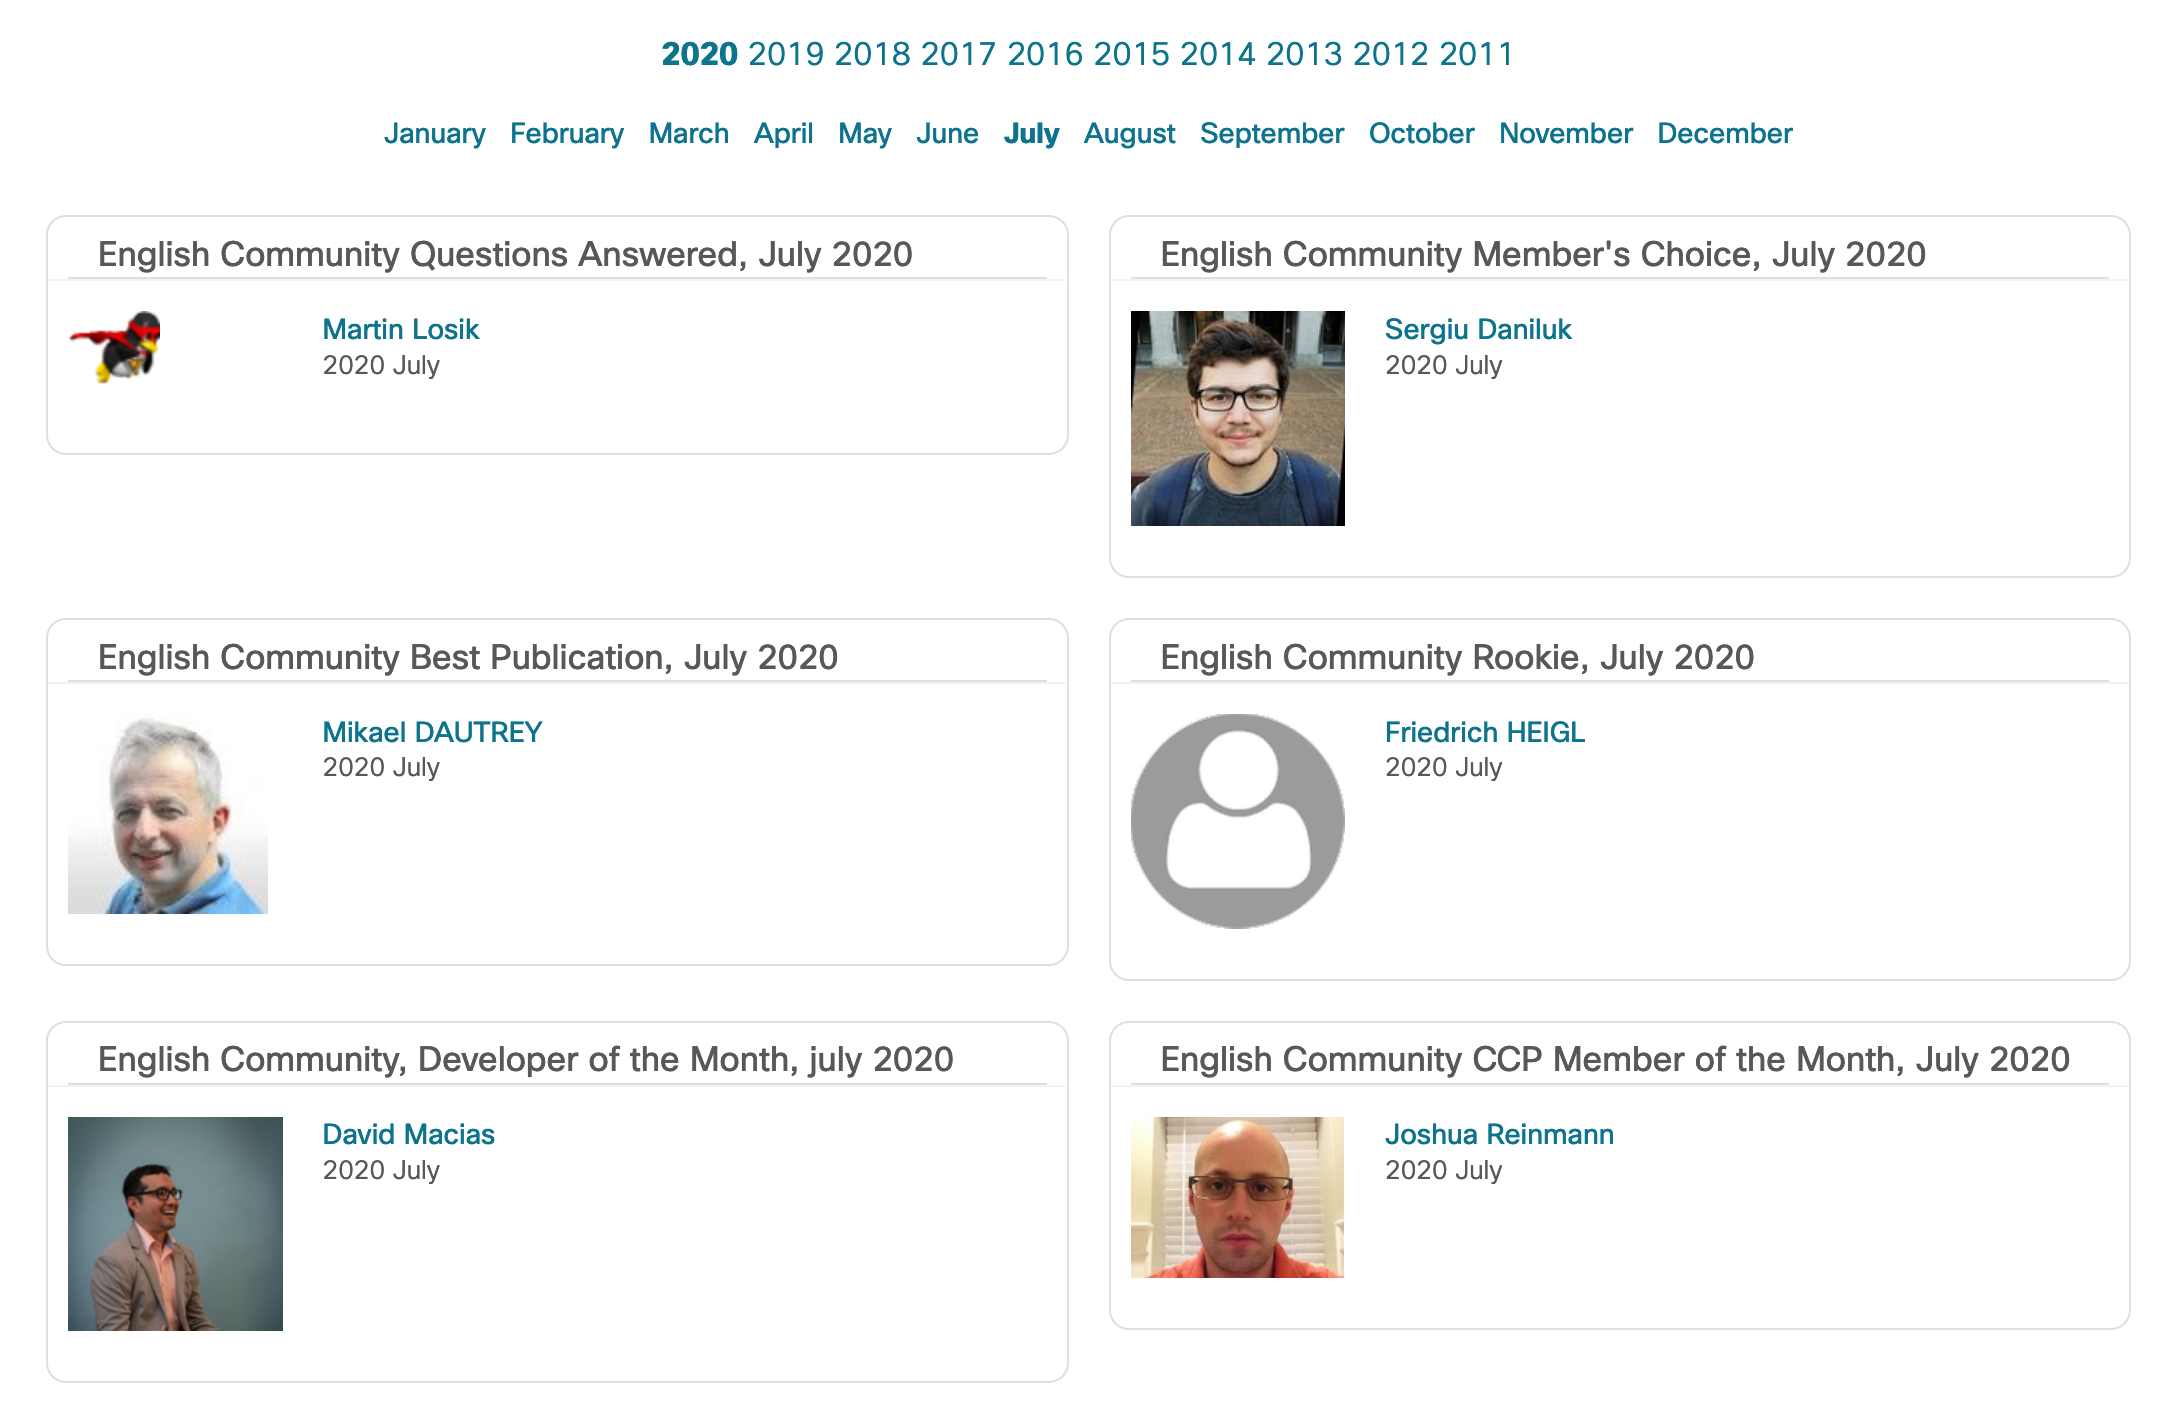
You can find current and past winners here or try to spot me in the picture below.

Current Spotlight Winners

Current Spotlight Winners

Looking back through my blog posts in 2008 I talked about getting my first star due to my contributions in the Cisco NetPro forums and how happy I was about it. In that blog I have a picture of my profile showing a total of 103 posts made with 8 questions resolved. That number, 12 years later, has ballooned to 3030 posts and 208 solutions.

I encourage anyone starting out or a seasoned veteran to contribute in the various Cisco Communities it’s a great way to network with your Cisco peers and try to tackle some very interesting technical problems while you procrastinate from your not as interesting technical problems.

~david

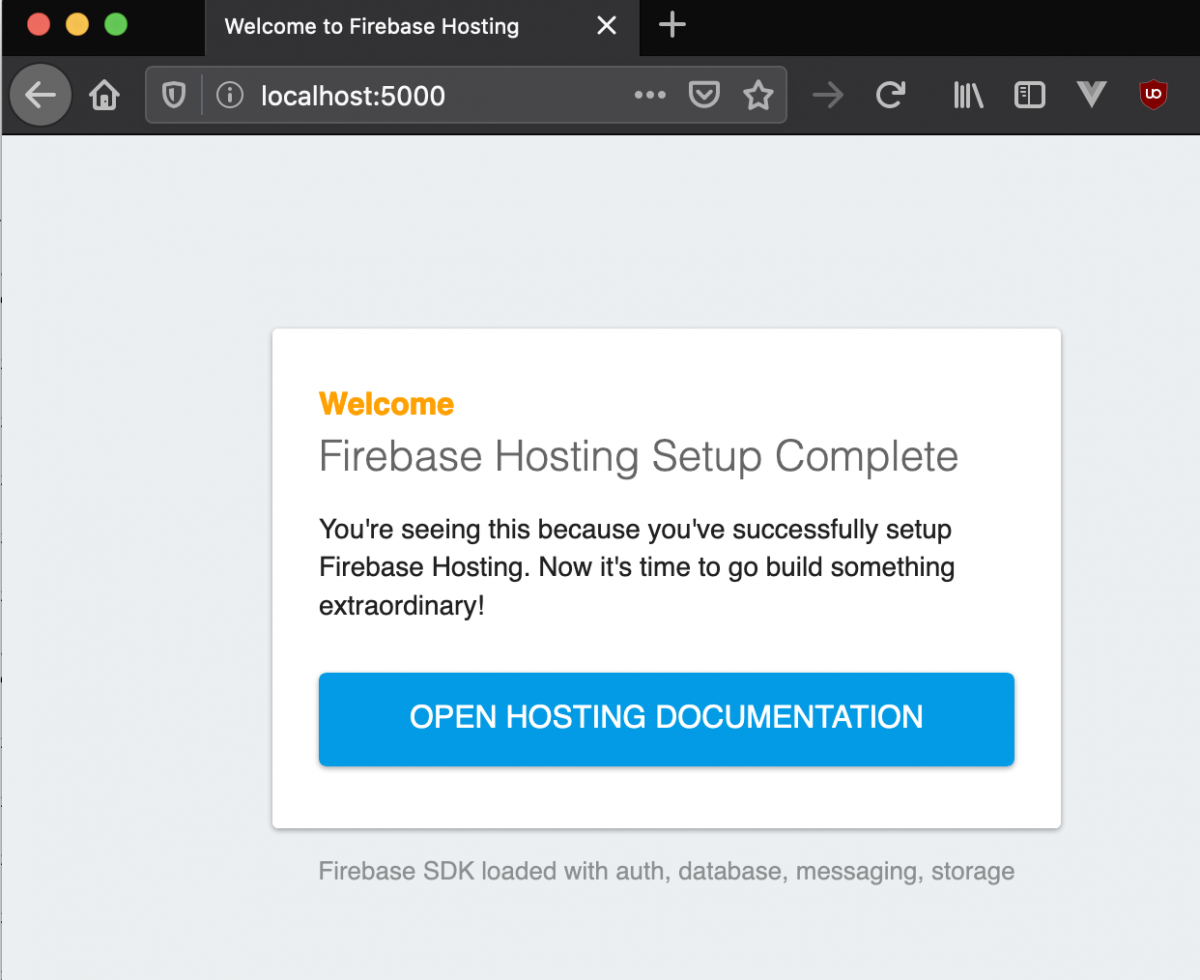
Firebase default Hosting webpage

Serverless Development with Firebase Emulator

I’m getting more and more into serverless development. Trying to avoid handling any sort of hardware sounds like a dream come true. No more handling security patching, load balancing, etc. However, one of the biggest things I struggle with is how to do local development efficiently without having to deploy your code to the cloud every time? Google’s serverless offering, Firebase, released a very cool tool this year which allows you to emulate most their services locally. Here are some of my learnings so far. These should be specifically relevant if you’re doing any React development with Firebase.

Setting Up Your Local Development

Prerequisites:

  • We won’t be using the node.js server, but use node to install components and to develop our React app.
  • Firebase account.
  • Firebase CLI a key way to do that is using the command npm install -g firebase-cli
  • Optional but recommended create-react-app installed npm install -g create-react-app
  • Optional Your favorite IDE. I’m a sucker for VS Code.

Project Setup

Setting up your project. From the Firebase console, Add project:

  1. Choose a name.
  2. Choose your Google Analytics setting, not relevant for this.
  3. Create project.
  4. Add an app to get started and choose Web.
  5. Choose a name, I generally use the same name as the project and set up Firebase Hosting.
  6. Click on Database and create a Cloud Firestore database. Choose to start in test mode. Choose your favorite/closest region.

Local Setup

  • Create a folder where you’ll be doing your development, this will be your root folder. I give this folder a project relevant name.
  • First make sure you login with the below command and use the Google account associated with the Firebase console above.
    • firebase login

  • Initialize your project with the command below. Make sure to choose the following features and be sure to select the Firestone project we created earlier during the project setup. Choose all the other defaults presented and choose the following emulation settings.
    • firebase init

      Firebase init cli

      Choose your Firebase services you’ll be using.

      Choose the Firebase services to emulate

      Firebase cli emulator settings.

Of most importance here is that you take a look at your firebase.json file which has been generated by the initialization. It should look very much like this. Pay close attention to the emulators and hosting sections as these will play an important role later. One thing to watch out for at this point is to ensure the ports you’ve asked the emulator to use are actually open. On the next step we will be able to confirm if they are opened or not, but this is the file you use to change them if you get an error. Here’s what it should look like if you’re following along.

{
  "firestore": {
    "rules": "firestore.rules",
    "indexes": "firestore.indexes.json"
  },
  "functions": {
    "predeploy": [
      "npm --prefix \"$RESOURCE_DIR\" run lint"
    ]
  },
  "hosting": {
    "public": "public",
    "ignore": [
      "firebase.json",
      "**/.*",
      "**/node_modules/**"
    ],
    "rewrites": [
      {
        "source": "**",
        "destination": "/index.html"
      }
    ]
  },
  "emulators": {
    "functions": {
      "port": 5001
    },
    "firestore": {
      "port": 8080
    },
    "hosting": {
      "port": 5000
    },
    "ui": {
      "enabled": true
    }
  }
}
  • Finally it’s time to take a look at what we have so far. We’re going to start the emulator and see what we get with the out of the box setup for a Firebase project. If you get any errors it’s more than likely that you have a port conflict. I have a port conflict and moved Function from 5001 to 5080. If you need to to the same go back to your firebase.json file and find a free port and try again.
    • firebase emulators:start

If everything worked you should see the following.

Firebase emulator running

Firebase emulator running

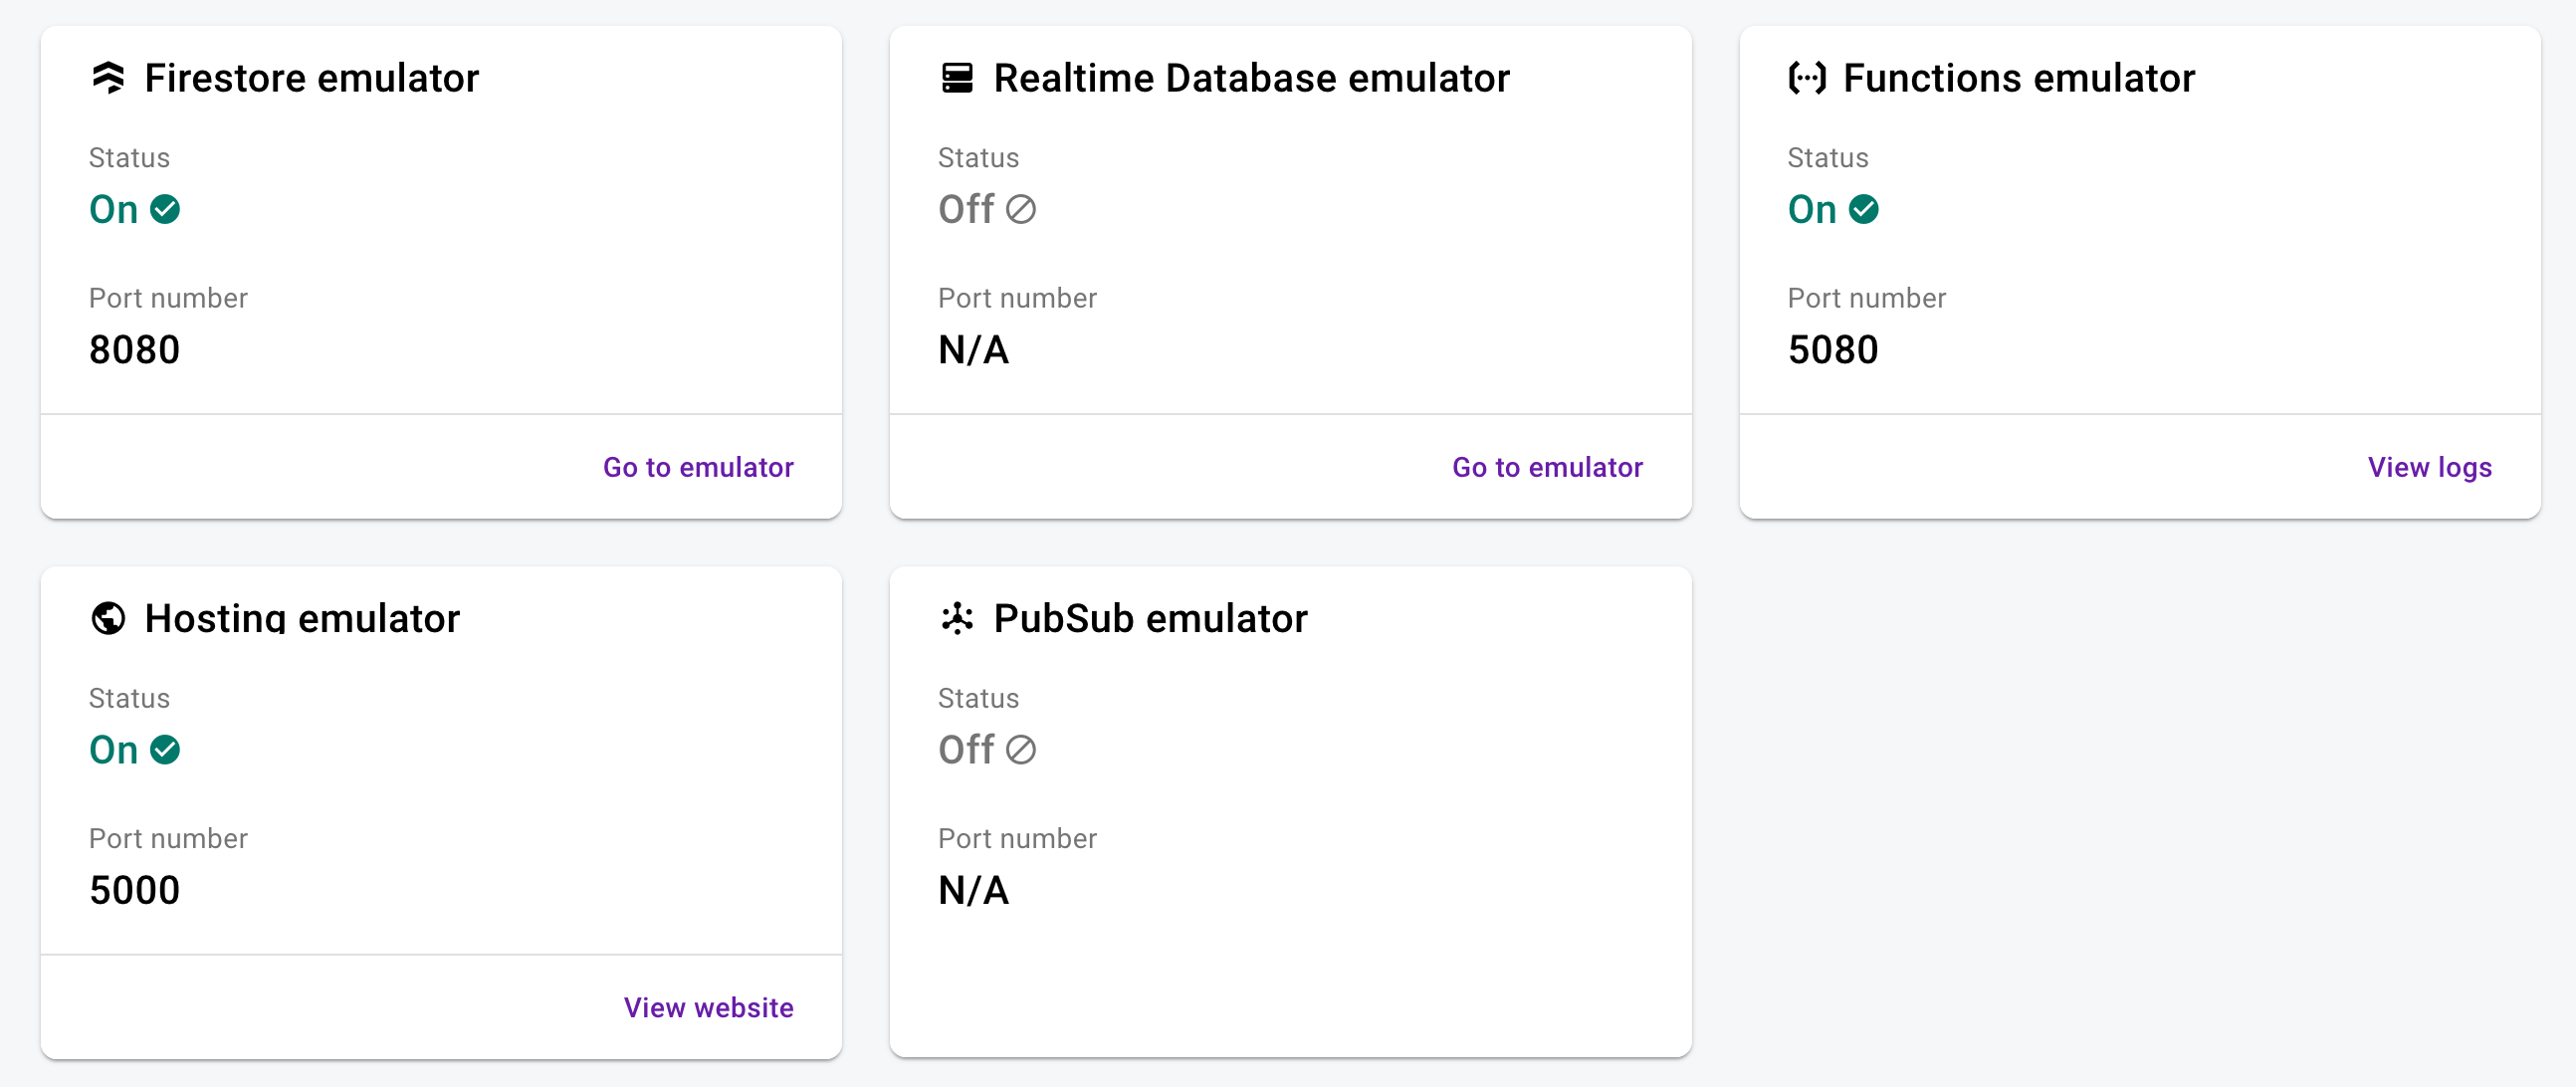
At this point let’s stop for a second and break down what we have available to us. First, going to http://localhost:5000 will show you Firebase Hosting’s emulation. Next, going to http://localhost:4000 gives you a nice dashboard of all your emulated services and their status. As well as links to the relevant logs and details for those services. Finally, a log window with a very handy search feature to be able to do faster troubleshooting.

Firebase emulator UI

Firebase emulator UI

Firebase emulator log UI

Firebase emulator log UI

If you’ve gotten this far you’ve setup a project through the Firebase console. You’ve setup your local dev environment. You’ve emulated Firebase for local test. Now we’re going to go through a very simple exercise where we’re going to use the most popular services for Firebase and show what you can and can’t emulate.

React Development Part 1

We are going to create a simple React application that allows a user to register, login, and then see the registration details they entered. This exercise will walks us through a few things:

  • Hosting: For the React application
  • Functions: API for registration and login
  • Firestore: Database for user information
  • Authentication: Firebase user management

First there are a few things we need to setup.

  1. In the Firebase console for your project select Authentication and “Setup sign-in method”. You’re going to want to setup Email/Password provider. This will allow users to use those details to authenticate.
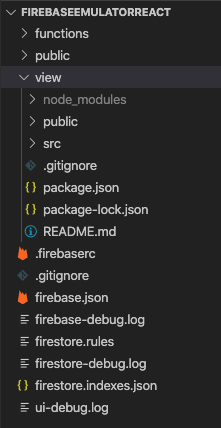
  2. In your terminal go to the root of your project and create a new create-react-app (CRA) app. I like to use view as my root React folder, but you can choose whatever you want. You’ll want to end up with the following folder structure.

create-react-app view

Default Firebase and CRA file structure

Default Firebase and CRA file structure

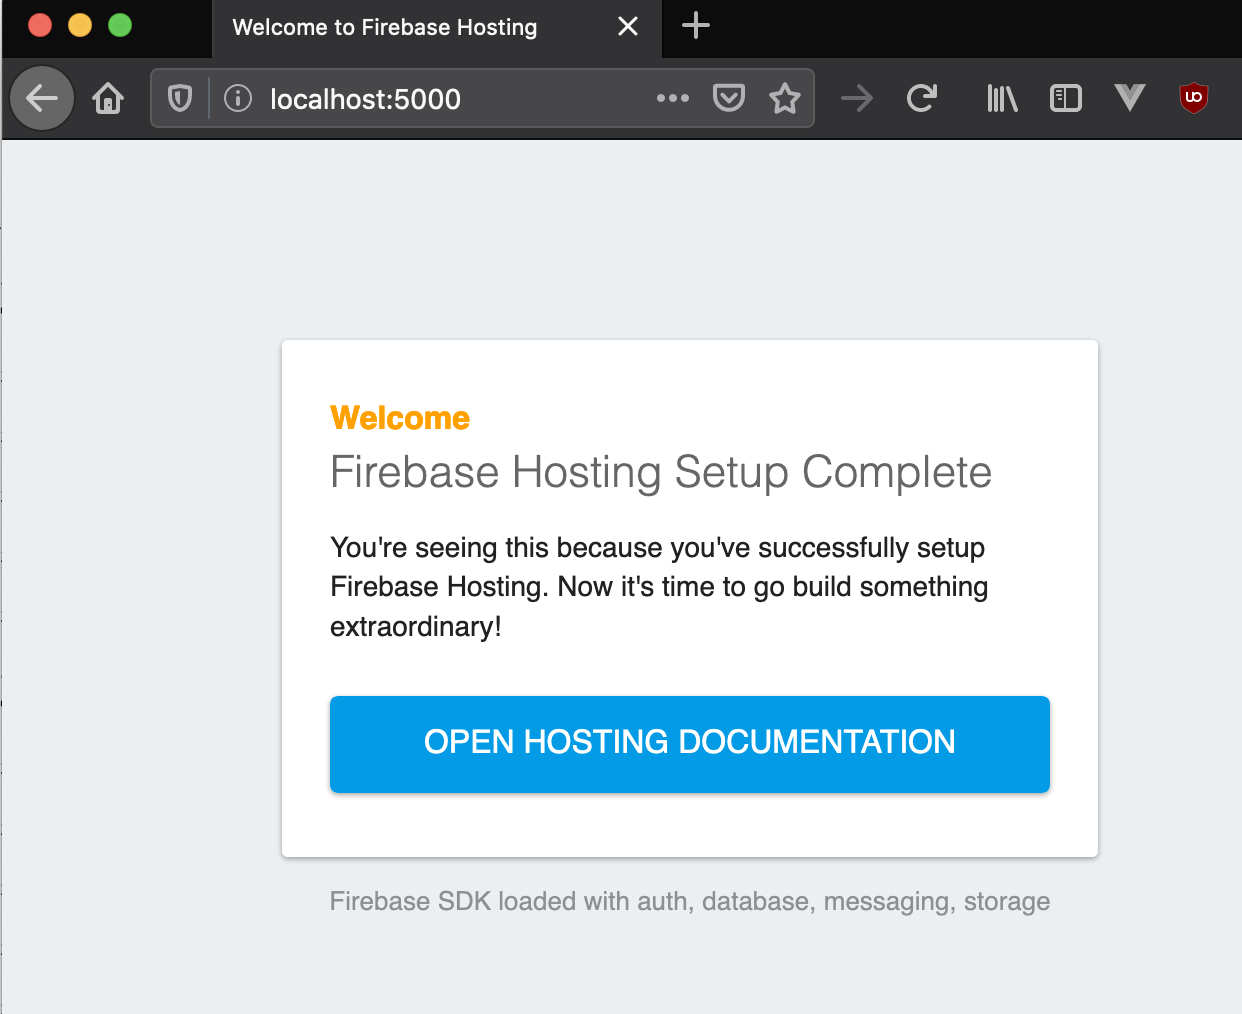
At this point you have a CRA app inside your Firebase, but when you go to your Hosting URL you are still going to see the default Firebase website.

Firebase default Hosting webpage

Firebase default Hosting webpage

Go back to your firebase.json and change your hosting path to view/build and then restart your Firebase emulator and you should now see your CRA app.

...
"hosting": {
"public": "view/build",
...
CRA default webpage

CRA default webpage

I will pick up the rest of the exercise on a follow up blog post as this is getting very lengthy.

~david

Another round of simple things you can do to create a better call center.

Back in September 2019 I talked about some minor and inexpensive things you can do to improve your customer service. This topic comes up often as many customers want to make incremental improvements without breaking the bank. The focus on this follow-up post is to try and provide another round of simple things which will yield improvements. Use these tips and the ones in my previous post before making any huge investments in your customer service strategy.

Have consistency across all your inbound numbers. This one is specifically important for healthcare. If I call your pulmonology department or I call my PCP, it’s ideal to have the same menu structure and same get out mechanisms. Trying to remember what options work for my pediatrician and for my neurologist creates unnecessary friction which really shouldn’t be there. If you absolutely have to have different flows, use this opportunity to compare and contrast which flows behave better and use data to use the best flow in as many departments as possible.

Have your agents live where the information is found. There’s nothing worse than hearing agents banging away a novel on their keyboard when they are talking to you. Surely I’m not asking a question which they have never heard before and surely they don’t have to type these many words for every call, right? CTI connectors for CRMs/ERPs are getting cheaper and cheaper and there are plenty of tools available which allow keyboard shortcuts and templating. If your agents are repeatedly typing out the same phrases this is an easy win for automation and get immediate returns.

Agent training and retraining. The best run call centers have a lot of communication between agents, supervisors, management. There is constant reminders about the work they do, why they do it, and how to do it better. Training and refreshers happen constantly and they expand beyond what to say to the customer, but also how to better navigate tools, how to deal with tough calls, and how to improve their writing. All of these things create a better experience for everyone around.

Collect some information. Every call center dreams of 100% deflection. Bots, virtual agents, etc., all with a single purpose to prevent the caller to talk to a human and have a computer answer their question. However, not all call centers even have any type of self service, but even if you don’t you should still have your customers provide you with some piece of information. It can be something simple like their zip code or what state they are calling from or more complex like their customer or account number. Either way, training your callers to have some information to give you does a few things: paves the way for adoption of self service to be easier, makes you seem like you’re more advanced than you really are, and give some extra data which you can later use for analysis. What data you ask for is certainly depended on the call center, but in my opinion asking anything from the customer is better than nothing.

This is getting longer than I expected, I’ll work on releasing part 3 of this at a later point.

Be well,

~david