Cisco Courtesy Callback (CCB) and CCE Hours of Operations

A project from last year requested that CCB not be provided if the expected wait time (EWT) was longer than how long this group was going to be open. The other requirements was to try and do it without using a custom element so they could better support the application if I was no longer around. There were two challenges with this request. First, getting the hours of operations. Second, parsing through that data to figure out if the EWT would be greater than close time or not. This blog will not provide the whole solution, but it should give you enough to be able to piece things together to fit your needs.

Getting the Hours of Operations

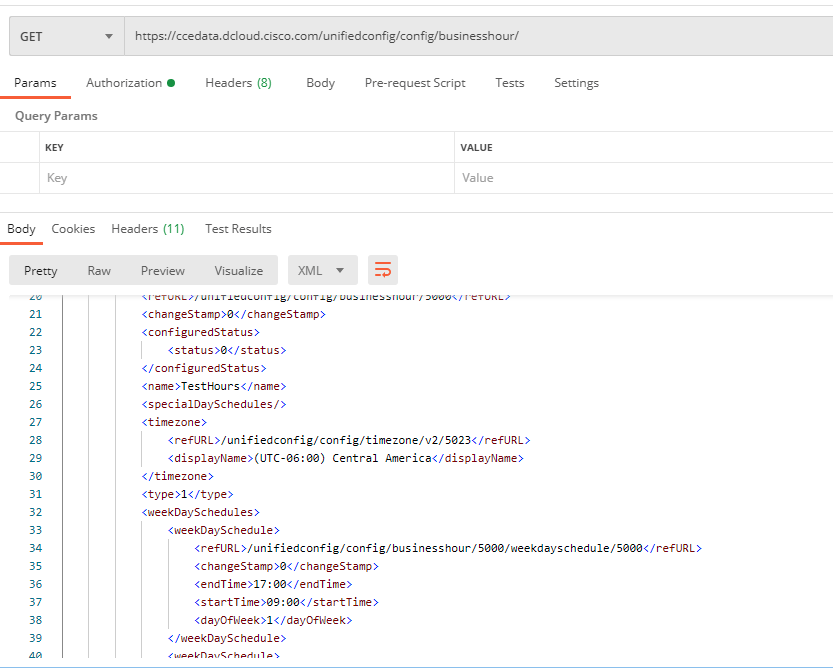
Assuming you’re running Contact Center Enterprise (UCCE/PCCE)  12.x, Cisco has an API to get the business hours using a GET request to https://{CCEAdminFQDN}/unifiedconfig/config/businesshour/ and using basic authentication you can see this:
GET Request Business Hours

GET Request Business Hours

Let’s take a closer look at the payload. Let’s focus on the two parts that are marked with ###.

</pre>
<?xml version="1.0" encoding="UTF-8" standalone="yes"?>
<businessHour>
<refURL>/unifiedconfig/config/businesshour/5000</refURL>
<changeStamp>0</changeStamp>
<configuredStatus>
<status>0</status>
</configuredStatus>
<name>TestHours</name>
<runTimeStatus>1</runTimeStatus>
<runTimeStatusReason>Week Day open reason</runTimeStatusReason>
<specialDaySchedules/>
<timezone>
<refURL>/unifiedconfig/config/timezone/v2/5023</refURL>
<displayName>(UTC-06:00) Central America</displayName>
</timezone>
<type>1</type>
<weekDaySchedules>
<weekDaySchedule>
<refURL>/unifiedconfig/config/businesshour/5000/weekdayschedule/5000</refURL>
<changeStamp>0</changeStamp>
<endTime>17:00</endTime>
<startTime>09:00</startTime>
<dayOfWeek>1</dayOfWeek>
</weekDaySchedule>
<weekDaySchedule>
<refURL>/unifiedconfig/config/businesshour/5000/weekdayschedule/5001</refURL>
<changeStamp>0</changeStamp>
<endTime>17:00</endTime>
<startTime>09:00</startTime>
<dayOfWeek>2</dayOfWeek>
</weekDaySchedule>
<weekDaySchedule>
<refURL>/unifiedconfig/config/businesshour/5000/weekdayschedule/5002</refURL>
<changeStamp>0</changeStamp>
<endTime>17:00</endTime>
<startTime>09:00</startTime>
<dayOfWeek>3</dayOfWeek>
</weekDaySchedule>
<weekDaySchedule>
<refURL>/unifiedconfig/config/businesshour/5000/weekdayschedule/5003</refURL>
<changeStamp>0</changeStamp>
<endTime>17:00</endTime>
<startTime>09:00</startTime>
<dayOfWeek>4</dayOfWeek>
</weekDaySchedule>
<weekDaySchedule>
<refURL>/unifiedconfig/config/businesshour/5000/weekdayschedule/5004</refURL>
<changeStamp>0</changeStamp>
<endTime>17:00</endTime>
<startTime>09:00</startTime>
<dayOfWeek>5</dayOfWeek>
</weekDaySchedule>
</weekDaySchedules>
</businessHour>
<pre>
The runTimeStatus tells us if the Business Hours are currently opened or closed and the next part tells us what the hours of operations are for each day. Based on your use case you an just use the runTimeStatus to make a decision to offer CCB, but if you need to check if EWT is greater than close time, then we need to do a bit of extra work.
Parsing Through the Data
First, using an action element you first need to convert the XML into an array:
&lt;/pre&gt;&lt;pre&gt;importPackage(com.audium.server.cvpUtil)
var xml = {Data.Element.RESTGetBH.response_body}
var path = ""
var dow, dowPath, endTimePath
var endTimeArr=["00:00","00:00","00:00","00:00","00:00","00:00","00:00"]

for(var ctr=1; ctr&amp;amp;lt;=7;ctr++)
{
dowPath="/businessHour/weekDaySchedules/weekDaySchedule["+ctr+"]/dayOfWeek"
dow = XpathUtil.eval(xml,dowPath)

endTimePath = "/businessHour/weekDaySchedules/weekDaySchedule["+ctr+"]/endTime"
endTimeArr[dow]=XpathUtil.eval(xml,endTimePath )
}

print("\nendTimeArr=" + endTimeArr)

endTimeString = endTimeArr.join(";")
print("\nendTimeString=" + endTimeString)

endTimeString

Next, we need to parse what time we close today. Notice that we pass today’s day from ICM:

&lt;/pre&gt;&lt;pre&gt;var arr = {LocalVar.LocalEndArrayString}.split(";")
var dow={LocalVar.dayOfWeekBH}
var time = arr[dow]
print("\nendTime=" + time)
time

Finally, we need to calculate in seconds what time we close:


var closeTime = {LocalVar.todayClose};

var hours = closeTime.substring(0,2);
var minutes = closeTime.substring(closeTime.length-2, closeTime.length);
closeTimeInSeconds = Number(hours)*3600+Number(minutes)*60;

At this point we have an array containing all the close hours, we have what time we closed today, and finally we have how many seconds from midnight we’re going to close. Now you can make some calculations to figure out if you should offer CCB or not.

~david
WireShark RTP Player

Troubleshoot RTP issues with WireShark when using Jabber or IP Communicator

This was an interesting one that I wanted to document. We have our agents and supervisors on either VDI Jabber or Windows Jabber or CIPC and we could not get silent monitoring to work. When the supervisor activated it everything looks correct, but there was no audio for the supervisor while the agent and caller had no issues. Supervisor could then barge in to the call and audio would work just fine. Here are the steps we took to troubleshoot this.

  1. Get the IP addresses of the agent and supervisor device. Then get a packet capture of both end points while performing silent monitoring.
  2. Using this filter get all the packets coming from the other device to your computer: ip.addr == {other parties IP}. You should see a good bit of UDP packets. At this point if you don’t see any packets coming from the other endpoint you know that more than likely the network or far end device configuration is at fault as your device didn’t send or receive any RTP.
Wireshark Packet Capture

Wireshark Packet Capture

3. Click click on any of the packets Decode As… Set Current to RTP.

WireShark Decode Packets

WireShark Decode Packets

4. All your previous UDP packets should now be RTP packets.

WireShark Decoded Packets as RTP

WireShark Decoded Packets as RTP

5. Go to Telephony > RTP Streams and Analyze the stream that is detected. You will then be able to Play Streams to confirm you get the expected audio.

WireShark RTP Stream Analysis

WireShark RTP Stream Analysis

6. Confirm audio stream is correct.

WireShark RTP Player

WireShark RTP Player

At this point we’ve confirmed our device is getting RTP, but our soft phone isn’t playing it. So a likely culprit could be the Windows firewall. Using your favorite text editor go to c:\Windows\System32\LogFiles\Firewall and open domainfw.log and publicfw.log. What you want to look for is the IP of the other device and see if you see any drops.

2020-01-01 12:03:48 DROP UDP {RemoteIP} {LocalIP} 17488 24576 200 – – – – – – – RECEIVE

If you look at the port this was received on you’ll notice that it is the RTP range Cisco recommends to have open. So at this point you can disable the firewall, which I don’t recommend, or create a new firewall rule and add UDP ports 16384-32767 as allowed.

~david

Windows ODBC Data Source Success

Windows ODBC Connection to CVP Reporting Database

This one took me a good bit of hours and googling with very little results. I wanted to post this for posterity and for anyone else out there trying to do the same thing. The end goal is to create a Windows ODBC Data Source connection to your Cisco CVP Reporting database.

First, a bit of a recap. Cisco’s CVP Reporting server utilizes IBM’s Informix database. It’s been like that for many years and to be honest it’s both great and terrible. It’s great because you don’t have to pay (directly) for a license to run the database. And horrible because it feels like Informix is just one step above using an sqlite database. Informix is used in Cisco CommunicationsManager (UCM), Contact Center Express (UCCX), Unity Connections (UCxN), and of course CVP Reporting.

On to the main course.

  1. You must obtain a free IBM account and go to this link. You must choose the SDK option and download the Informix Client SDK Developer Edition.
    • If you want to do this with ODBC x64 then download clientsdk.4.10.FC14.windows64.zip
    • For the x32 version download clientsdk.4.10.TC14.zip.
  2. Install either download, you can install them both too. They both work independently or side by side. Then reboot your computer.
  3. From there you must go to your CVP Reporting server and find your onconfig file. It should be in c:\db\Informix\etc. Open the file and find the following two lines. Make note of the values you see.
    • DBSERVERNAME
    • NETTYPE
  4. Open ODBC Data Source Administrator on your local machine. Go to System DSN > Add…
  5. Choose IBM Informix ODBC Driver > Finish.
  6. General > Data Source Name > Give it any name
  7. Connection > Server Name > The value of DBSERVERNAME in the onconfig file.
    1. Host Name: IP, FQDN, or hostname of server
    2. Service: 1526
    3. Protocol: The value of NETTYPE in the onconfig file.
    4. Database Name: cvp_data
    5. User Id: Generally cvp_dbuser but you an connect with any valid user.
    6. Password: Your password.
  8. Environment > Client Locale > EN_US.UTF8
    • Database Locale: EN_US.UTF8 If you can’t set this value, hit apply to close the ODBC properties and then set this property.
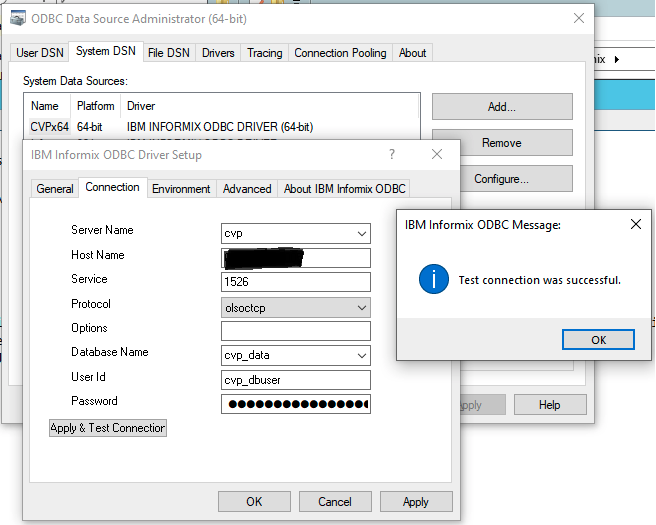
  9. Go back to the Connection tab and Apply & Test Connection and give it a minute or two and you should see:
Windows ODBC Data Source Success

Windows ODBC Data Source Success

Hope this helps.

~david

2020 Cisco Forums Profile

It’s nice to be recognized

I got a nice surprise in my inbox today. An email from Cisco letting me know that I was the first ever winner of the English Community Developer of the Month. Per Cisco the Community Spotlight Awards:

… recognizes members whose significant contributions designate leadership and commitment to their peers within their respective communities, including the Cisco Learning Network (CLN) and Cisco Community. Spotlight Awards Program is designed to recognize and thank individuals who help make our communities the premier online destination for Cisco enthusiasts.

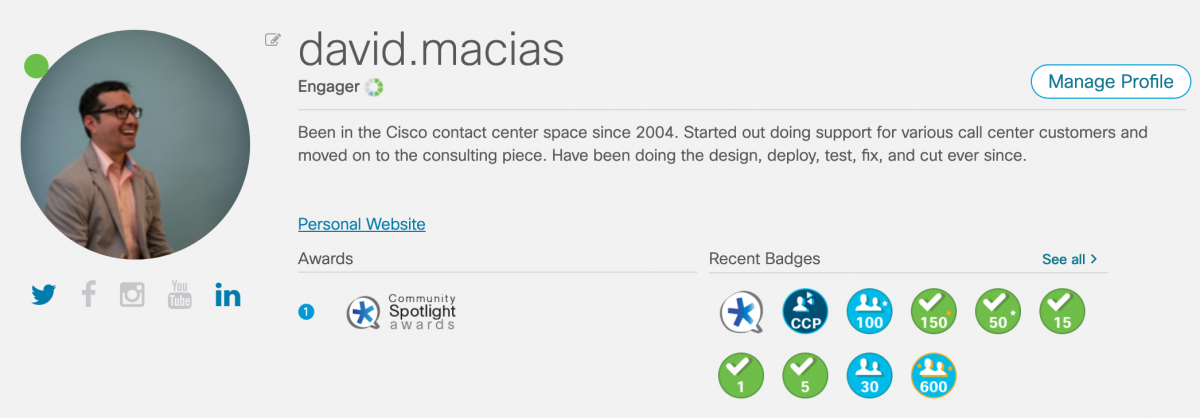
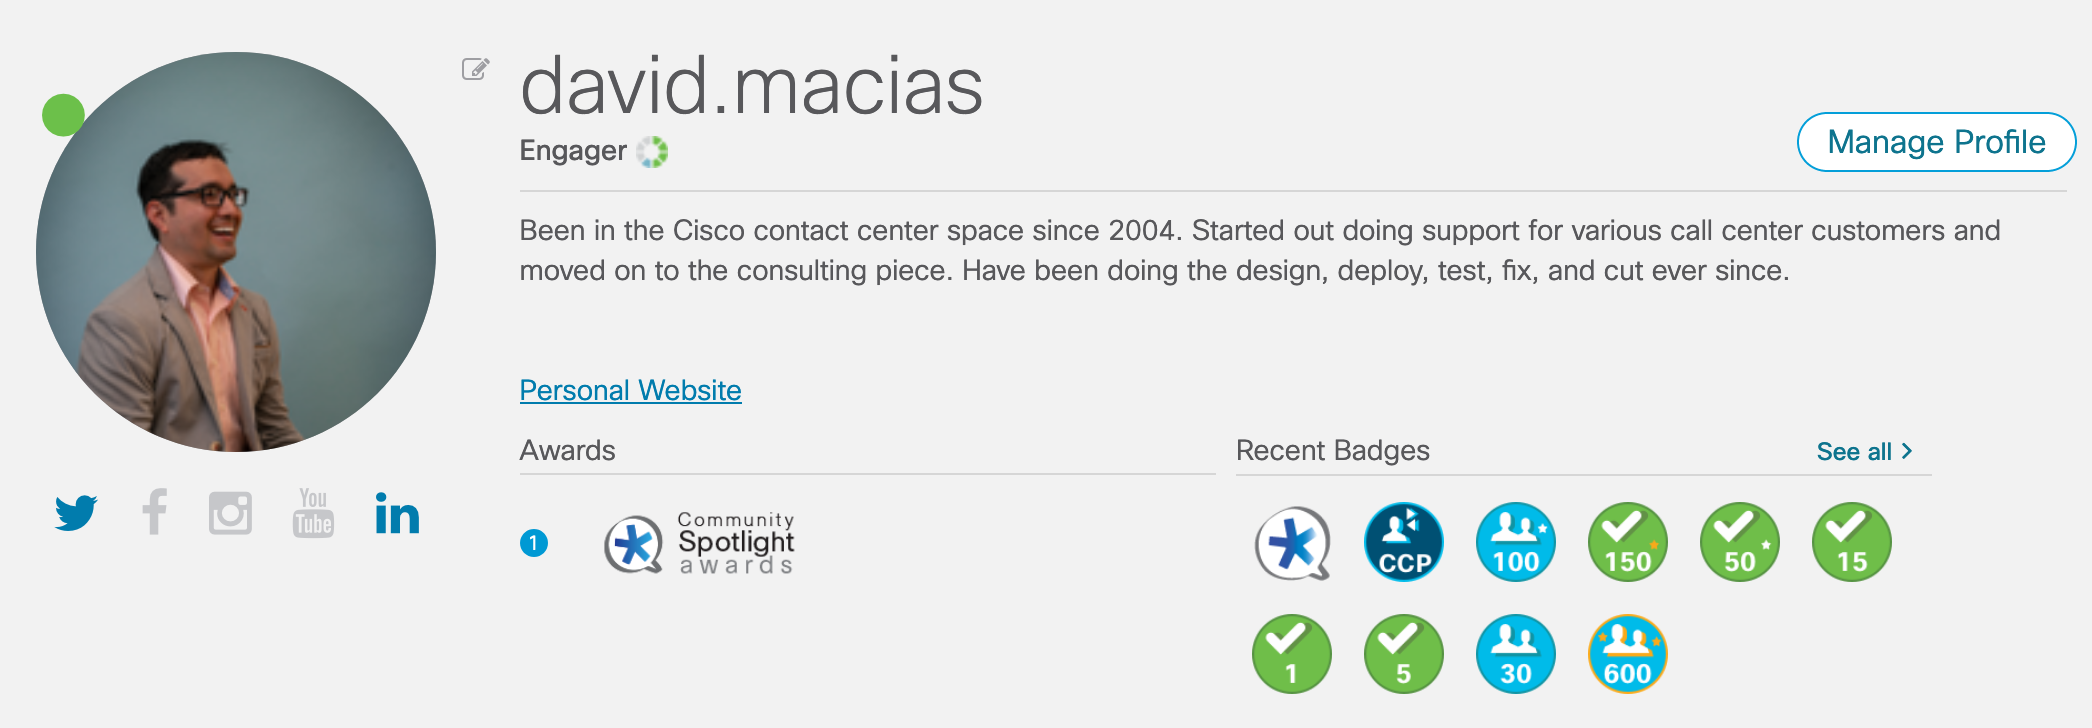
I get a cool badge to show off too.

2020 Cisco Forums Profile

2020 Cisco Forums Profile

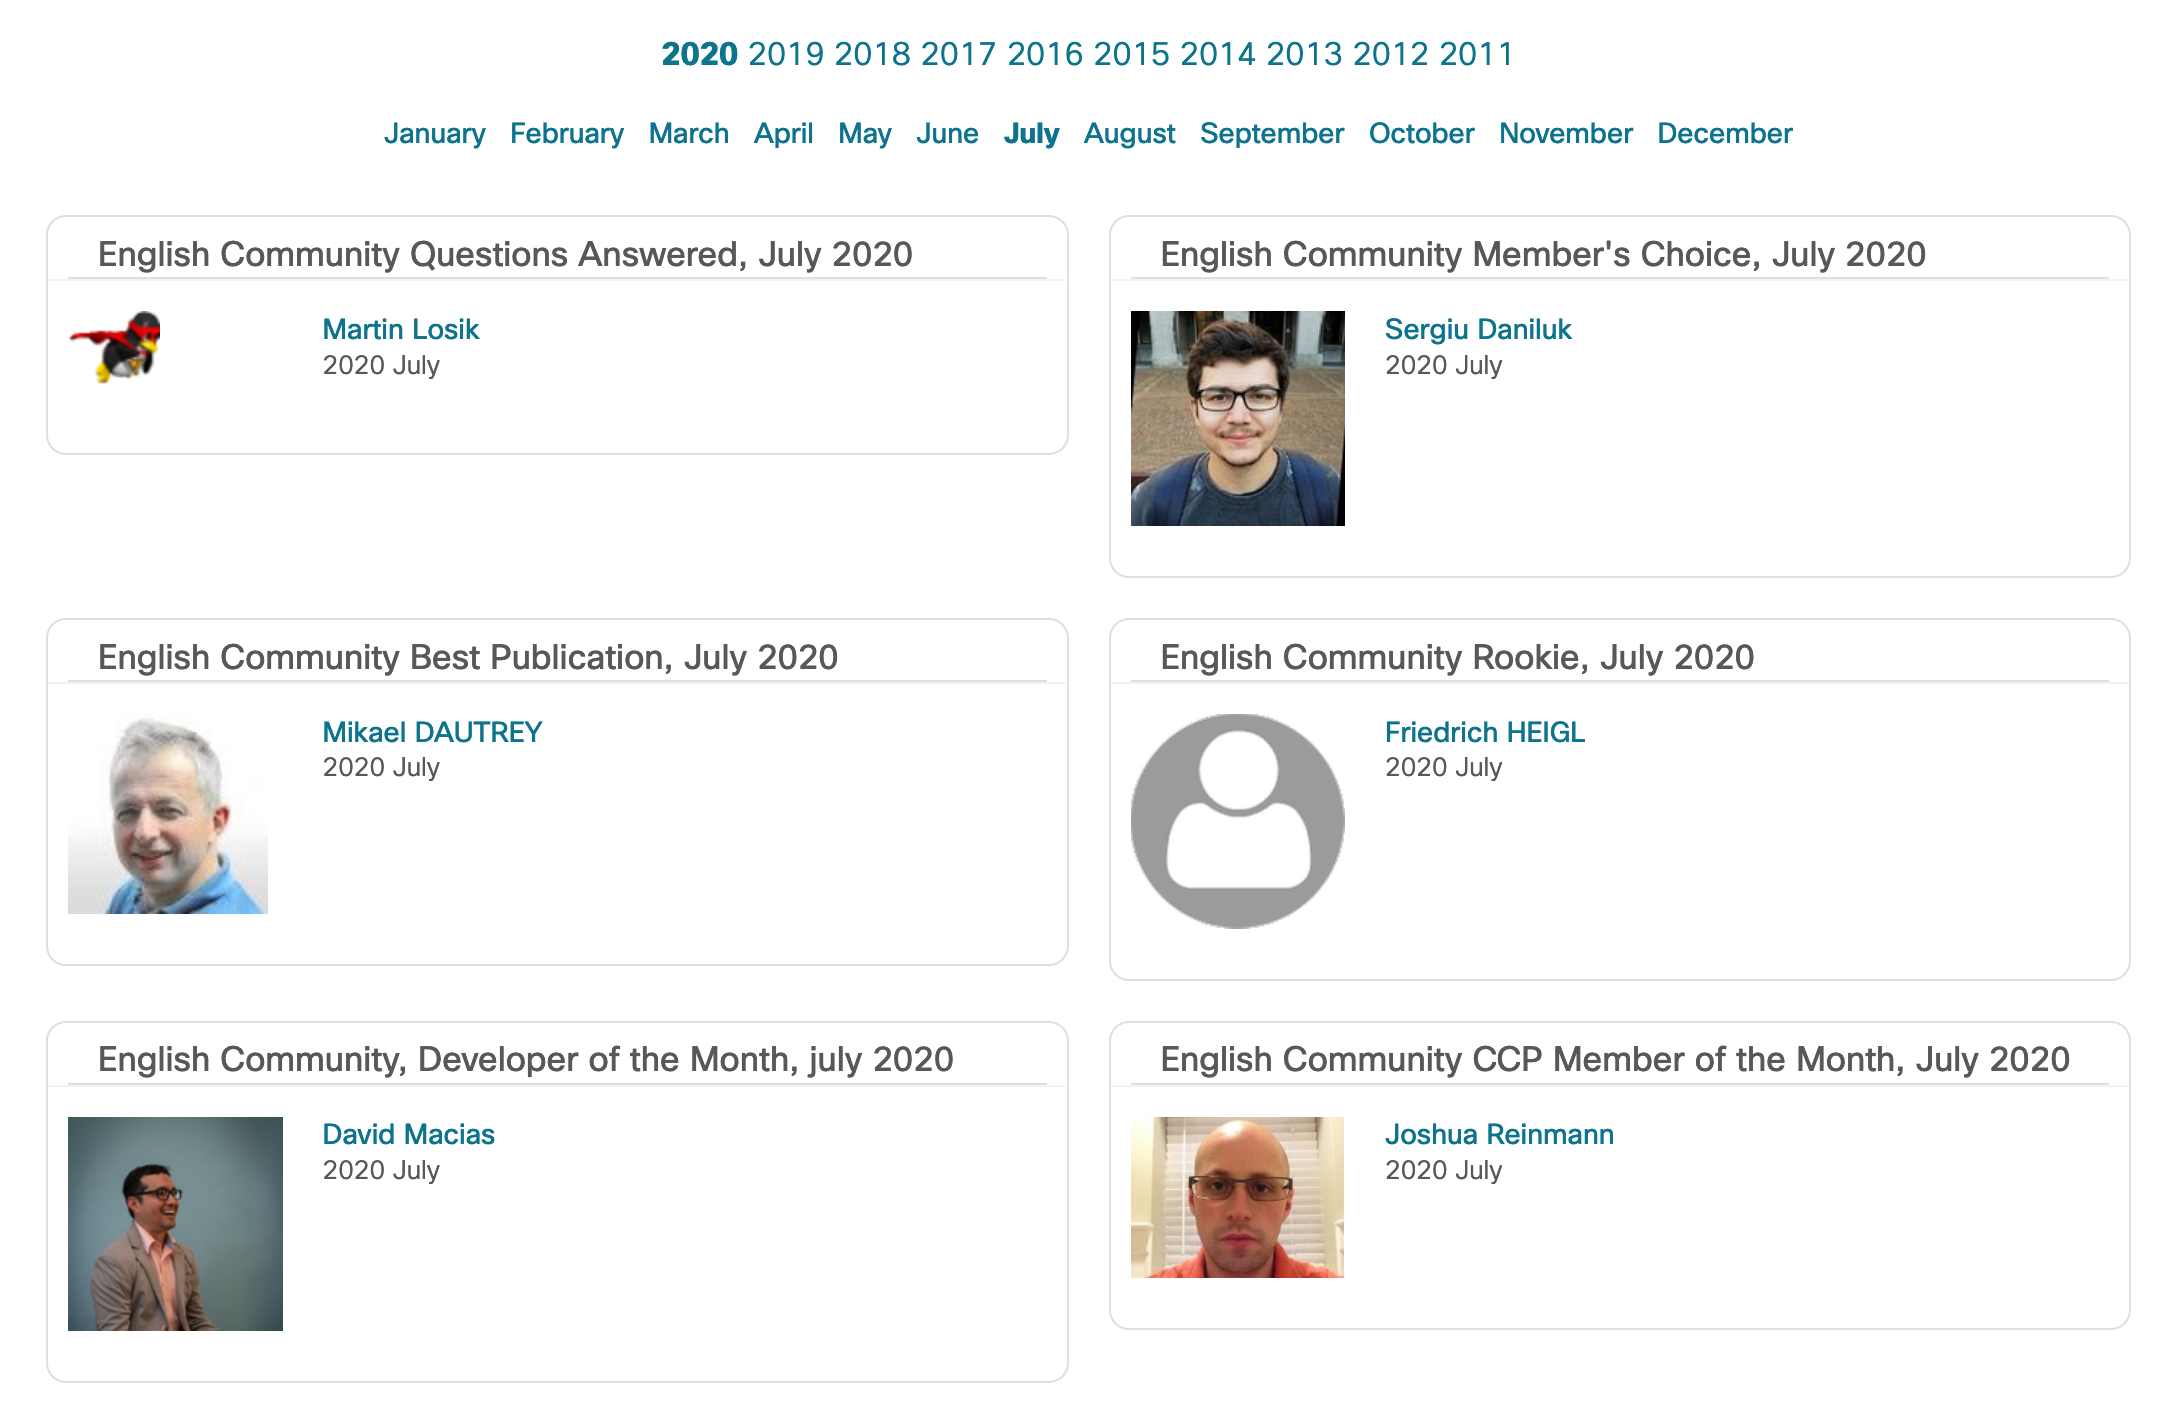
You can find current and past winners here or try to spot me in the picture below.

Current Spotlight Winners

Current Spotlight Winners

Looking back through my blog posts in 2008 I talked about getting my first star due to my contributions in the Cisco NetPro forums and how happy I was about it. In that blog I have a picture of my profile showing a total of 103 posts made with 8 questions resolved. That number, 12 years later, has ballooned to 3030 posts and 208 solutions.

I encourage anyone starting out or a seasoned veteran to contribute in the various Cisco Communities it’s a great way to network with your Cisco peers and try to tackle some very interesting technical problems while you procrastinate from your not as interesting technical problems.

~david

Correlate Nuance Call Logs and CVP Logs

During development, when you’re making a handful of calls for testing, it’s always easy to see your call traverse various systems. You can look at router logs for ICM troubleshooting, VXML debugs for the gateway, activity logs for CVP, and call logs for Nuance. However, once you go into production trying to correlate your activity logs with Nuance call logs becomes very painful. You can narrow your call logs pretty close based on the time of the call and then you have to look at the content and match up what CVP received from Nuance to find the exact log you need. Thankfully there’s a better way.

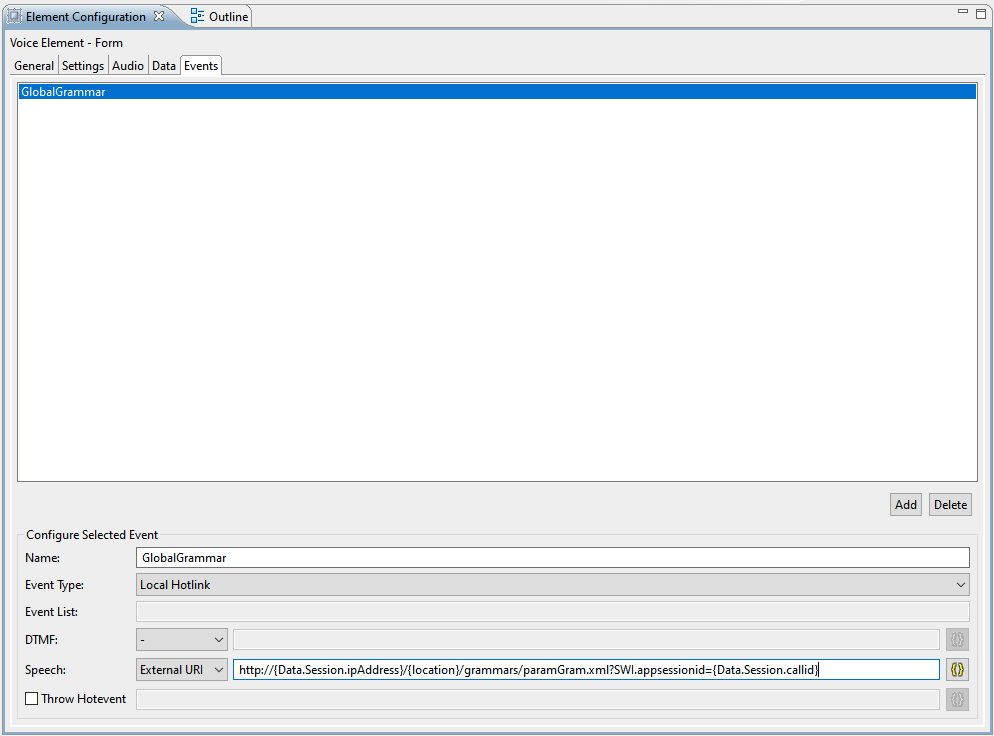
On the first audio element your call encounters add a Local Hotlink. Below you’ll see the details. The most important part is the External URI:

http://IPofMediaServer/en-us/grammar/paramGram.xml?SWI.appsessionid={CallData.UniqueCallID};SWI.appstepid=1

CVP Studio Audio Element Configuration

CVP Studio Audio Element Configuration

We have a parameter grammar with the only purpose of attaching the CVP call ID to the logs. The parameter grammar is pretty generic and it really doesn’t matter what you see in the values.

<?xml version=”1.0″ encoding=”ISO-8859-1′?>
<SWIparameter version=”1.0″ id=”my_parameter_grammar” precedence=”1″ ignore_unknown_parameters=”1″>
<parameter name=”swirec_application_name”>
<value>MyApp</value>
</parameter>
</SWIparameter>

The logs will then go from this:

23-NUAN-30-15-NUANCE01-813C33A-AC5D11EA-82A0A22E-A1298902@172.1.1.18-LOG

To this:

23-NUAN-30-15-NUANCE01-813C33A-AC5D11EA-82A0A22E-A1298902@172.1.1.18-722BA95BB43D11EAA713A22EA1298902-LOG

Additionally, utterances will also include the call ID making it super easy to find the logs you’re looking for. Finally, the call logs will include the call ID inside the log itself in this format:

SESN=722BA95BB43D11EAA713A22EA1298902

I want to thank the totally awesome Janine Graves for this awesome tip. If you’re looking for any CVP training she is the go to person in the world.

~david

Tip to search multiple Cisco CVP activity log errors quickly

We’ve been chasing a Nuance issue and as part of the process I’m monitoring the activity logs for certain errors to see if they are related to the issue we’re chasing or something else. I have multiple applications across over a dozen CVP servers and going one by one using Notepad++ is time consuming. Since the Cisco life is a Windows world here’s a quick way to do this and save you a ton of time.

There are tools out there like PowerGREP which do something similar, but my personal choice is to use Sublime Text. From there you go to Find > Find in Files.

  1. In Where add the locations you want to search and separate them by a comma:

\\server1\c$\cisco\cvp\VXMLServer\applications\YourApp\logs\ActivityLog,\\server1\c$\cisco\cvp\VXMLServer\applications\YourOtherApp\logs\ActivityLog,\\server2\c$\cisco\cvp\VXMLServer\applications\YourApp\logs\ActivityLog,\\server2\c$\cisco\cvp\VXMLServer\applications\YourOtherApp\logs\ActivityLog

2. In Find, make sure to select Regular expression and enter:

(?=.*06\/11\/2020.*error\.noresource$)|(?=.*06\/11\/2020.*Hotevent_Error_NoResource$)\w+

3. Click Find and watch all matches appear.

The expression above is looking for two different types of errors. error.noresource and Hotevent_Error_NoResource. It’s looking for this information only for the date of 06/11/2020, to ensure we only get the most recent logs. Finally, since we know this error is always at the end of the line we use the $ to anchor that string at the end of the line.

I hope this helps someone else do their work faster.

~david

CVP and Nuance Input Troubleshooting

Recently we encountered an issue where if you had to enter a long input and it took you longer than 10 seconds you would get a nomatch error as the result for your form. This happened even if you were in the middle of entering DTMF. Here’s the process we used to troubleshoot the issue. Which by the way has not yet been solved, but I will post an updated once it does.

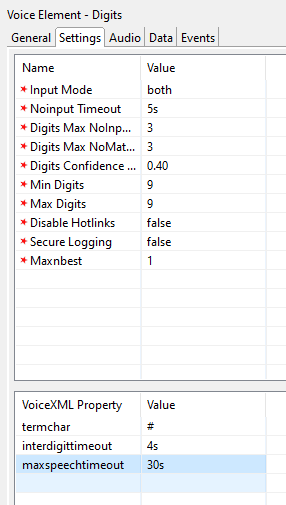
First, let’s see the parameters for the VXML form:

Cisco CVP Voice Element Settings

Cisco CVP Voice Element Settings

Next, let’s look at a snipped of the VXML browser logs. For debugs I used:

#debug voip ccapi inout
#debug ccsip message
#debug voip rtp session named
#debug voip application vxml def
#debug voip application vxml dump
#debug mrcp all

Notice the lines in bold. These are the parameters I want to highlight from the Nuance point of view.

<vxml xmlns=”http://www.w3.org/2001/vxml” version=”2.1″ application=”/CVP/Server?audium_root=true&amp;calling_into=S031_MerchantIVR”>
<property name=”termchar” value=”#” />
<property name=”interdigittimeout” value=”4s” />
<property name=”maxnbest” value=”1″ />
<property name=”maxspeechtimeout” value=”30s” />
<property name=”confidencelevel” value=”0.40″ />
<property name=”timeout” value=”5s” />
<form id=”audium_start_form”>
<block>
<assign name=”audium_vxmlLog” expr=””” />
<assign name=”audium_element_start_time_millisecs” expr=”new Date().getTime()” />
<goto next=”#start” />
</block>
</form>

To see all the communication between the voice browser and Nuance use the “mrcpv2” filter.

Wireshark MRCPV2 Capture

Wireshark MRCPV2 Capture

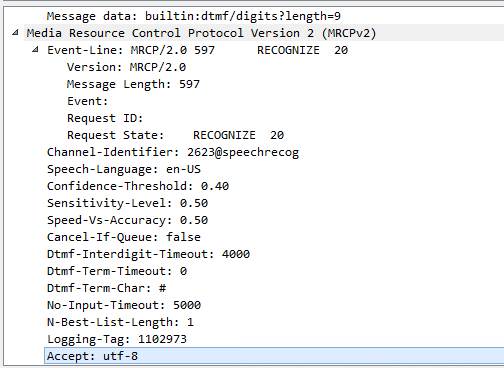
If you want to narrow down to packets which define the grammar properties to Nuance use the following filter “mrcpv2.Event-Line contains “DEFINE-GRAMMAR”” From there we find the packet which matches the above debugs and CVP Studio screenshot:

Wireshark MRCPV2 Packet Grammar Definition

Wireshark MRCPV2 Packet Grammar Definition

In the above picture you’ll see that interdigittimeout corresponds to Dtmf-Interdigit-Timeout. Timeout corresponds to No-Input-Timeout and finally maxspeechtimeout corresponds to recognition-timeout which is NOT present in the MRCP packet. What happens here is that Nuance then uses it’s default timeout which is set to 10s. You can change this in your NSSserver.cfg by setting the following (in this case 22s):

server.mrcp2.osrspeechrecog.mrcpdefaults.recognition-timeout VXIInteger 22000

~david

Cisco CVP Standalone Lab Installation

For this we’re using VMWare Fusion to install the OS, you should also have the CVP OVA and ISO to make your life easier.

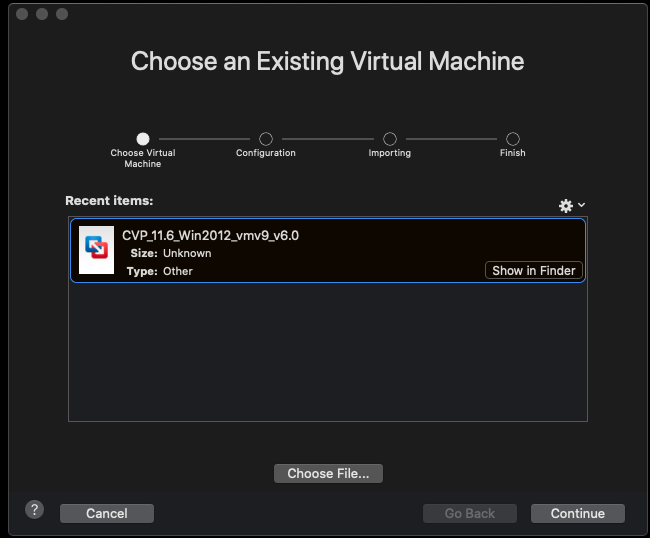
File > Import. Choose OVA

Screen Shot 2020-02-09 at 7.40.27 AM.png

Continue
Accept
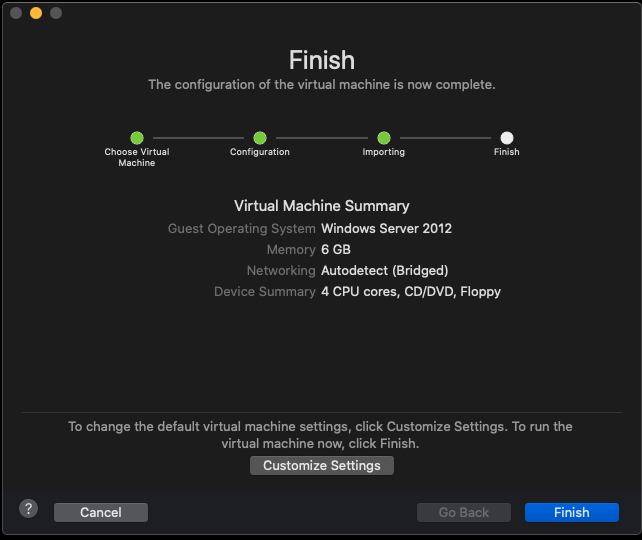
There are 3 options at this point for the VM configuration:

Cisco Unified CVP Call Server-VXML Server

Guest OS: Microsoft Windows Server 2012 (64-bit)
CPU: 4 vCPU
Memory: 10 GB vRAM
Disk: 1 – 250 GB vHDD
Network: 1 vNIC VmxNet3

Cisco Unified CVP Operations Console

Guest OS: Microsoft Windows Server 2012 (64-bit)
CPU: 2 vCPU
Memory: 4 GB vRAM
Disk: 1 – 80 GB vHDD
Network: 1 vNIC VmxNet3

Cisco Unified CVP Reporting Server

Guest OS: Microsoft Windows Server 2012 (64-bit)
CPU: 4 vCPU
Memory: 6 GB vRAM
Disk: 1 – 80 GB vHDD
Disk: 2 – 438 GB vHDD
Network: 1 vNIC VmxNet3

Since this is a lab, but I still want things to look as close to production as possible I will be using the Reporting Server deployment option.

Screen Shot 2020-02-09 at 7.45.39 AM.png

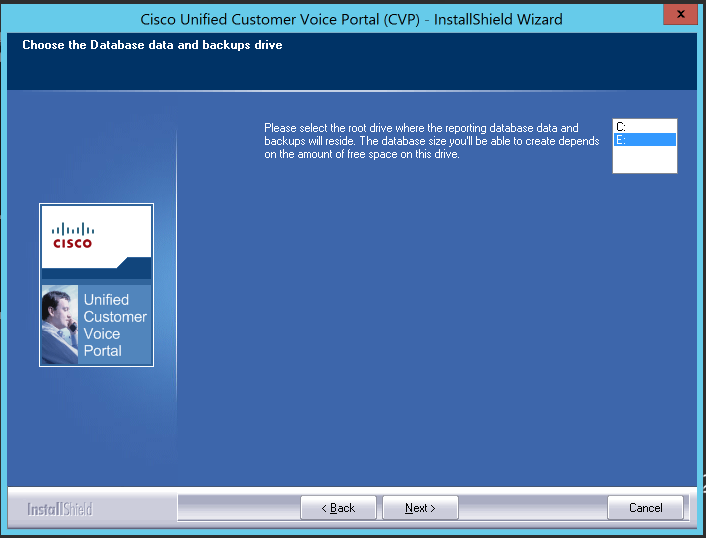
  • Install Windows 2012. Ensure you have two drives and make sure the machine is on the network.
  • Install IIS
  • Give it an IP on the network.
  • Disable IPv6
  • Run Windows Update
  • Disable Windows Update to run automatically
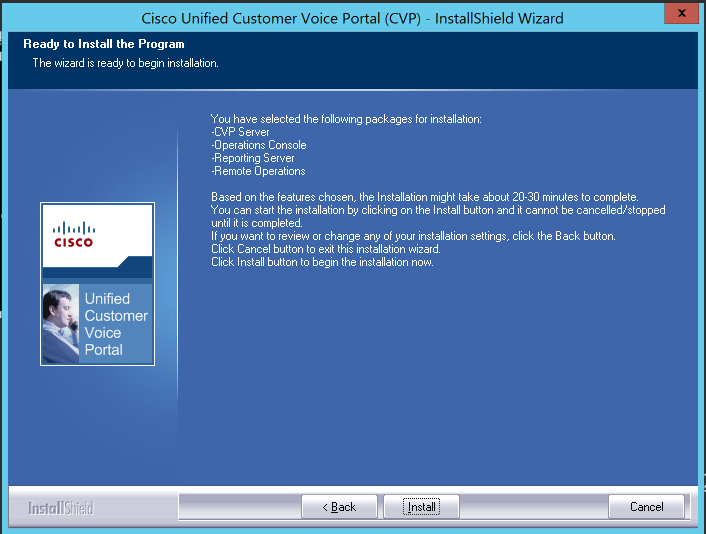
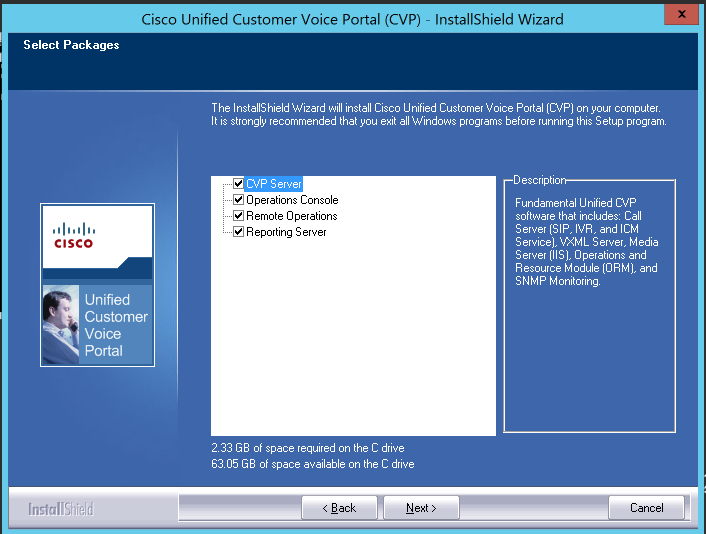
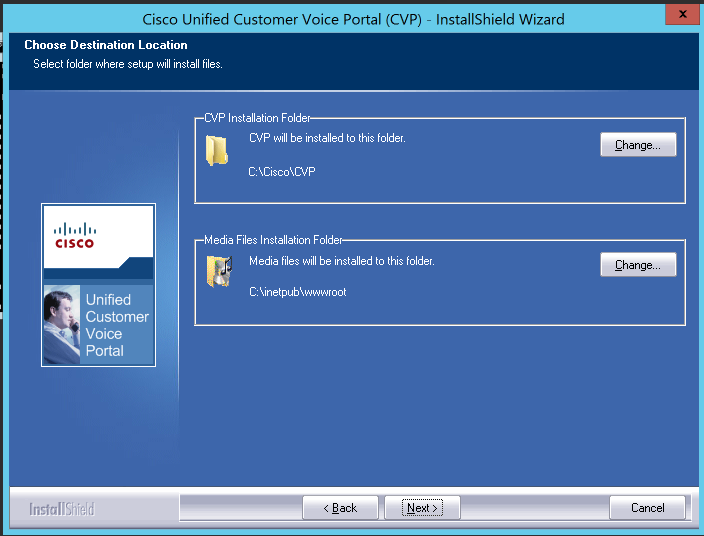
  • Mount the CVP ISO, open a command prompt and run CVP\Installer_Windows\setup.exe labonly

Screen Shot 2020-02-09 at 9.33.09 PM.png

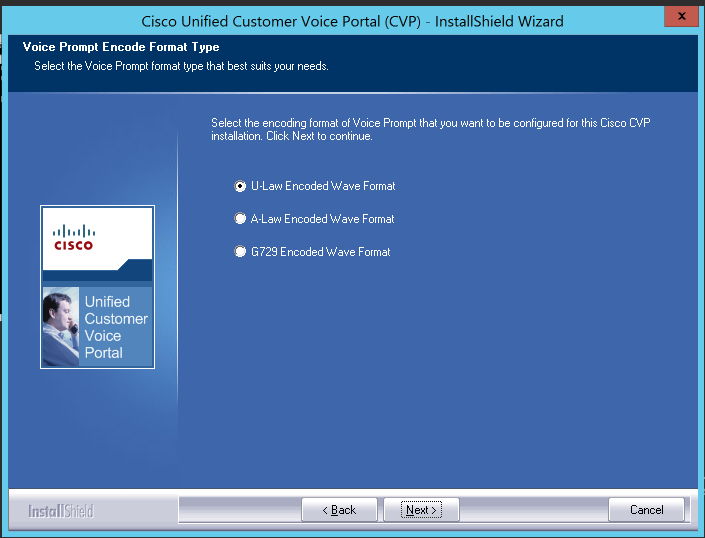
Screen Shot 2020-02-09 at 9.34.27 PM.png

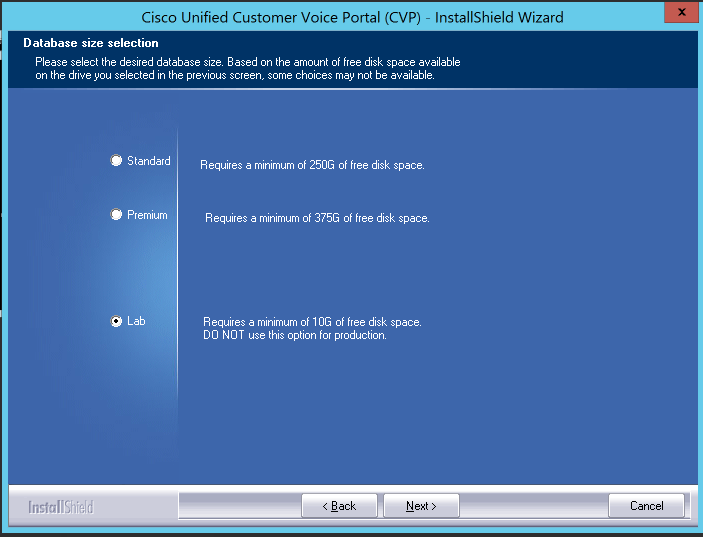
Screen Shot 2020-02-09 at 9.57.51 PM.png

Fill out the X.509 Certificate information.

Screen Shot 2020-02-09 at 10.01.33 PM.png

Screen Shot 2020-02-09 at 10.01.46 PM.png

Screen Shot 2020-02-09 at 10.02.01 PM

Screen Shot 2020-02-09 at 10.05.39 PM.png

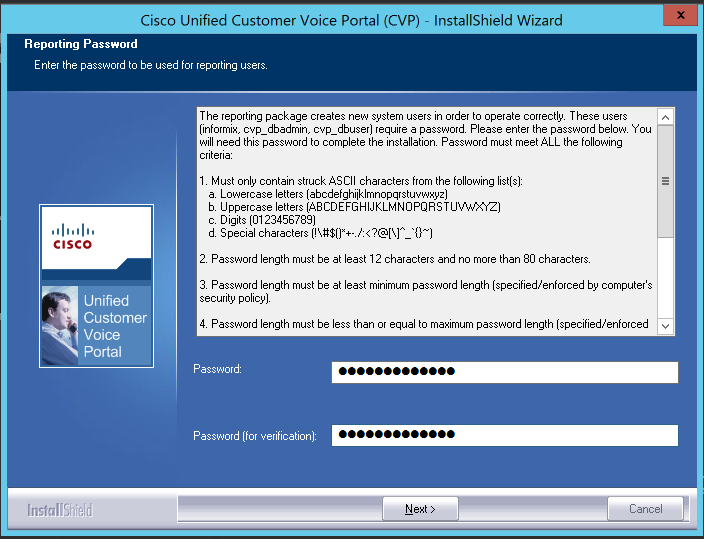
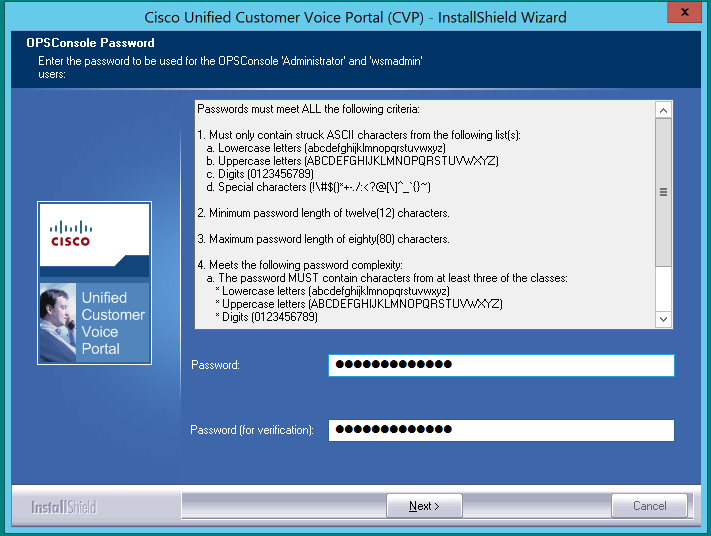
Choose your favorite secure password.

Screen Shot 2020-02-09 at 10.19.54 PM.png

Finish and restart.

This is only one half of the equation, you’ll need need the voice piece in order to be able to get CVP to do anything.

~david