Forward your VoIP Number to another phone and send text messages to email

Given the recent VOIPO shutdown announcement:

Screenshot 2025-08-04 at 2.11.18 PM

and the amount of attention this has gotten on r/voip I figured I would post this to help others who are looking for options. This will require a bit of technical knowledge, but I included every single step required so you could do this yourself. Please make sure you read the entire post before you get started.

What this solution does:

  1. If you receive a call on your phone number, it will be forwarded to a secondary number. The forward is completely blind, if you don’t answer the call it will do whatever your secondary number does when it doesn’t answer. There is no transcription or notification of any kind. It could be added, but that’s outside the scope of this post.
  2. If you receive an SMS message on your phone number, you will receive an email with the contents of said message. There is no response back to the original sender. There is no other notification other than the email you receive. The email will probably go to SPAM, but that’s easy to address.
  3. This has only been tested in the US. I have to imagine other countries would work similarly, but I can’t guarantee anything outside the US.
  4. This solution has no guarantees of any kind. I’ve been using something similar for maybe 10 years and have configured similar solutions for my customers for even longer. However, you are not my customer, but if you want to become my customer head on over to Square O to learn more or send us an email at hello at squareo.com.

Please note that there are NO affiliate links in this post.

Products Used:

  1. We are going to use Twilio for handling a phone call and SMS message. Think of Twilio as a programming platform for telephony services. You can control your calls and text messages with code. Twilio pricing is pretty excellent because it’s very transparent and you have per use charges. Twilio directly replaces VOIPo for example.
  2. We are going to use Mailgun for handling emails. Think of Mailgun as a programming platform for email services. All those promotional emails, news letters, etc. that you get in your inbox come from a provider like Mailgun.

Expected costs:

In our case, let’s assume we get a single call that’s 10 minutes long and 2 text messages. The pricing formula would look like this:

incoming minutes*total minutes + outgoing minutes*total minutes+incoming messages*total messages
($0.0085 / min*10)+($0.0140 / min*10)+($0.0083 / msg*2)=$0.2416 or about 2.5 cents USD.

Note that we are charged for the incoming call and the outgoing call, so we’re paying double for this. It’s important to be aware of this. This is a very common practice on pay as you go platforms.

For email: Mailgun has a very generous free tier of 100 emails per day. This means that if you receive more than 100 text messages per day you would have to sign up for their $15/month plan which allows for 10,000 emails/month. 

Now, there’s one more item which will incur costs and this is the phone number. If you buy a new number or port your number to Twilio you will be charge $1.15/month to hold each phone number. So our total charges based on the example above will be around $1.18/month.

Let’s start building. Prerequisites:

  1. A Mailgun account, you can sign up to a free account via this link.
  2. A Twilio account, you can sign up for a free account via this link. Please note that when you first open an account with Twilio you’re in Trial Mode. Your account needs to NOT be an trial account in order for this to work.
  3. You do not need to port your number until you have everything working, but once you do, you’ll need to submit a porting request. Instructions here.

Twilio Setup for Call Forwarding Only

  1. From the console you’ll want to find Services under Functions and Assets. If you have a new account you will more than likely have to go to Explore products > Developer tools > Functions and Assets.

f0116444-173b-424a-ba89-e90046424d33

2. You will want to Create Service and name it something logical. I chose forwarding-call-sms as my service name.
3. You will then be sent to the function page and see a /welcome in the right hand side. Click the 3 vertical dots and Delete.

Screenshot 2025-08-04 at 3.16.43 PM

4. Click the Add+ button > Add Function.
5.  Name your function /voice and copy and paste the following code.

exports.handler = function(context, event, callback) {
// IMPORTANT: Replace the placeholder number below with your actual forwarding phone number (digits only).

let yourDefaultForwardingNumber = “15551231234”;

// Set the destination phone number.
// It will use the number from the incoming event if it exists,
// otherwise it constructs the full number from your default.
let destinationPhoneNumber = event.PhoneNumber || `+${yourDefaultForwardingNumber}`;

// Generate the TwiML to tell Twilio how to forward this call
let twiml = new Twilio.twiml.VoiceResponse();

let dialParams = {};

// The <Dial> TwiML verb is used to connect the current call to a new number
twiml.dial(dialParams, destinationPhoneNumber);

// Return the TwiML to Twilio
callback(null, twiml);
};

6. Update the line that start with let yourDefaultForwardingNumber with your 10 digit phone number starting with 1.
7. Hit Save
8. Hit Deploy All and you should see something like this.

Aug 4, 2025, 03:24:33 PM Saving function path: /voice…
Aug 4, 2025, 03:24:34 PM Saved function: /voice
Aug 4, 2025, 03:24:46 PM Starting build…
Aug 4, 2025, 03:24:47 PM Completed…
Aug 4, 2025, 03:25:02 PM Build completed
Aug 4, 2025, 03:25:02 PM Deploying…
Aug 4, 2025, 03:25:03 PM Deployed to environment: forwarding-call-sms-…

9. From the console you’ll want to find the Buy a number under Phone Numbers > Manage. You can choose different types of phone numbers based on all sorts of criteria. To get started pick any local number that supports Voice and SMS. Once purchased you’ll want to go to Active Numbers and click on it to configure the function we wrote to be triggered every time a call arrives.

2c2cc12b-b311-43e8-bfcf-77ba030d45a7
10.Under Voice Configuration you’ll want your configuration to look like this.

Screenshot 2025-08-04 at 3.32.16 PM

11. Click Save configuration and you are done. 
12. Place a test call and see what happens.

Mailgun and Twilio Setup for Call SMS to Email Only

  1. Login to your Mailgun dashboard and go to Sending > Domains. The domain should look something like sandboxXYZ.mailgun.org. Copy the domain and save it for later use.
  2. Click on your sandbox domain and go to Setup.
  3. Add the email address of who will receive the SMS emails and send invite. You must click on the I Agree link you get in your inbox to ensure emails will be sent to you via Mailgun.

Screenshot 2025-08-04 at 11.04.20 PM

3. Under Sending keys add a sending key and copy the Sending API key and save it for later use.
4. Go back to Twilio > Functions and click on the function you used on the first step.
5. Add a new function called /sms and add the following code and Save.

exports.handler = function(context, event, callback) {
constAPI_KEY = context.MAILGUN_API_KEY;
constDOMAIN = context.MAILGUN_DOMAIN;

const formData = require(‘form-data’);
constMailgun = require(‘mailgun.js’);

const mailgun = newMailgun(formData);
const client = mailgun.client({username: ‘api’, key: API_KEY});

const messageData = {
from: context.FROM_EMAIL,
to: context.TO_EMAIL,
subject: `New SMS message from: ${event.From}`,
text: event.Body
};

client.messages.create(DOMAIN, messageData)
.then((res) => {
let twiml = newTwilio.twiml.MessagingResponse();
callback(null, twiml);
})
.catch((err) => {
console.error(err);
callback(err);
});
};
6. Click on Dependencies and add the following two exactly as you see the below.

mailgun.js

11.1.0

form-data4.0.1

7. Click on Environment Variables and add the following 4 variables with your respective values.

FROM_EMAIL

your@email.com

TO_EMAILyour@email.com
MAILGUN_API_KEY

Key saved from step 3 above.

MAILGUN_DOMAINDomain saved from step 1.

8. Deploy all
9. From the console you’ll want to find your phone number under Phone Numbers > Manage. You’ll want to set up your messaging configuration to look like this.

Screenshot 2025-08-04 at 11.35.41 PM

10. Click Save configuration and you are done. 
11. Send a text message to your Twilio number and check your spam folder. You should see an email like the one below.


Screenshot 2025-08-04 at 11.32.51 PM

Good luck.

~david


Adding Text to Speech to Your IVR Using SaaS (Google Cloud Functions)

I’ve been on a text-to-speech and speech-to-text kick lately. My last post talked about using AWS S3 and Amazon Transcribe to convert your audio files to text and in previous articles I’ve covered how to create temporary prompts using Poly so you can build out your contact center call flows. Well, now we’re going to expand our use case to allow a traditional on premise call center to leverage the cloud and provide dynamic prompts. My use case is simple. I want my UCCX call center to dynamically play some string back to my caller without having to use a traditional TTS service.

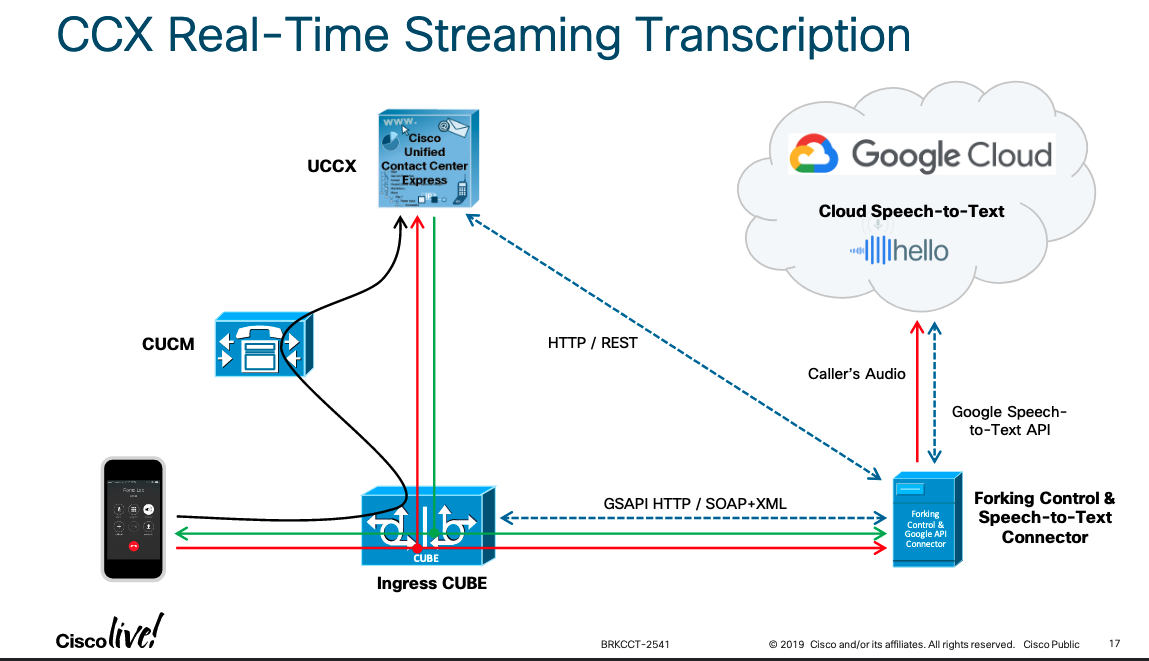
First, this is not new in any way and other people have solved this in different ways. This Cisco DevNet Github repo provides a method to use voicerss.org to generate TTS for UCCX. However, this process requires loading a jar file in order to do Base64 decoding. Then there’s this Cisco Live presentation from 2019, by the awesome Paul Tindall, who used a Connector server to do something similar. To be fair the Connector server allowed for a ton more functionality than what I’m looking for.

Screen Shot 2021-09-15 at 3.38.30 PM

Cisco Live Presentation

Second, I wanted this functionality to be as easy to use as possible. While functionality keeps getting better for on premise call center software there are still limitations around knowledge to leverage new features and legacy version that can’t be upgraded that makes it harder to consume cloud based services. I wanted the solution to require the least amount of moving parts possible. That means no custom Java nor additional servers to stand up.

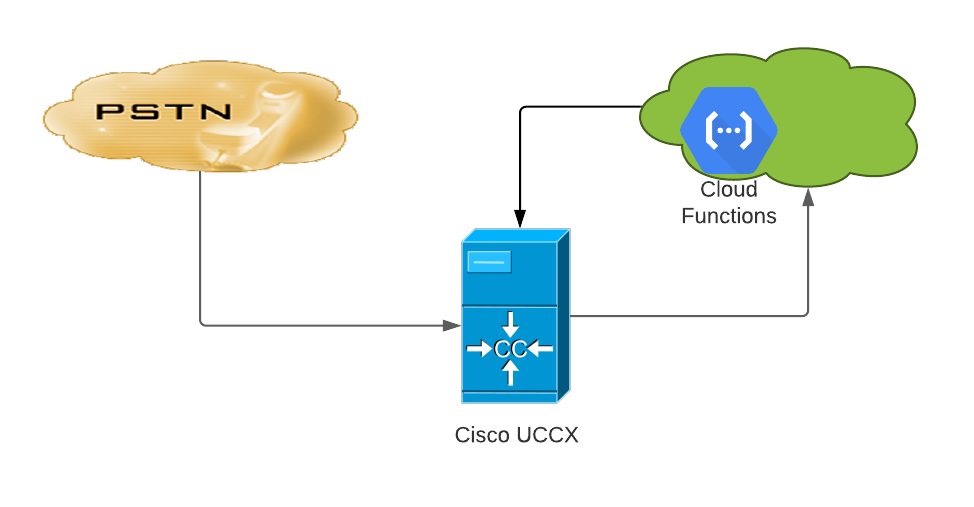
The solution I came up with leverages Google’s cloud (GCP) specifically Cloud Functions. However, the same functionality can be achieves used AWS Lambda or Azure’s equivalent. At a high level we have an HTTP end point where you pass your text string to and in return you will get a wav file in the right format which you can then play back.

Blank diagram

Flow Diagram

The URL would look something like this:

https://us-central1-myFunction.cloudfunctions.net/synthesize_text_to_wav?text=American%20cookies%20are%20too%20big

The Good Things About This

  • Pay as you go pricing for TTS. Looking at the pricing calculator a few hours of TTS a month would run under $2.00/month.
  • Infinitely scalable. If you’re handling 1 call or 100 calls your function will always return data.
  • Easy to use.

The Bad Things About This

  • There is a delay between making the request and getting the wav file. I’ve seen as long as 7 seconds at times. I would only use this in a very targeted manner and ensure it didn’t affect the caller experience too drastically.
  • Requires your on premise IVR to have internet access. Often time this is a big no no for most businesses.

Some initial testing with UCCX is showing some positive results. I’m going to investigate if there’s a way to accelerate the processing in order to keep the request and response in under 3 seconds as well as adding the ability to set language, voice, and even SSML via arguments. If you want to build this yourself here’s the code for the function.

def synthesize_text_to_wav(request):
"""Synthesizes speech from the input string of text."""
text = request.args.get('text')

client = texttospeech.TextToSpeechClient()
input_text = texttospeech.SynthesisInput(text=text)
voice = texttospeech.VoiceSelectionParams(
language_code="en-US",
name="en-US-Standard-C",
ssml_gender=texttospeech.SsmlVoiceGender.FEMALE,
)
audio_config = texttospeech.AudioConfig(
audio_encoding=texttospeech.AudioEncoding.MP3
)
response = client.synthesize_speech(
request={"input": input_text, "voice": voice, "audio_config": audio_config}
)

src_file_path = '/tmp/output.mp3'
dst_file_path = '/tmp/output.wav'

# make sure dir exist
os.makedirs(os.path.dirname(src_file_path), exist_ok=True)

# The response's audio_content is binary.
with open(src_file_path, "wb") as out:
out.write(response.audio_content)
print('Audio content written to file "output.mp3"')
AudioSegment.from_mp3(src_file_path).export(dst_file_path, format="wav", codec="pcm_mulaw", parameters=["-ar","8000"])
return send_file(dst_file_path

Be awesome!

~david

Firebase default Hosting webpage

Serverless Development with Firebase Emulator

I’m getting more and more into serverless development. Trying to avoid handling any sort of hardware sounds like a dream come true. No more handling security patching, load balancing, etc. However, one of the biggest things I struggle with is how to do local development efficiently without having to deploy your code to the cloud every time? Google’s serverless offering, Firebase, released a very cool tool this year which allows you to emulate most their services locally. Here are some of my learnings so far. These should be specifically relevant if you’re doing any React development with Firebase.

Setting Up Your Local Development

Prerequisites:

  • We won’t be using the node.js server, but use node to install components and to develop our React app.
  • Firebase account.
  • Firebase CLI a key way to do that is using the command npm install -g firebase-cli
  • Optional but recommended create-react-app installed npm install -g create-react-app
  • Optional Your favorite IDE. I’m a sucker for VS Code.

Project Setup

Setting up your project. From the Firebase console, Add project:

  1. Choose a name.
  2. Choose your Google Analytics setting, not relevant for this.
  3. Create project.
  4. Add an app to get started and choose Web.
  5. Choose a name, I generally use the same name as the project and set up Firebase Hosting.
  6. Click on Database and create a Cloud Firestore database. Choose to start in test mode. Choose your favorite/closest region.

Local Setup

  • Create a folder where you’ll be doing your development, this will be your root folder. I give this folder a project relevant name.
  • First make sure you login with the below command and use the Google account associated with the Firebase console above.
    • firebase login

  • Initialize your project with the command below. Make sure to choose the following features and be sure to select the Firestone project we created earlier during the project setup. Choose all the other defaults presented and choose the following emulation settings.
    • firebase init

      Firebase init cli

      Choose your Firebase services you’ll be using.

      Choose the Firebase services to emulate

      Firebase cli emulator settings.

Of most importance here is that you take a look at your firebase.json file which has been generated by the initialization. It should look very much like this. Pay close attention to the emulators and hosting sections as these will play an important role later. One thing to watch out for at this point is to ensure the ports you’ve asked the emulator to use are actually open. On the next step we will be able to confirm if they are opened or not, but this is the file you use to change them if you get an error. Here’s what it should look like if you’re following along.

{
  "firestore": {
    "rules": "firestore.rules",
    "indexes": "firestore.indexes.json"
  },
  "functions": {
    "predeploy": [
      "npm --prefix \"$RESOURCE_DIR\" run lint"
    ]
  },
  "hosting": {
    "public": "public",
    "ignore": [
      "firebase.json",
      "**/.*",
      "**/node_modules/**"
    ],
    "rewrites": [
      {
        "source": "**",
        "destination": "/index.html"
      }
    ]
  },
  "emulators": {
    "functions": {
      "port": 5001
    },
    "firestore": {
      "port": 8080
    },
    "hosting": {
      "port": 5000
    },
    "ui": {
      "enabled": true
    }
  }
}
  • Finally it’s time to take a look at what we have so far. We’re going to start the emulator and see what we get with the out of the box setup for a Firebase project. If you get any errors it’s more than likely that you have a port conflict. I have a port conflict and moved Function from 5001 to 5080. If you need to to the same go back to your firebase.json file and find a free port and try again.
    • firebase emulators:start

If everything worked you should see the following.

Firebase emulator running

Firebase emulator running

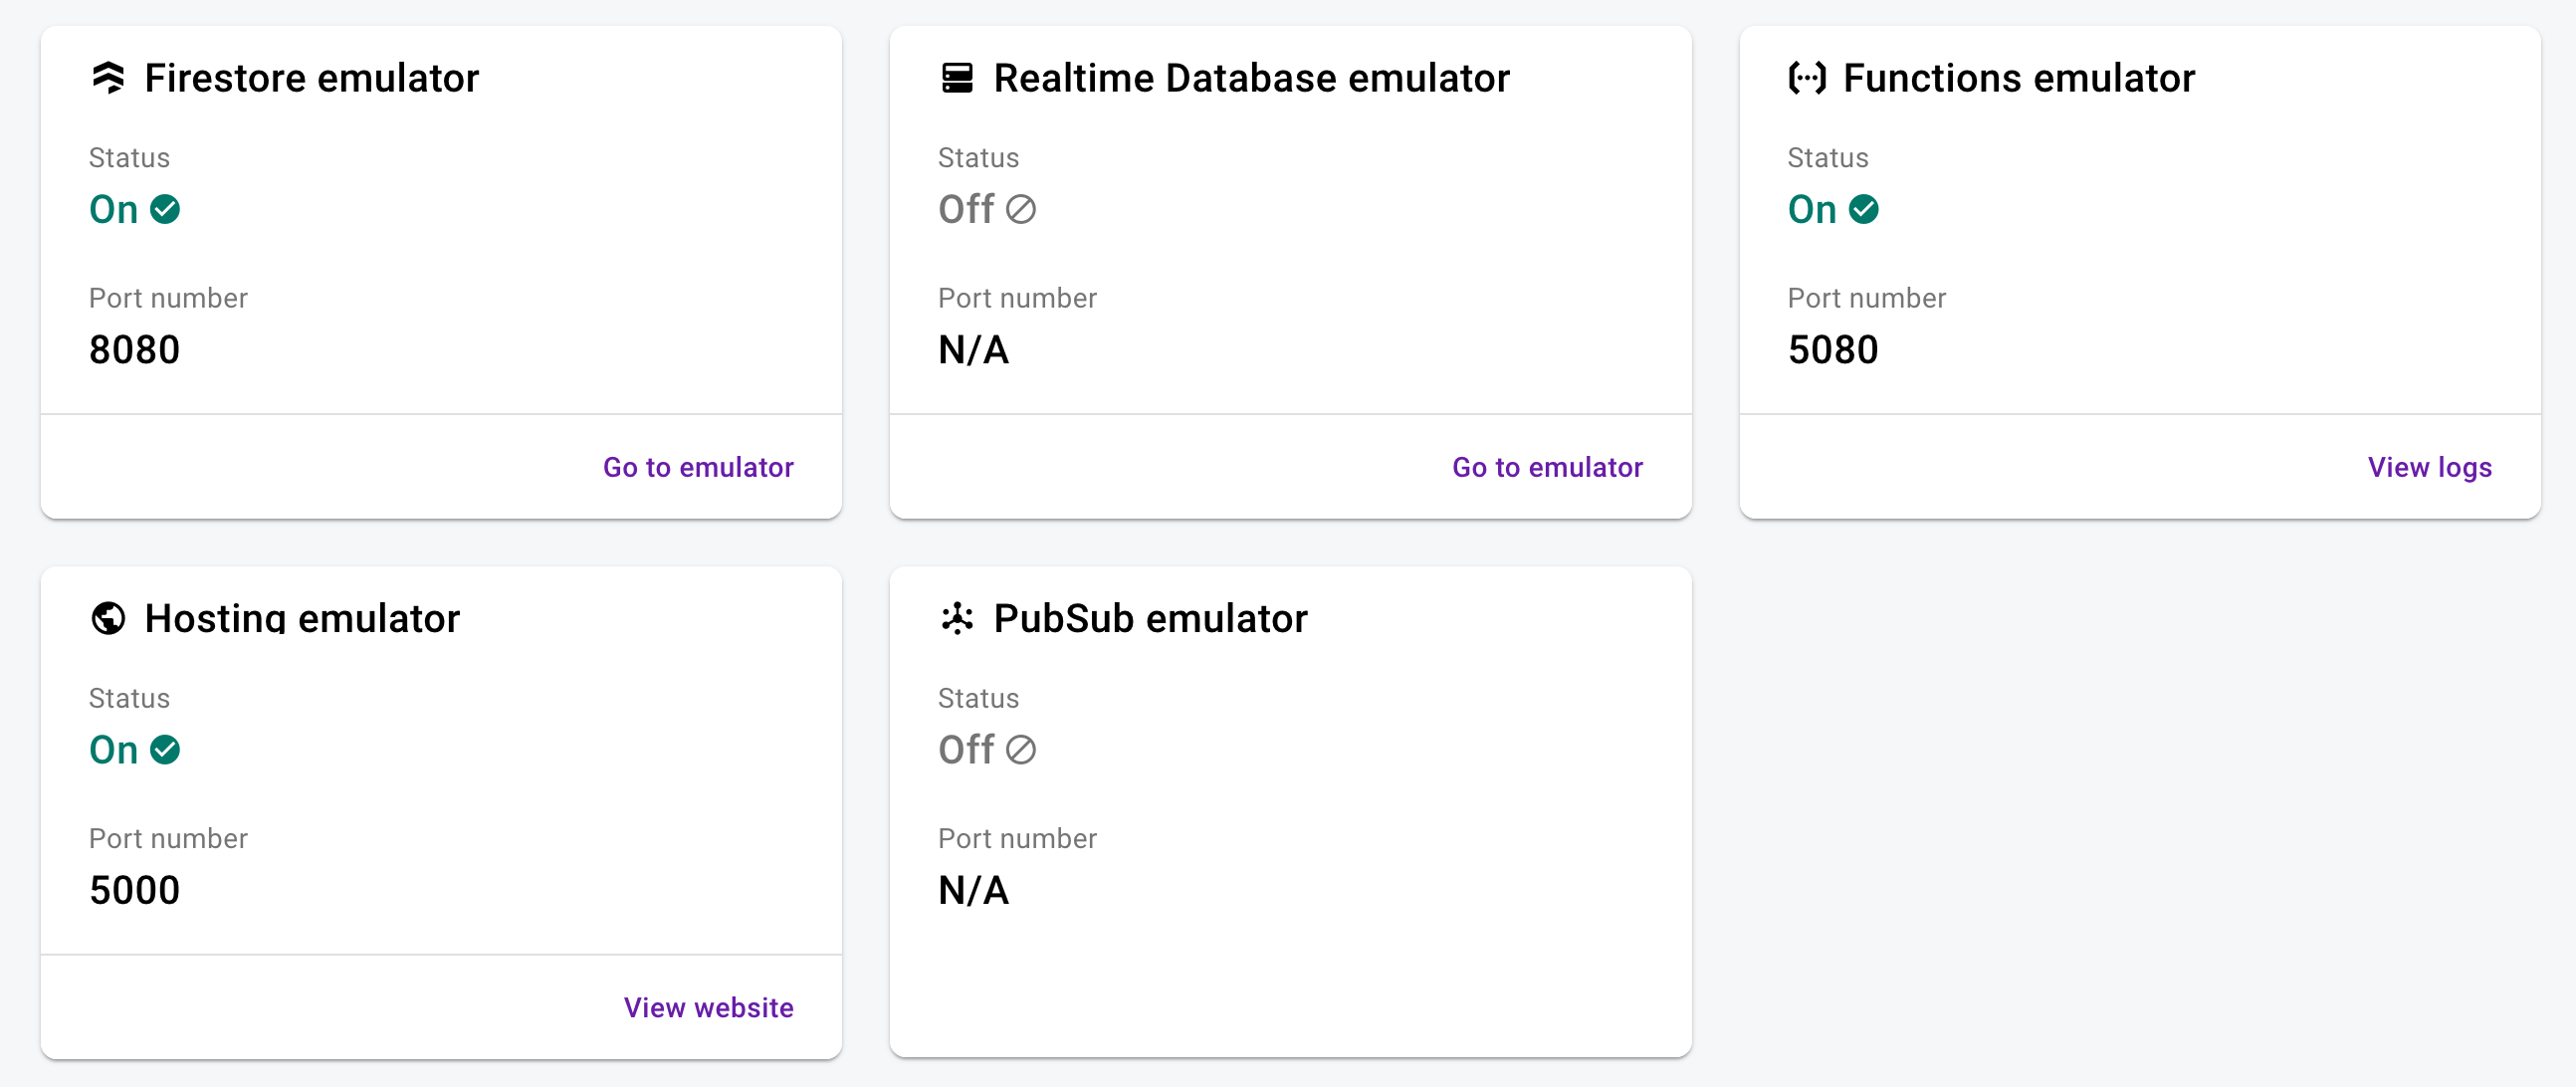
At this point let’s stop for a second and break down what we have available to us. First, going to http://localhost:5000 will show you Firebase Hosting’s emulation. Next, going to http://localhost:4000 gives you a nice dashboard of all your emulated services and their status. As well as links to the relevant logs and details for those services. Finally, a log window with a very handy search feature to be able to do faster troubleshooting.

Firebase emulator UI

Firebase emulator UI

Firebase emulator log UI

Firebase emulator log UI

If you’ve gotten this far you’ve setup a project through the Firebase console. You’ve setup your local dev environment. You’ve emulated Firebase for local test. Now we’re going to go through a very simple exercise where we’re going to use the most popular services for Firebase and show what you can and can’t emulate.

React Development Part 1

We are going to create a simple React application that allows a user to register, login, and then see the registration details they entered. This exercise will walks us through a few things:

  • Hosting: For the React application
  • Functions: API for registration and login
  • Firestore: Database for user information
  • Authentication: Firebase user management

First there are a few things we need to setup.

  1. In the Firebase console for your project select Authentication and “Setup sign-in method”. You’re going to want to setup Email/Password provider. This will allow users to use those details to authenticate.
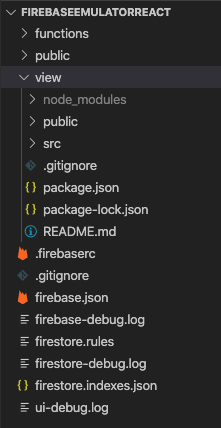
  2. In your terminal go to the root of your project and create a new create-react-app (CRA) app. I like to use view as my root React folder, but you can choose whatever you want. You’ll want to end up with the following folder structure.

create-react-app view

Default Firebase and CRA file structure

Default Firebase and CRA file structure

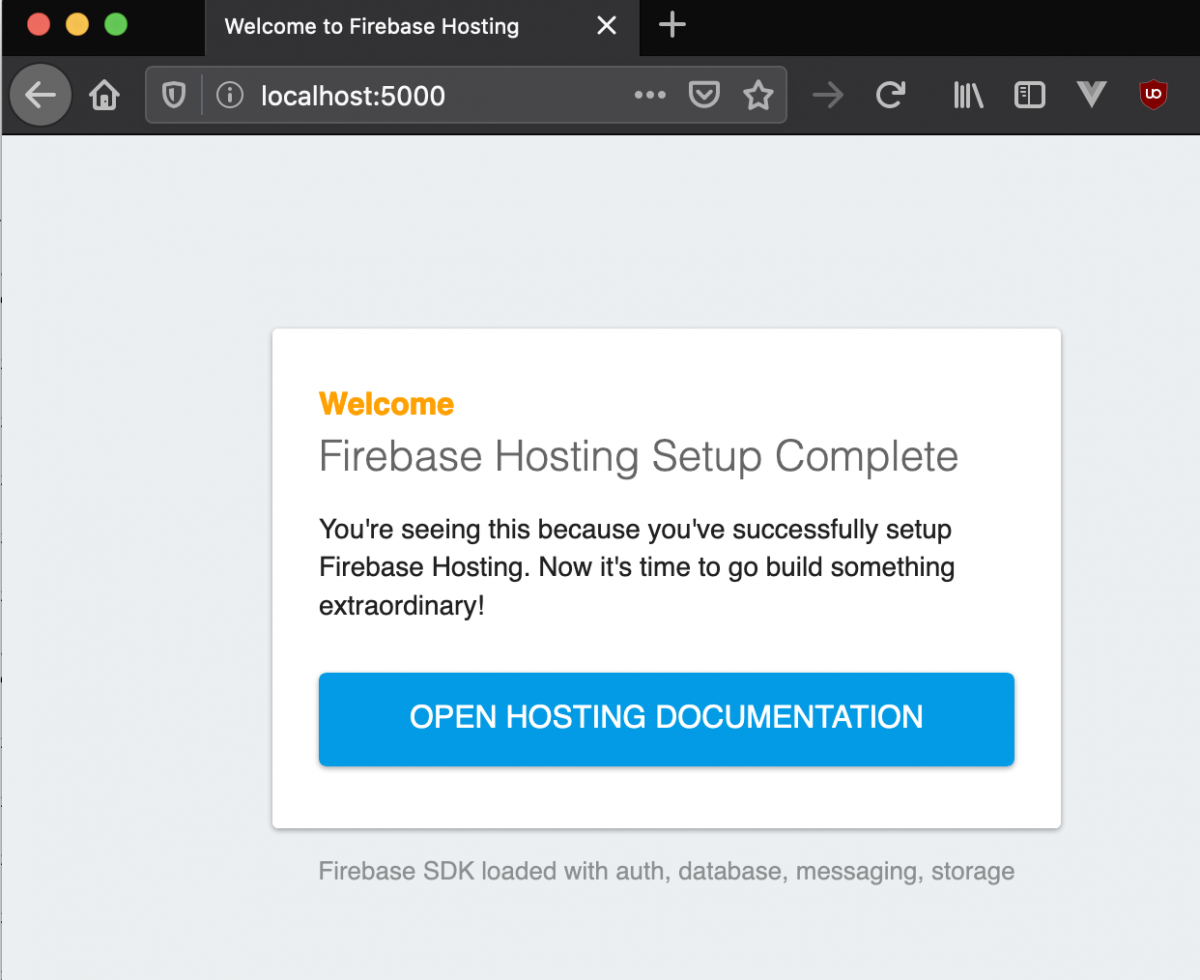
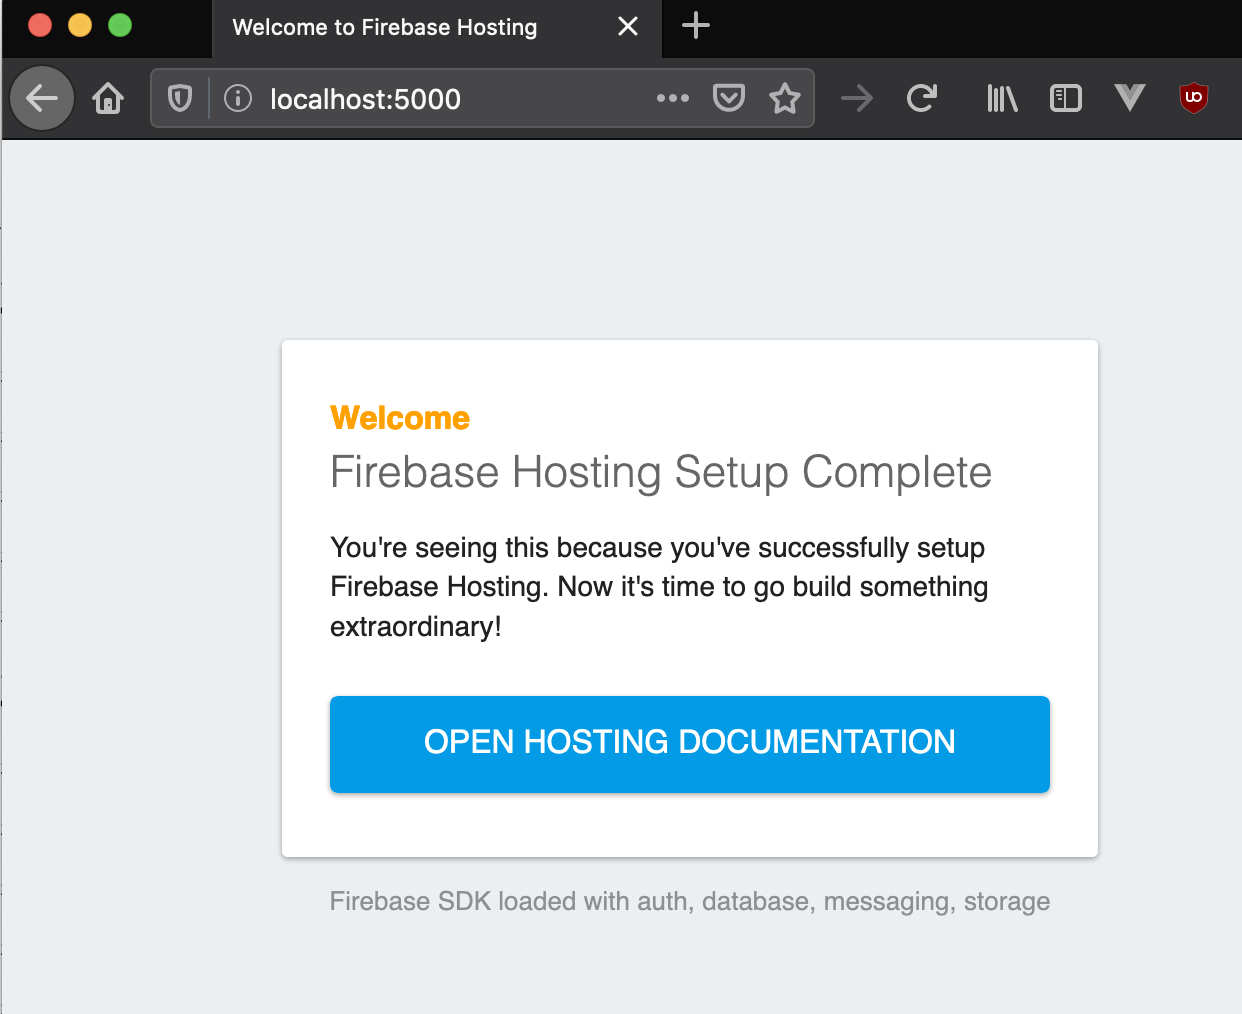
At this point you have a CRA app inside your Firebase, but when you go to your Hosting URL you are still going to see the default Firebase website.

Firebase default Hosting webpage

Firebase default Hosting webpage

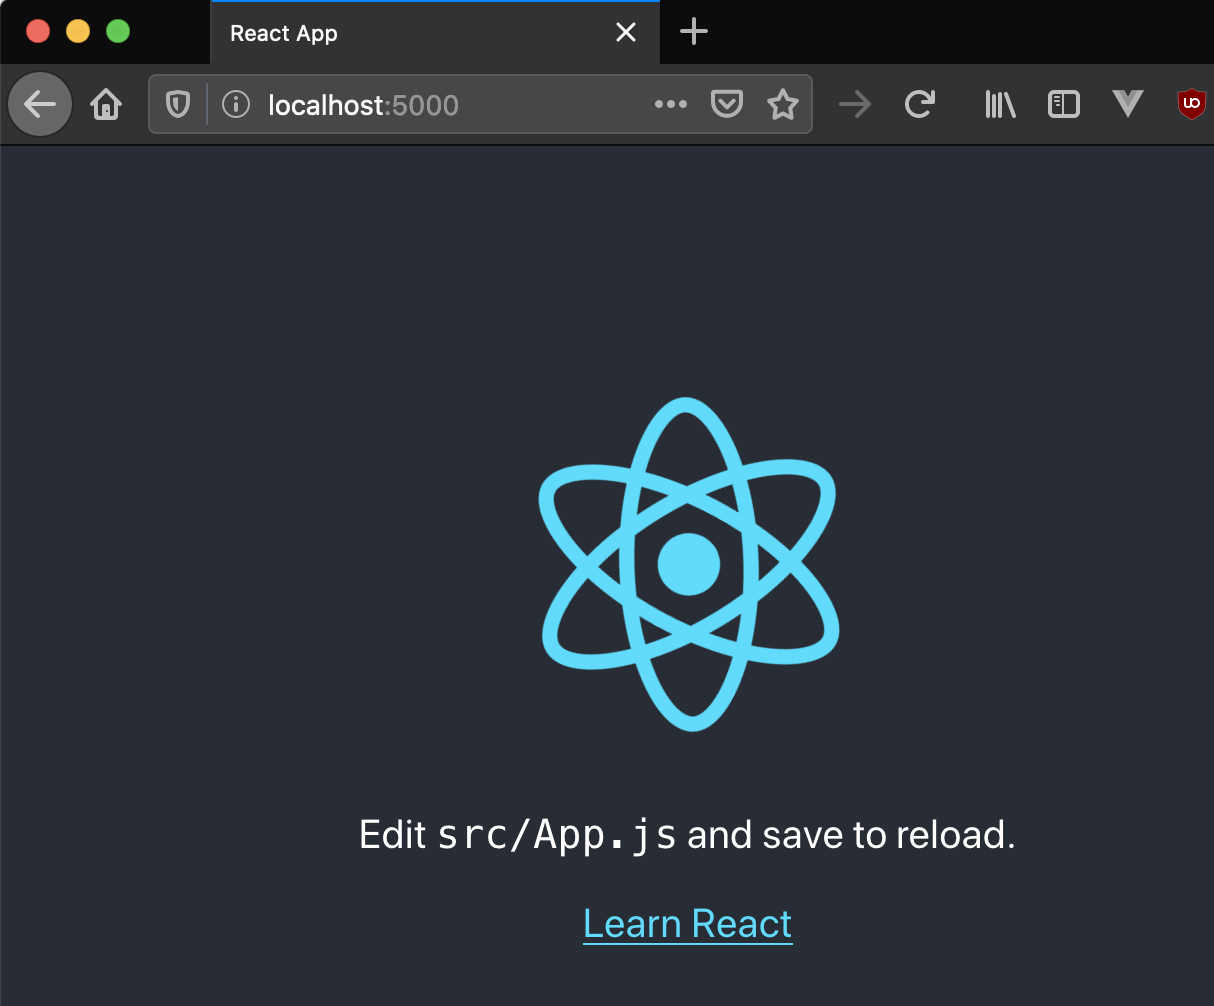
Go back to your firebase.json and change your hosting path to view/build and then restart your Firebase emulator and you should now see your CRA app.

...
"hosting": {
"public": "view/build",
...

CRA default webpage

CRA default webpage

I will pick up the rest of the exercise on a follow up blog post as this is getting very lengthy.

~david