The last few weeks have given me an opportunity to dig deeper into the AWS’s Amazon Connect solution. The purpose of this post will be to document some of my frustrations with the contact flow editor which I believe should be easy to fix. There are a few more frustrations which I don’t believe are easy, so I’ll save those for another post.
In the Contact flows screen there are a few things I would love to see. Firsts, make the Name, Type, and Description columns sortable. When there’s a very long list of flows this allows to quickly see specific groupings of flows together. Second, add an action menu at the end of the row which allows for a quick way to publish, duplicate, or delete a flow. This simple menu would save at least 2 extra clicks and covers some of the common actions one takes once inside the editor.

Amazon Connect Contact Flows Screen
Let’s click on a specific contact flow and take it from the top down. Perhaps the most important thing here would be an auto save or confirmation that you might lose your changes if you try to navigate away from the editor screen. It’s very common that you have to go find a queue or prompt ARN, as they are not available in the editor, so if you browse away from the editor without saving you’ve lost your progress.
In an ideal world you would be able to easily switch from flow to flow without having to go back to the main contact flows screen. A drop down next to the flow name to quickly switch between flows would be great. This is specially useful when you want to copy and paste blocks between flows.

Contact Flow Editor Top Bar
I’ve covered this one before, but it fits nicely with this post. You can save a flow or publish a flow and you can do both by using the publish button. However, the confirmation notification that you performed one or the other doesn’t confirm which one you did. This is minor annoyance as you can then move your eyes from the far left of the screen where the notification is found to the top right of your screen to see the Latest button label which will tell you the status of your current flow. It would be nice if the notification confirmed which action you took, I find myself savings when I meant to publish and it always takes me a second to confirm which one I did.

The workspace or the big white area with a grid where you place your blocks is the next focus. It’s nice to have infinite room to the right and bottom, but it would be nice if the same would be applied to the top and left. As your flow has more and more branching you find yourself scrolling further and further down, it would be nice if by default your start of the flow would be centered by default.
Remembering the zoom level or setting a default zoom level per flow will save a few clicks. As the flows gets bigger you start having to zoom in and out a lot more. When the flow is rather large, there’s very little reason why the default zoom level is the same as a flow which only has a few blocks. Below is the default view of two different flows. While this default view is useful for smaller flows, for bigger flows it’s not as useful and you immediately have to scroll around or zoom out to get to where you want to go faster.
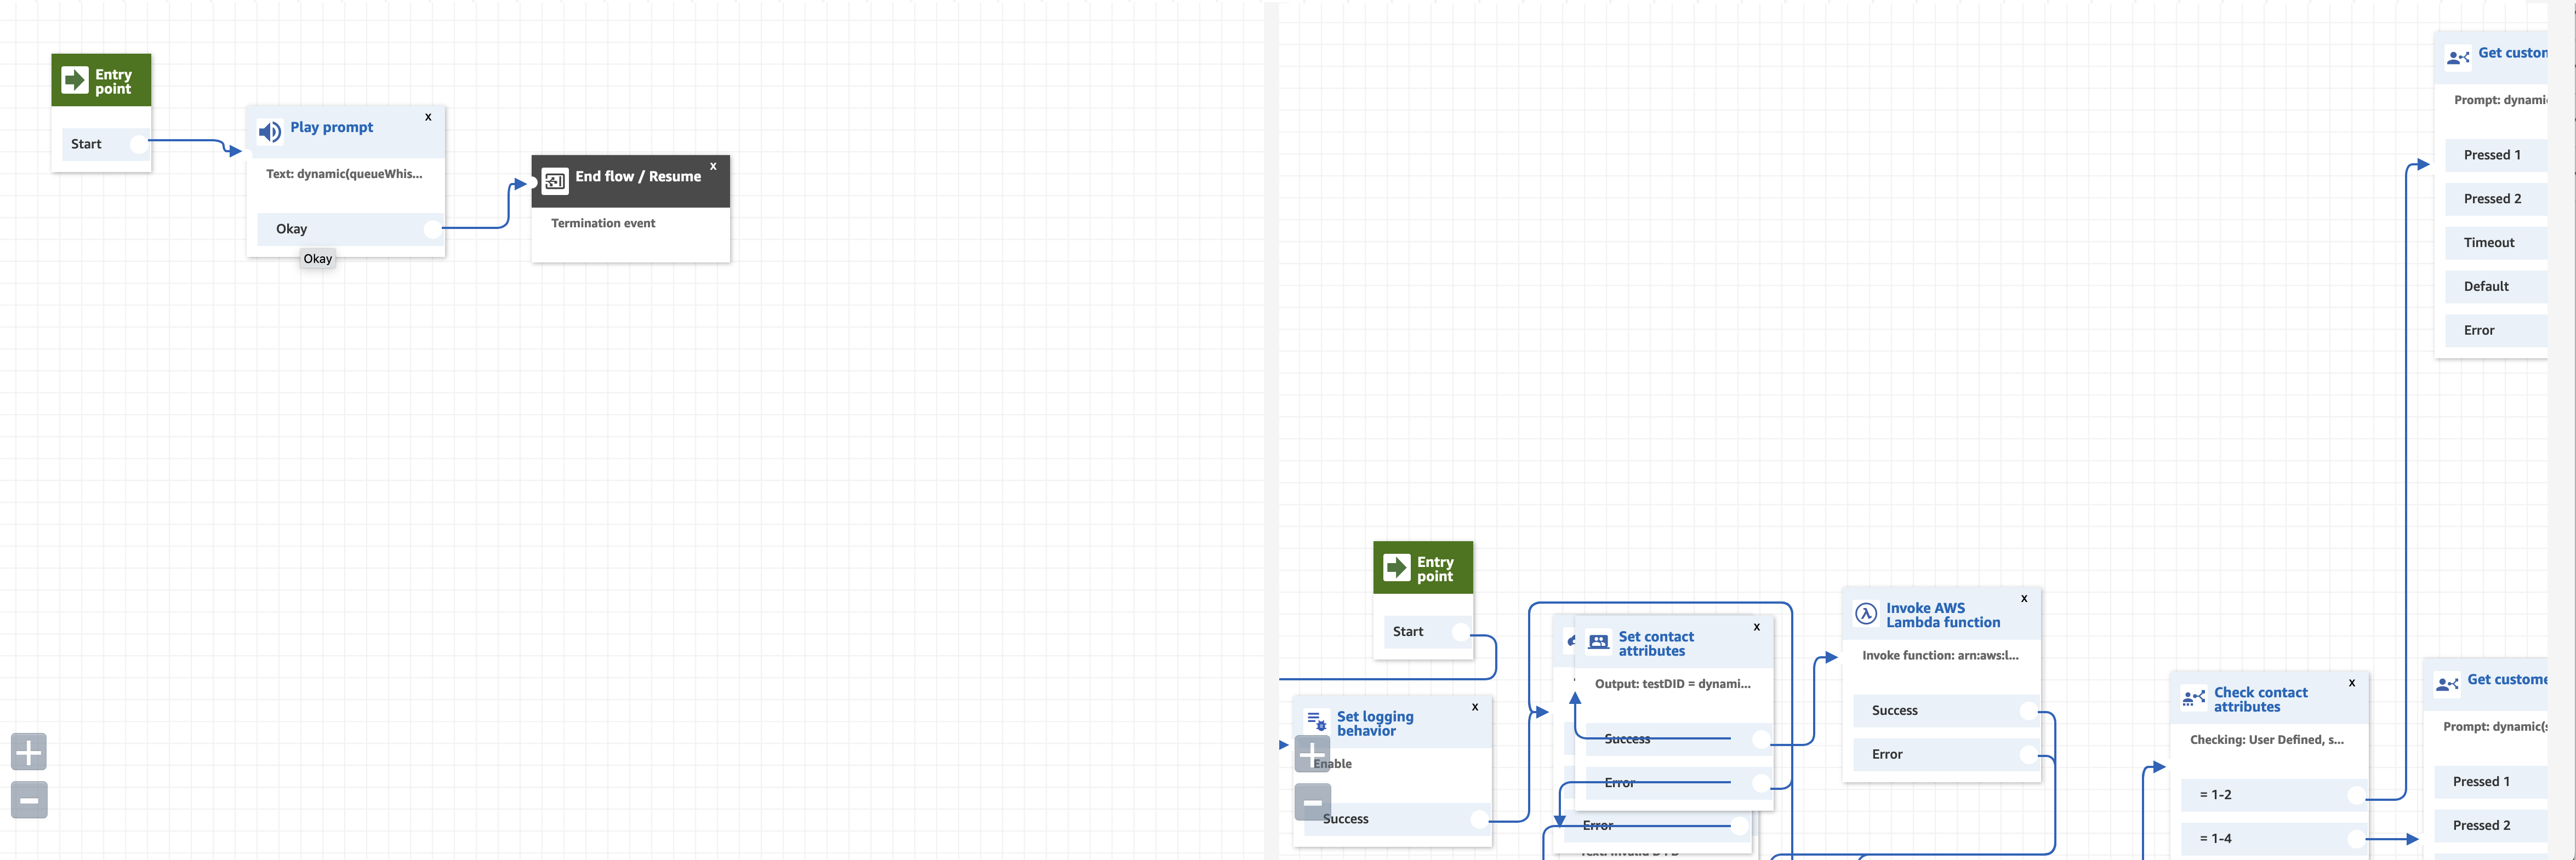
Default View of Two Different Flows
One of the great things about contact flows is how many things you can do dynamically. However, you first have to bring in a lot of that data over to the flow. You do this with a Set contact attributes block. However, as you add more attributes it starts to become harder to find the right attribute you want to reference. Adding a way to sort or collapse every attribute details would make it much easier to find the attribute you’re looking for. This is specially important as the editor doesn’t tell you what attributes have already been defined. If that was the case this point might not be as important. Imagine having to scroll through a dozen of the aqua blocks below, having to read each name to get to the one you want. Painful!
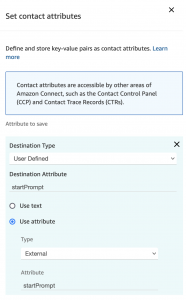
Amazon Connect Set Contact Attribute
And finally, my biggest annoyance: block details. Block details are the configuration options each block has. You can get to them by clicking the top dark gray bar of any block.
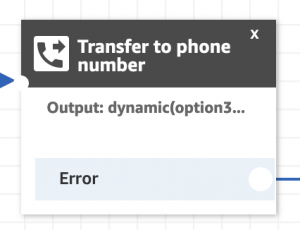
Contact Flow Block
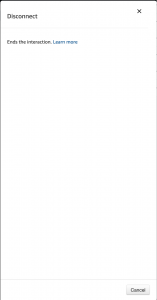
There are two annoyances here. First, you can’t click on the workspace to close the block details. Even if you didn’t make a change you have to move your mouse to the far bottom left or right to click the cancel/x buttons. Heck, let me use the escape key to get out of there. So often I just need to see the configuration without making changes and having to cancel out every time takes unnecessary steps.
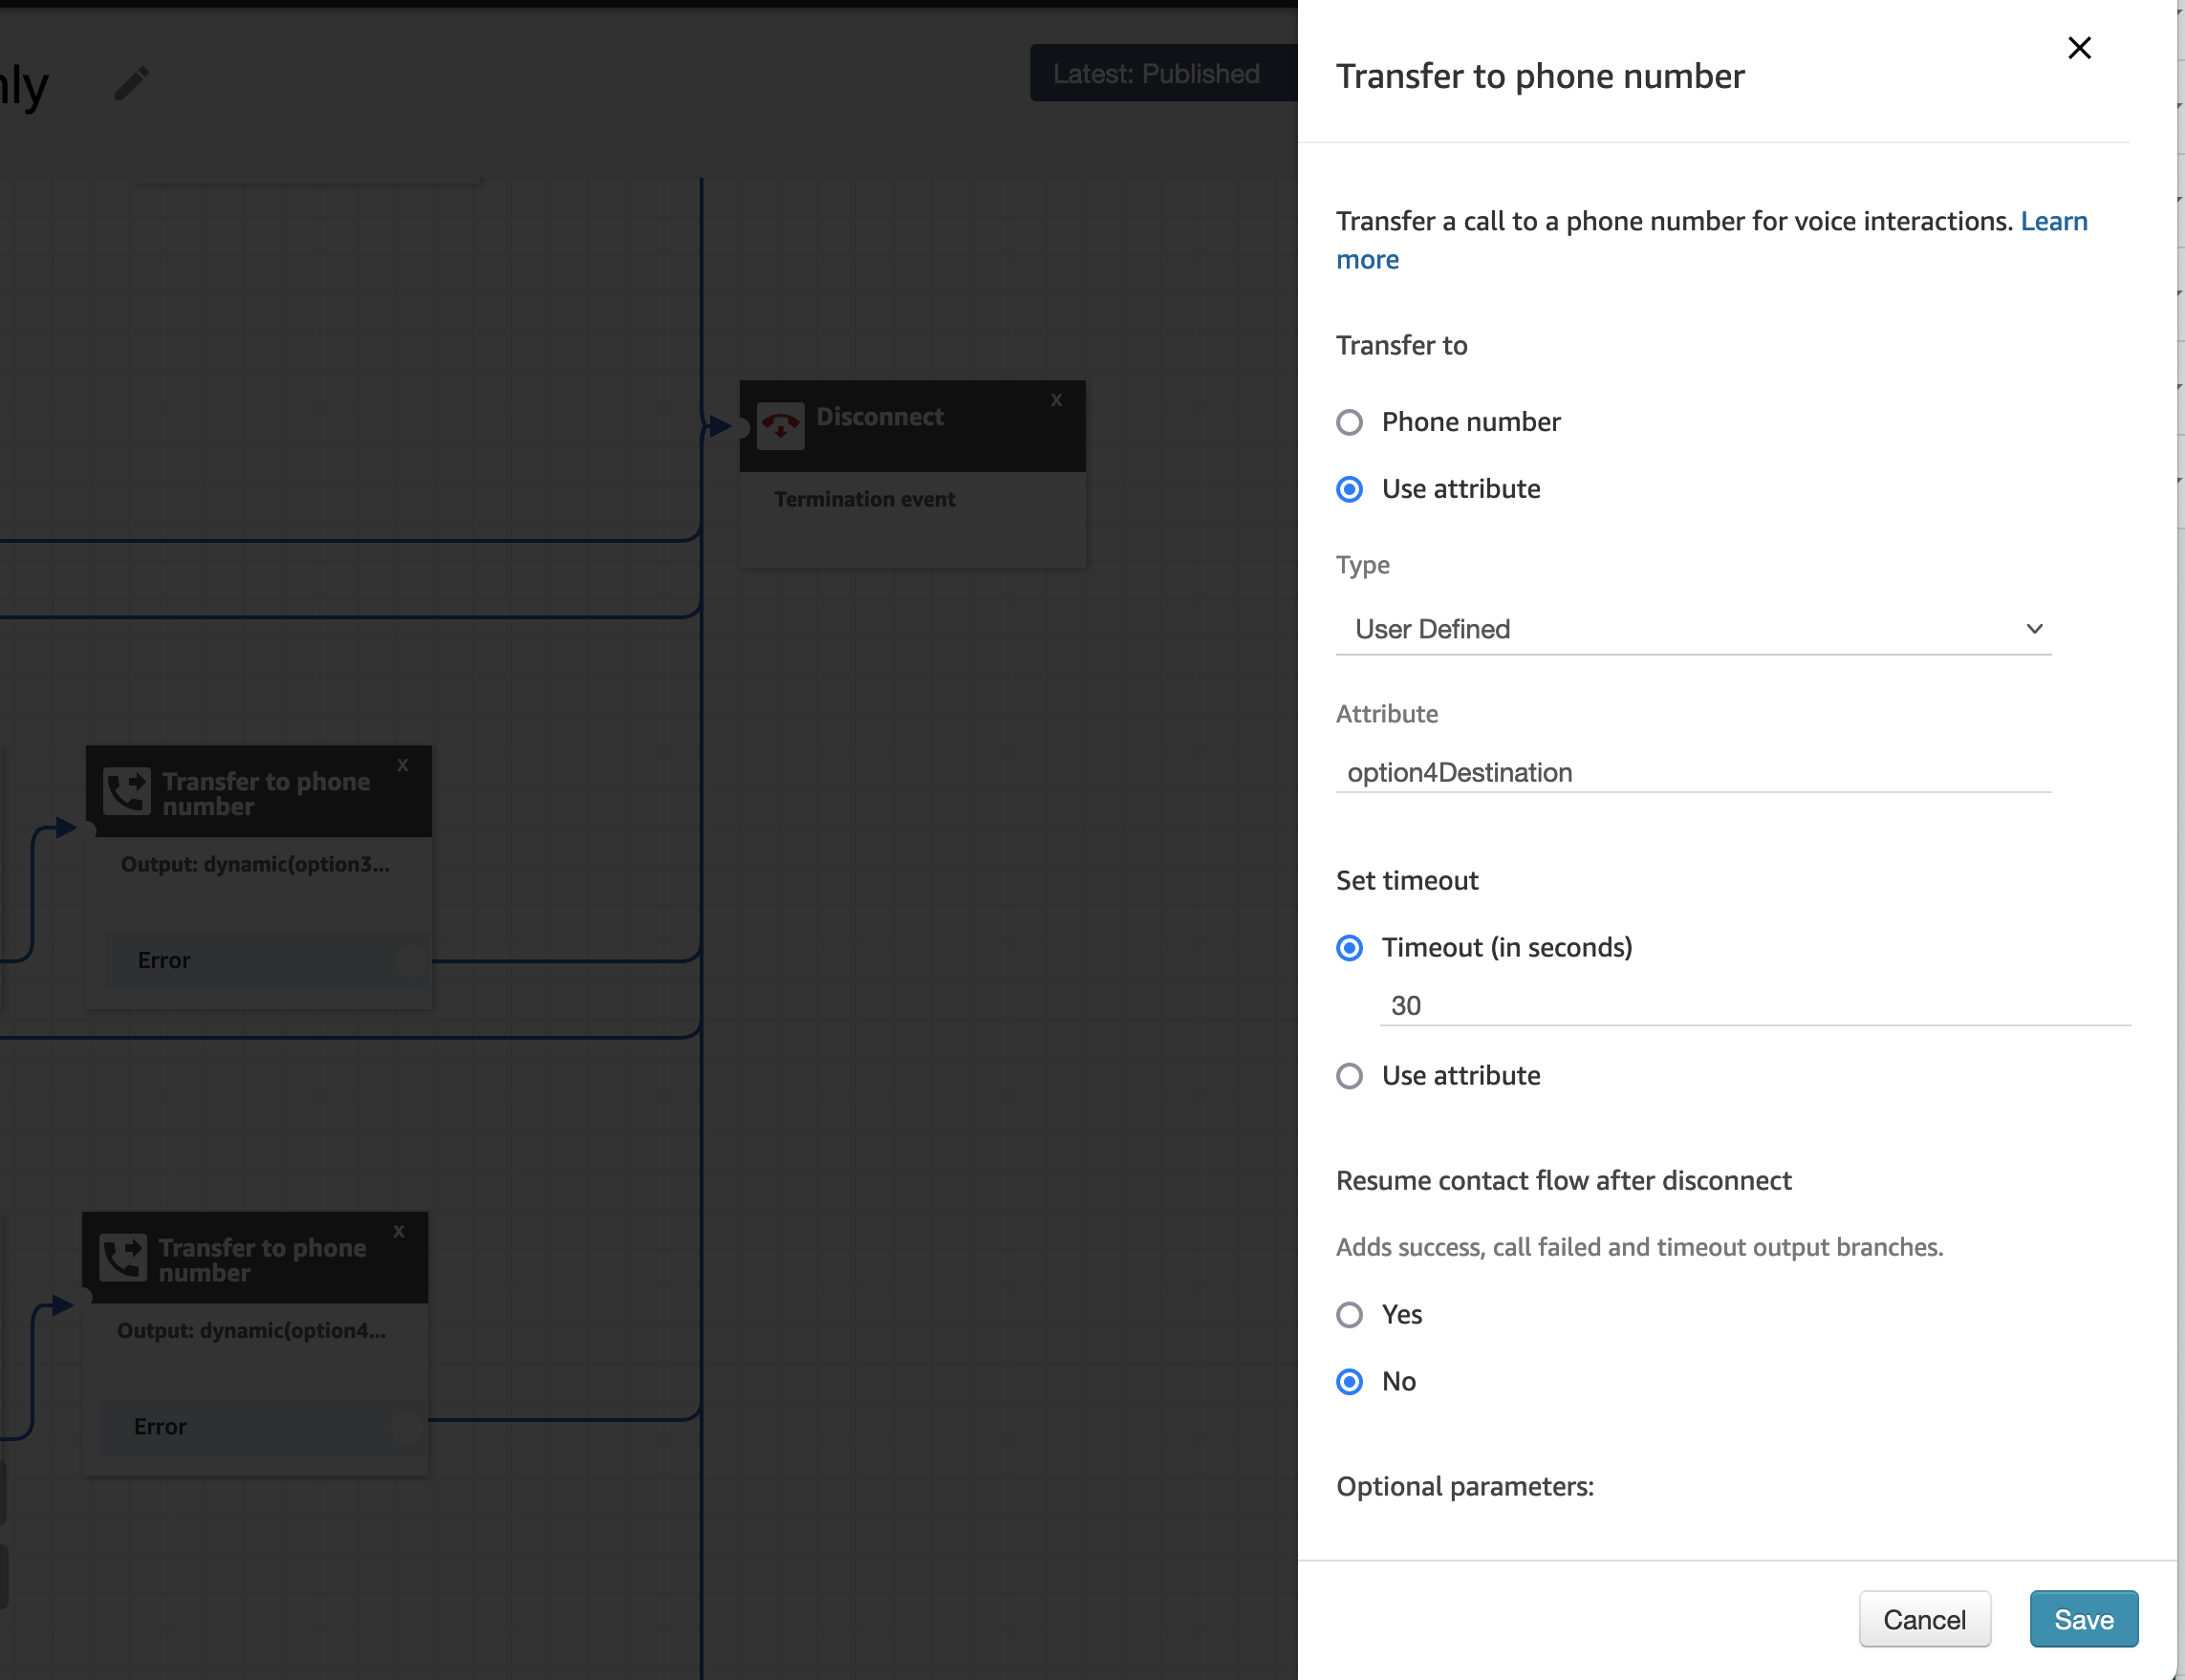
Contact Flow Configuration Details
And finally, do not show me the details of a block that has nothing for me to configure. If by mistake I clicked on the gray bar of a terminate block. There’s nothing of value that this screen adds. Others might find the link to the documentation helpful, but I don’t. This annoyance would be lessen if I could quickly escape from this screen, but since I’m being held captive by it and there’s no useful information displayed it just makes my blood boil.
Terminate Block Details
I hope this post is not taken as me saying that Amazon Connect is not a good solution, far from it. This post is out there in hopes that someone at AWS who has the power to make things better sees what I believe are common frustrations.
~david


You must be logged in to post a comment.