ASR TTS DNS error with Cisco CVP and VXML Gateway

I was struggling with setting up Nuance for one of my customers and while everything looked good on the Nuance side the connection between the gateway and Nuance failed right in the beginning. The very first thing is to setup some debugs on the gateway:

CCSIP SPI: SIP Call Message tracing is enabled (filter is OFF)
HTTP Client:
HTTP Client Main Process debugging is on
HTTP Client Sockets debugging is on
HTTP Client API Process debugging is on
HTTP Client Cache Module debugging is on
HTTP Client Messages debugging is on
HTTP Client Error debugging is on
HTTP Client Background Messages debugging is on
HTTP Client Cookie/Session debugging is on
MRCP:
MRCP client detail debugging is on

Next go follow the SIP trace and figure out where things start going wrong. We start with the initial invite for ASR.

3405261: Apr 14 23:51:30.451: //370879/B1BCCB67BB48/SIP/Msg/ccsipDisplayMsg:
Sent:
INVITE sip:asr@192.168.1.251:5060 SIP/2.0
Via: SIP/2.0/TCP 104.0.36.145:5060;branch=z9hG4bK8B21B80

From: <sip:+11235551234@us-east-va.sip.flowroute.com>;tag=47F96D40-1629
To: sip:asr@192.168.1.251

We get an OK, but notice the Contact address.

3405262: Apr 14 23:51:30.599: //370879/B1BCCB67BB48/SIP/Msg/ccsipDisplayMsg:
Received:
SIP/2.0 200 OK
Via: SIP/2.0/TCP 104.0.36.145:5060;branch=z9hG4bK8B21B80
Contact: <sip:mrcpserver@NUANCE10:5060;transport=TCP>
To: <sip:asr@192.168.1.251>;tag=75547221

From: <sip:+11235551234@us-east-va.sip.flowroute.com>;tag=47F96D40-1629

And then we get a failure.

3405264: Apr 14 23:51:30.639: %VOICE_IEC-3-GW: SIP: Internal Error (100, dns qry fail): IEC=1.1.128.7.51.0 on callID 370879 GUID=B1BCCB677DE111EABB48AD04394A93D1

Now after a bit of googling and reading Avaya documentation. The issue is that the Nuance Speech Server by default will use the hostname in its SIP header information and because DNS wasn’t working correctly the address mrcpserver@NUANCE10 doesn’t resolve. To fix fix DNS or open up your NSSserver.cfg and set the following:

server.mrcp2.sip.contact.useHostIPAddress VXIInteger 1

From this point forward Nuance will use the IP address for all SIP headers and you avoid DNS all together.

Remember, it’s always DNS. :)

~david

Individual Component Installation of Nuance on Windows 2012 R2

I have done more Nuance installs in the last few weeks than I’ve done in my whole life. Recently I had to revisit installing Nuance without using the Nuance Portal and since it had been a few years since I had gotten around to it I figured I would document the process as a few things were murky in my mind. We’re going to be installing:

License Manger 11.7
Nuance Recognizer 10.2.8
Nuance Vocalizer (Enterprise) 6.0.7
Nuance Speech Server 6.2.9

This installation will work with UCCE/CVP 11.6 using VVB which means mrcp2 and the configuration is specific to mrcp2.

License Manager

First start with the License Manager as this components allows everything else to operate. The installation is pretty much a next, next, finish process. You will be asked to do a restart of the server.

The validation process is pretty straight forward. First, ensure that the Windows service was installed. It should not be running, but it should be set as automatic. Next open up the Licensing Tools program you just installed go to Start/Stop/Reread and hit Start Server. This will use a temp license to start up. The temp license is stored in C:\Program Files\Nuance\license_manager\license. Once you start the service confirm you see the Windows service as running. And that the output of Server Status is this:

——–
Status
——–
Flexible License Manager status on Tue 4/7/2020 13:17

[Detecting lmgrd processes…]
License server status: 27000@NUANCEHOST
License file(s) on NUANCEHOST: C:\Program Files\Nuance\license_manager\license\temp.lic:

NUANCEHOST: license server UP (MASTER) v11.7

Vendor daemon status (on NUANCEHOST):

swilmgrd: UP v11.7
Feature usage info:

Users of dummy: (Total of 1 license issued; Total of 0 licenses in use)

Go to Config Services tab to point to your license file. As a matter of practice I keep all licenses files in the same location to make it easy. Either restart the service or re-read the license file to ensure it reflects your entitlement correctly. From this point forward you need to make sure to have a proper license for each component otherwise the validation steps will fail.

Nuance Recognizer

This installer is very much like the licensing tool, which means it’s a next, next, finished process. You will have to perform a restart of the server once it’s done. Additionally, you will need to install the languages you want your recognizer to support. As an example, for en-us, there are two files you will need to install: NRec-en-US-10.0.2-10.2.0.x86_64-windows.zip and NRec-en-US-10.0.2-10.2.0-CumulativePatch-2_windows.zip.

The base installation of en-us is straight forward, but the patch is a bit more involved. First, unzip the patch to a temporary location make sure this temp location doesn’t have any spaces in the name otherwise the installer will fail. Second, open a command prompt as an administrator and cd to the temporary location of the patch. Ensure that “echo %SWISRSDK%” returns where the recognizer is installed for example C:\Program Files\Nuance\Recognizer. Also validate what version of nuance you’re running by running “nuance-version -p”. What you want to pay attention is the following:

Name: Nuance Recognizer
Location: C:\Program Files\Nuance\Recognizer\
Version:
Nuance Recognizer 10.2.8.2017022711 x86_64 – Package revision 17058

Name: Nuance Recognizer English en-US Language Pack
Location: C:\Program Files\Nuance\Recognizer\config\en.us\10.0.2
Version:
Nuance Recognizer en-US Language Pack – Rev. 10.0.2-10.2.0-15335

This tells us we have our base install and the language. Now run the install_cumulative_patch.bat and then validate it installed correctly by checking the Nuance version again. You should see this:

Name: Nuance Recognizer
Location: C:\Program Files\Nuance\Recognizer\
Version:
Nuance Recognizer 10.2.8.2017022711 x86_64 – Package revision 17058

Name: Nuance Recognizer English en-US Language Pack
Location: C:\Program Files\Nuance\Recognizer\config\en.us\10.0.2
Version:
Base: Nuance Recognizer en-US Language Pack – Rev. 10.0.2-10.2.0-15335
Cumulative Patch 2:
ELANGPACKS-36 Creditcard expiry date grammar – Extend default expiry year to be 25 years from now (parameter maxallowed changed to 300 months)
ELANGPACKS-39 Fixed @reject@, added @exh@ and removed #sil# from @noise
@ entries in system dictionary – all grammars recompiled with updated system dictionary
ENR-124 Added missing transcription ‘zed’ for letter z to system
dictionary

There are two ways to configure the recognizer service. The first is by editing Baseline.xml and the second it to use a user config which overwrites Baseline.xml. My preferred method is to use a user config file as it’s much easier to manage and it removes the monstrosity that is the Baseline files, but because that’s a whole other ball of wax we’re going to just do the direct edit to Baseline.xml. You must enter the licenses you have available in the value tags below in the following two lines:

<param name=”swirec_license_ports”>
<declaration group=”license” type=”int”
set_by=”default”>
<min_value>0</min_value>
</declaration>
<value>4</value>
</param>

<!– How many osr_swiep licenses will be checked out during SWIepInit() –>
<param name=”swiep_license_ports”>
<declaration group=”license” type=”int”
set_by=”default”>
<min_value>0</min_value>
</declaration>
<value>4</value>
</param>

The final step is ensuring you set the Recognizer to start as a service. Open up a command prompt again and cd to C:\Program Files\Nuance\Recognizer\Recognizer Service\amd64\bin. From there you need to decide what parameters you’ll set for the service. The below parameters are the default and should be used unless you know exactly what you’re doing.

C:\Program Files\Nuance\Recognizer\Recognizer Service\amd64\bin>nrs-win-service-
init.exe -i nrs-win-service.exe -servlet nrs -port 8200

From there start your service and then it’s time to validate everything worked as expected.

To validate that your recognizer is working as expected Nuance provides a small exe which allows you to test your config. You can find the utility at C:\Program Files\Nuance\Recognizer\samples\swirec_sample\SWIrecSample.exe. Using the command prompt run the utility piping the output to a log file:

SWIrecSample.exe > log.txt

You should see a lot of successful lines in the log file, here’s a small sample:

Function SWIrecInit returned SUCCESS.

Calling SWIepInit.

Calling SWIrecRecognizerCreate.

Function SWIrecRecognizerCreate returned SUCCESS.

Calling SWIrecSessionStart.

Nuance Vocalizer and Languages

Same thing as all the other installers, these are just a next, next, finished. Ensure you install the vocalizer first, restart, then languages and restart. The configuration is pretty straight forward too. As before having a user config is my preferred method however we’re going to stick with the basics and just update baseline.xml. Please note that this baseline.xml is different than the Recognizer Baseline.xml. Here are the two parameters you have to update based on your license entitlement:

<tts_license_ports>4</tts_license_ports>
<cpr_license_ports>4</cpr_license_ports>
<ssml_validation>warn</ssml_validation>

One thing to note is that the Vocalizer doesn’t need a Windows service to run, so don’t think you’ve done something wrong if you can’t see it in the services window. The validation process is two parts too. First run the nuance-version -p command and validate your voices are installed and recognized:

Name: Vocalizer for Enterprise en-US Zoe bet4 f8
Location: C:\Program Files (x86)\Nuance\Vocalizer for Enterprise\
Version:
Vocalizer for Enterprise 6.1.1.2013100217
Vocalizer for Enterprise Build ID 6.1.1.13275
Language: en-US
Voice: Zoe
Voice model: bet4
Coder: encrypt
Language version: 5.2.3.0000
Voice version: 5.2.3.13269

Name: Vocalizer for Enterprise
Location: C:\Program Files (x86)\Nuance\Vocalizer for Enterprise\
Version:
Vocalizer for Enterprise 6.0.7.2018052303
Vocalizer for Enterprise Build ID 6.0.7.18143

Next using the command line cd to C:\Program Files (x86)\Nuance\Vocalizer for Enterprise\common\speech\components and run the following command:

nvncmdline.exe -l en-us -n Zoe -s “Hello this is Zoe using text to speech.” -w –
o test.wav

Please note that you have to match the language and voice you have installed in the system. The good thing is that this command’s error outputs will tell you if there’s an issue with either the voice or the language not being detected. If the command runs successfully listen to test.wav to ensure it sounds like you expect it to.

Nuance Speech Server

The most important piece of this is that you install this component last as the installer detects the Recognizer and Vocalizer upon running. If you don’t install it last, then you will have to make some changes to your config to allow the Speech Server to know where to find the other components. The installer just like the others is just a next, next, finish installation. You will have to restart the server upon completion. Additionally, you should install the Nuance Speech Server Client matching your Speech Server which will allow you validate your configuration. Once everything is installed ensure the service is started and set it to an automatic startup type.

Validation is similar to the Vocalizer. Nuance provides a client which is able to test the Speech Server. From the command prompt go to C:\Program Files (x86)\Nuance\Speech Server\Client\script. From there run the following command:

..\bin\client.exe -s localhost -p 5060 demoprompt.mrcp

The output will be in demoPrompt.log and should be a good bit of SIP messaging and SSML. The most likely error you will see is that your service is not started or that you don’t have a valid license. Here’s a sample of the output:


INVITE sip:mresources@localhost:5060 SIP/2.0
Via: SIP/2.0/TCP NUANCEHOST:49474;branch=z9hG4bKf529526265c4fb15
Max-Forwards: 6
To: MediaServer <sip:mresources@localhost:5060>
From: clien_user <sip:clien_user@NUANCEHOST:49474>;tag=b5d67ee5
Contact: <sip:clien_user@NUANCEHOST;transport=TCP>
Call-ID: a385e9e251def062
CSeq: 1467710150 INVITE
Content-Type: application/sdp
Content-Length: 322

<?xml version=”1.0″?>
<speak version=”1.0″ xml:lang=”en-US” xmlns=”http://www.w3.org/2001/10/synthesis”>
<p>
<s>You have 4 new messages.</s>
<s>The first is from <say-as
interpret-as=”name”>Stephanie Williams</say-as>
and arrived at
<say-as interpret-as=”time”>3:45pm</say-as>.</s>

<s>The subject is <prosody
rate=”fast”>ski trip</prosody></s>
</p>
</speak>

Add your new ASR and TTS server to VVB and you should be good to go.

~david
Nuance Speech Suite Login Screen

Installing Nuance Speech Suite 10.5

The Nuance Speech Suite has been around for a couple of years, but it’s not until recently that I’ve started to really use it. Before I had always installed the individual components independently because that’s how I’ve always done it. However, I decided to finally buckle down and get the installation process for this down and wanted to create a tutorial post for it. Please note that while you can install the Extended version which includes MySQL as part of the installer. I wanted to install the Standard version which forces you to install the database individually. Additionally, this is strictly a lab install. For production and specially for a hosted environments there’s a lot more “engineering” that has to happen to get this right and to avoid killing your server.

What you’ll need:

  • Windows 2012 R2 x64
  • The latest version of JDK 1.8 (as of this post jdk-8u241-windows-i586.exe)
  • The latest Apache Tomcat package (as of this post apache-tomcat-8.5.51-windows-x86.zip)
  • The latest version of MySQL 5.7 Community or Enterprise (as of this post mysql-installer-community-5.7.29.0.msi)

Validate that 8.3 File naming is enabled:

  1. Open command prompt
  2. Type: cd c:\ <enter>
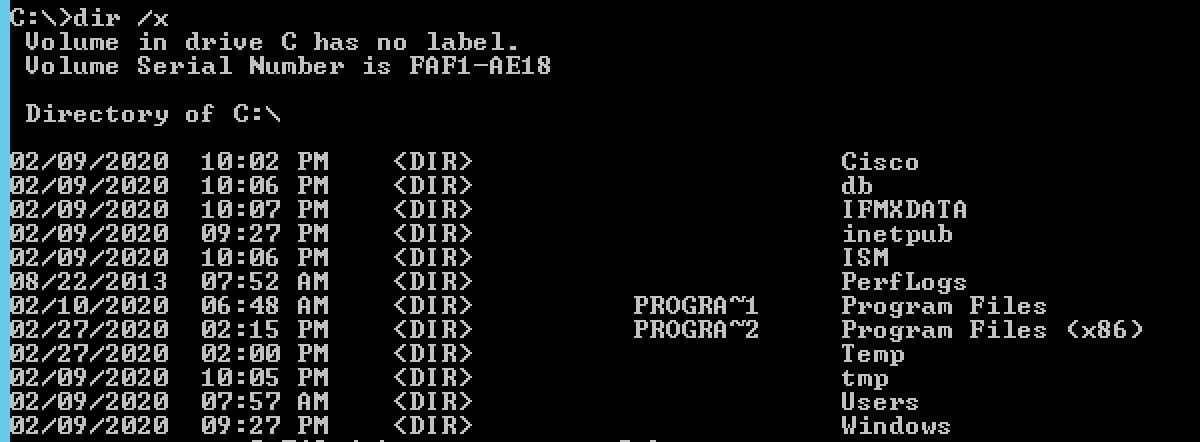
  3. Type: dir /x (/x will display the long and the 8.3 name)
  4. The important part is that you see something like “Progra~1″:
Command Prompt 8.3 File Naming Validation

Command prompt 8.3 file naming validation

5. If you don’t see the above Google how to enable 8.3 file naming in Windows.

Install the JDK:

  1. I choose all the installer defaults.
  2. Validate the installation by doing java -version from the command prompt.
Windows command prompt to validate JDK installation version

Windows command prompt to validate JDK installation version

Install Tomcat and validate it:

  1. Remember to not use the Tomcat installer, but the package which comes in a zip file. Extract this to your machine. I placed mine in C:\apache-tomcat-8.5.51
  2. Run C:\apache-tomcat-8.5.51\bin\startup.bat and ensure you can get to http://localhost:8080

Install MySQL:

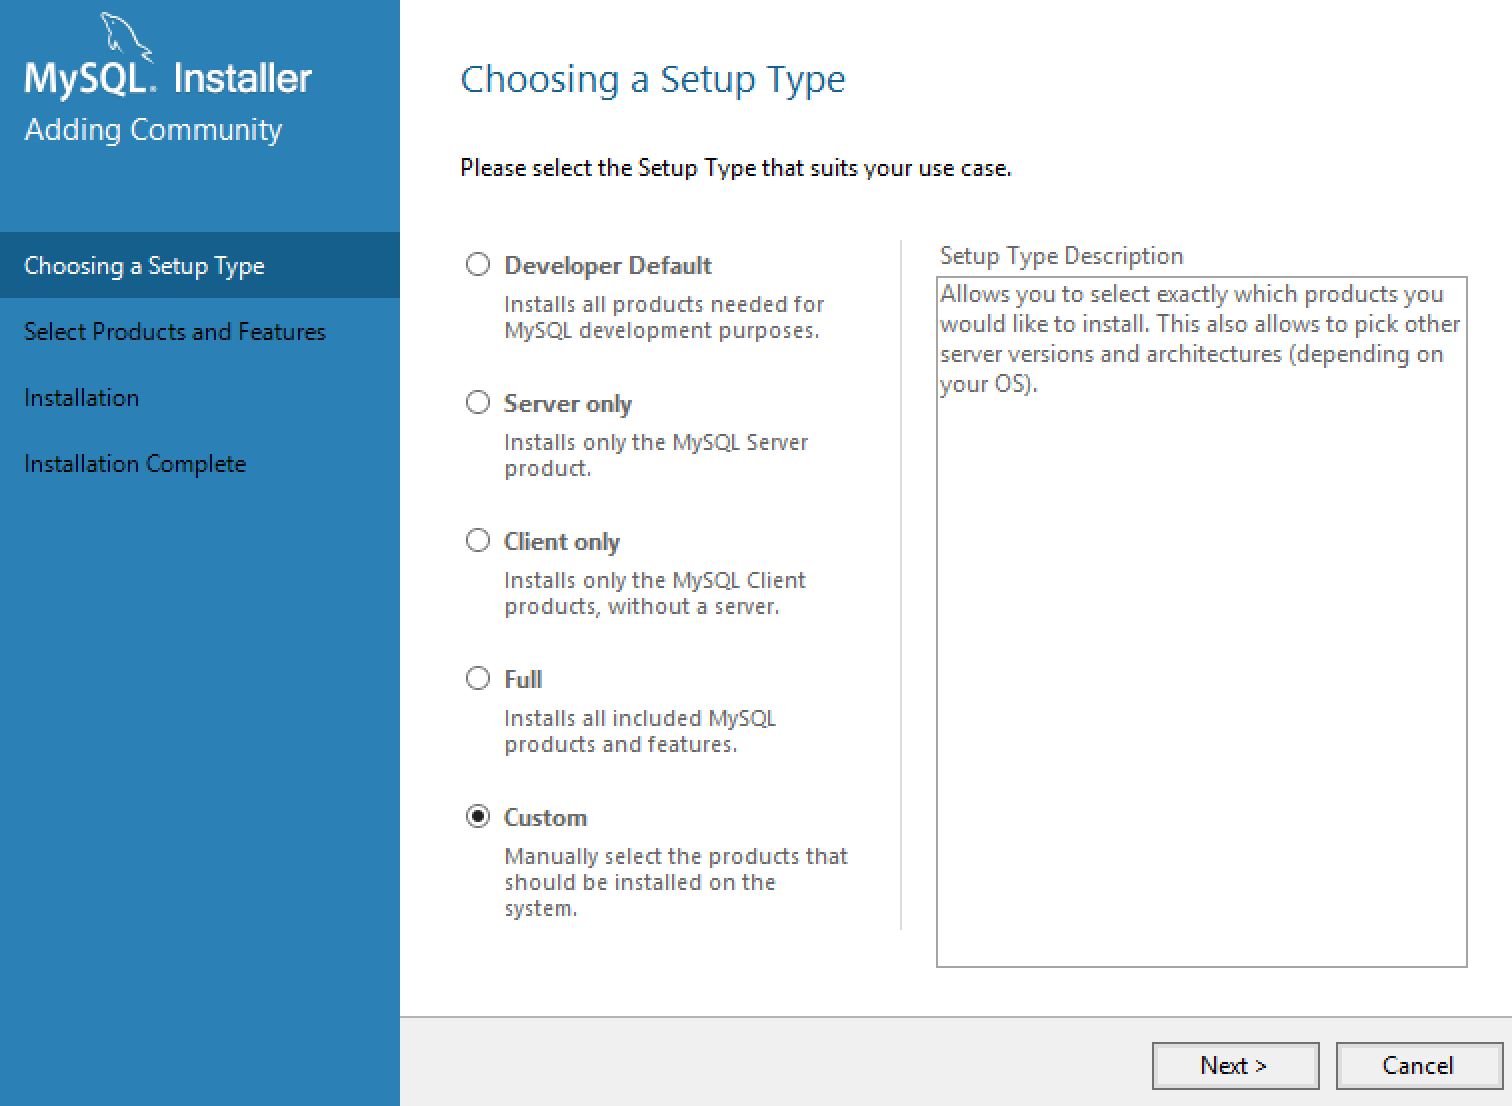
  1. Choose custom installation.
MySQL Installer

MySQL Installer

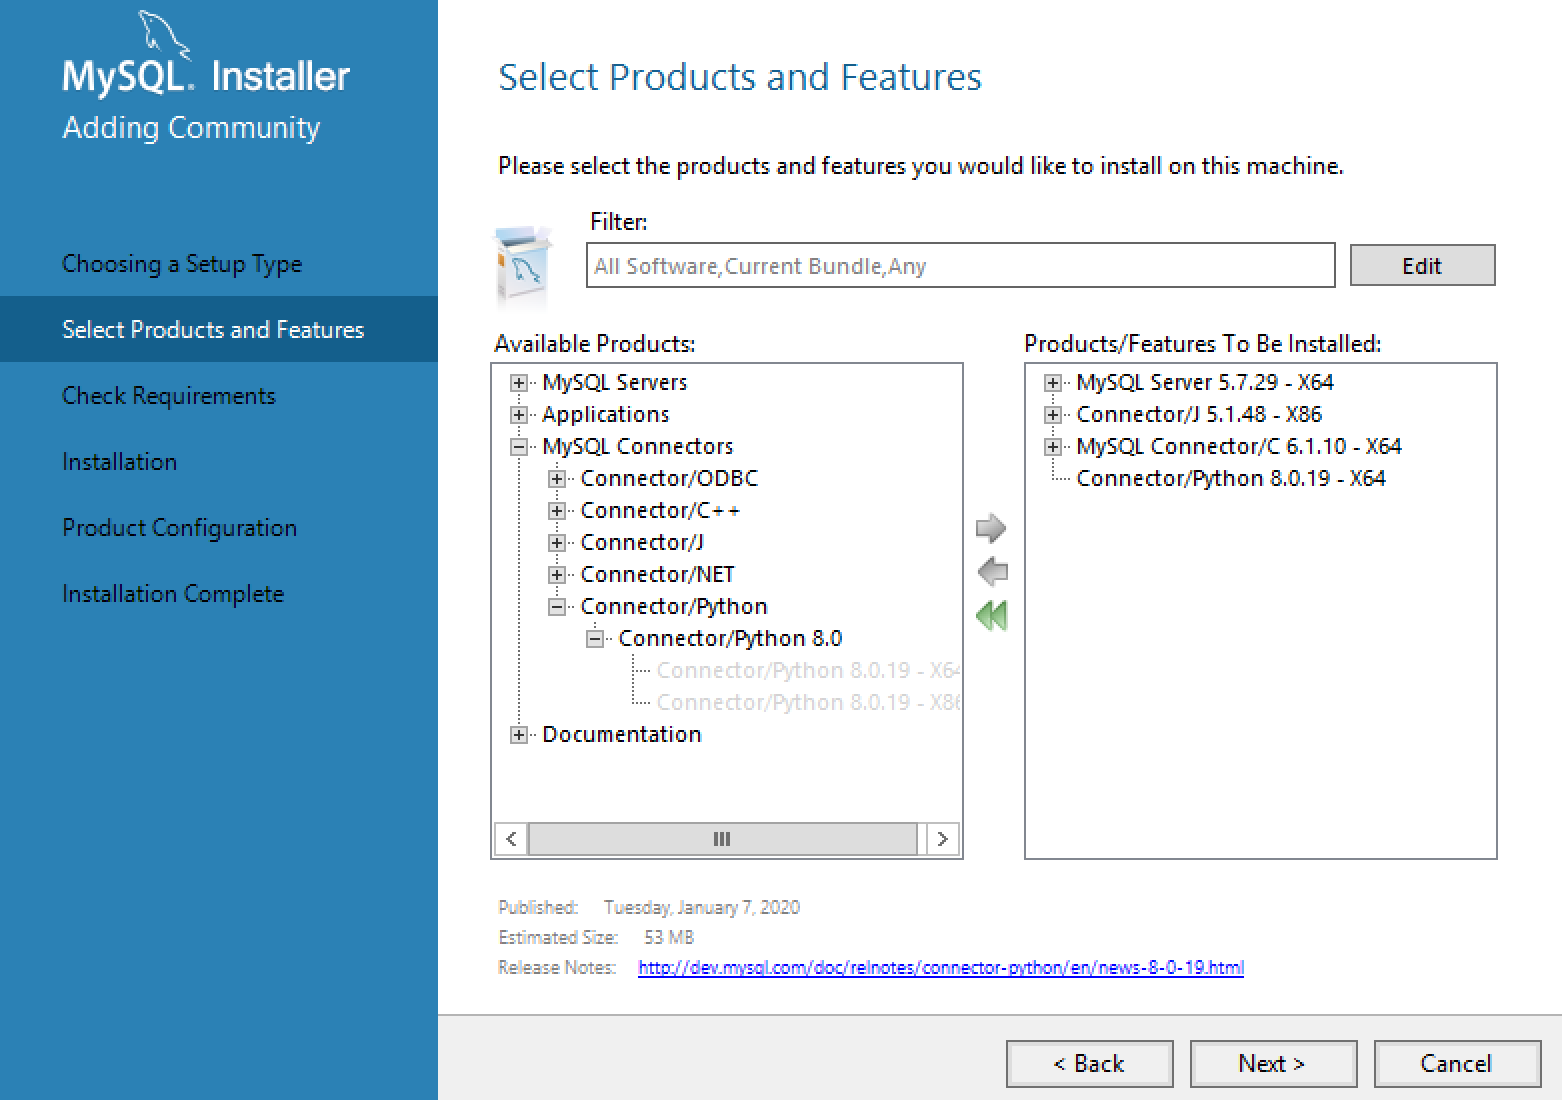
2. Choose the following features. There is an issue in the below screen shot. Additionally, Python is not required, that’s just because I use Python to parse Nuance logs. Maybe a blog post to come on this. You will have to use the Filter in the installer to find some of the specific versions you need.

MySQL Installer Features

MySQL Installer Features

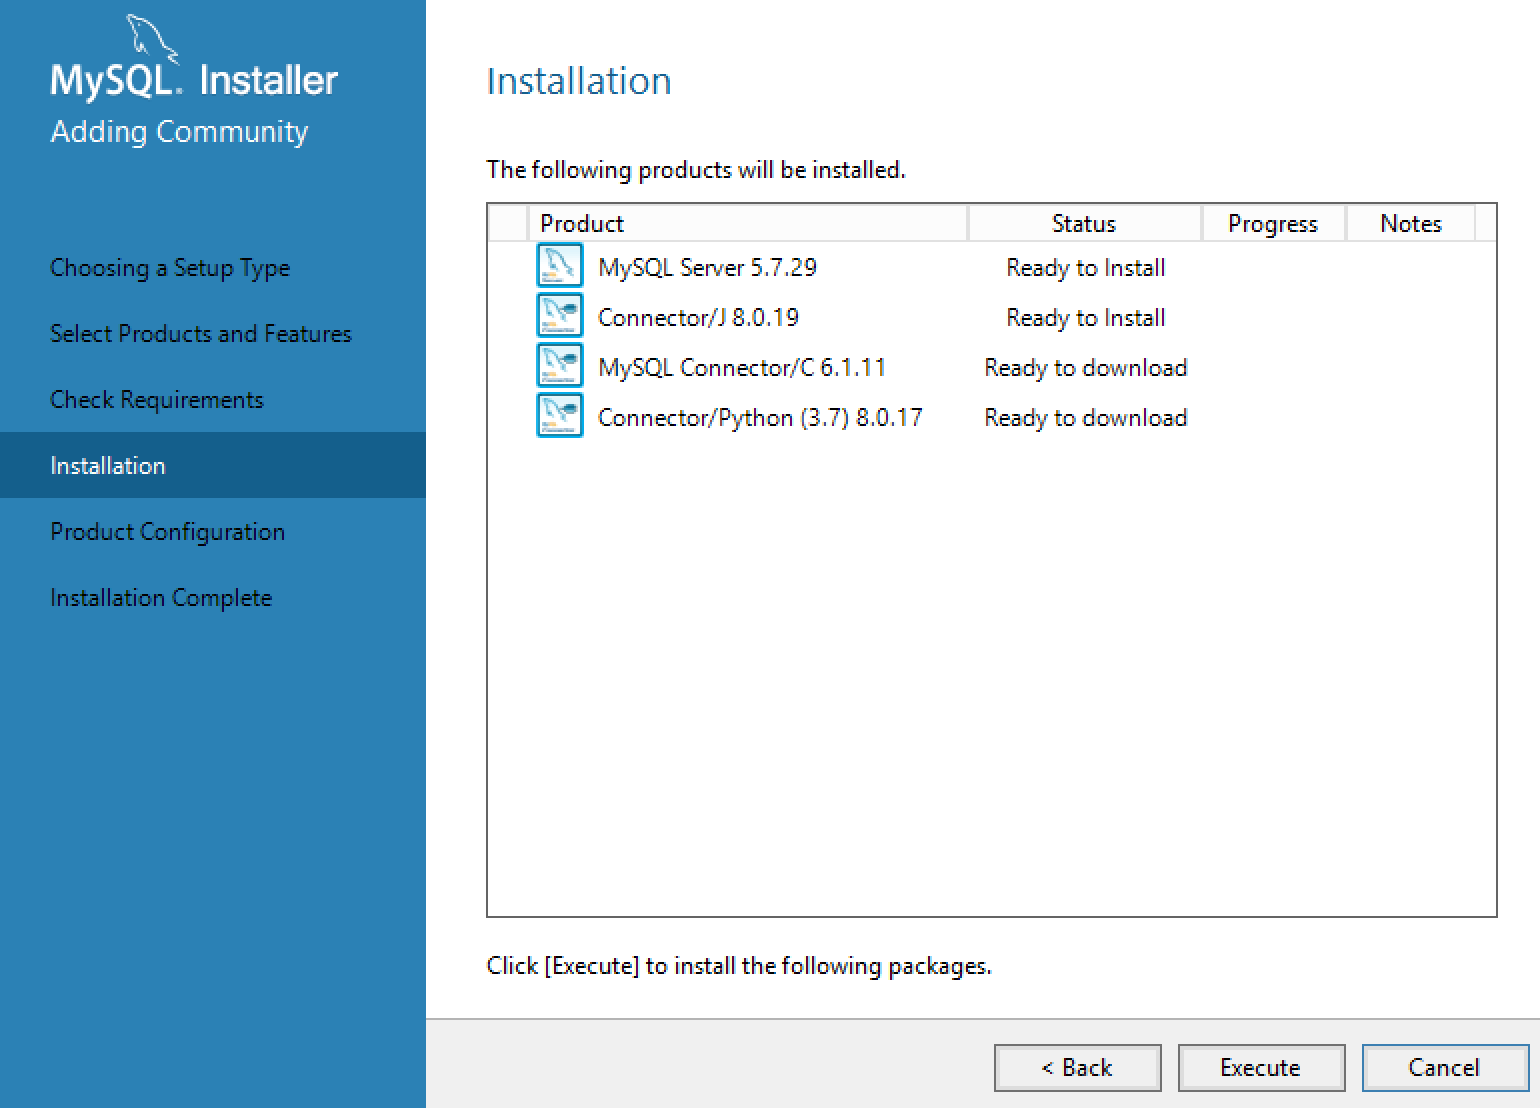
3. The installer might complain about some missing dependencies, but it should automatically resolve them. If that fails, you’ll have to resolve them manually. When everything looks good you should see this.


Screen Shot 2020-02-27 at 8.38.40 PM

MySQL Installer Ready

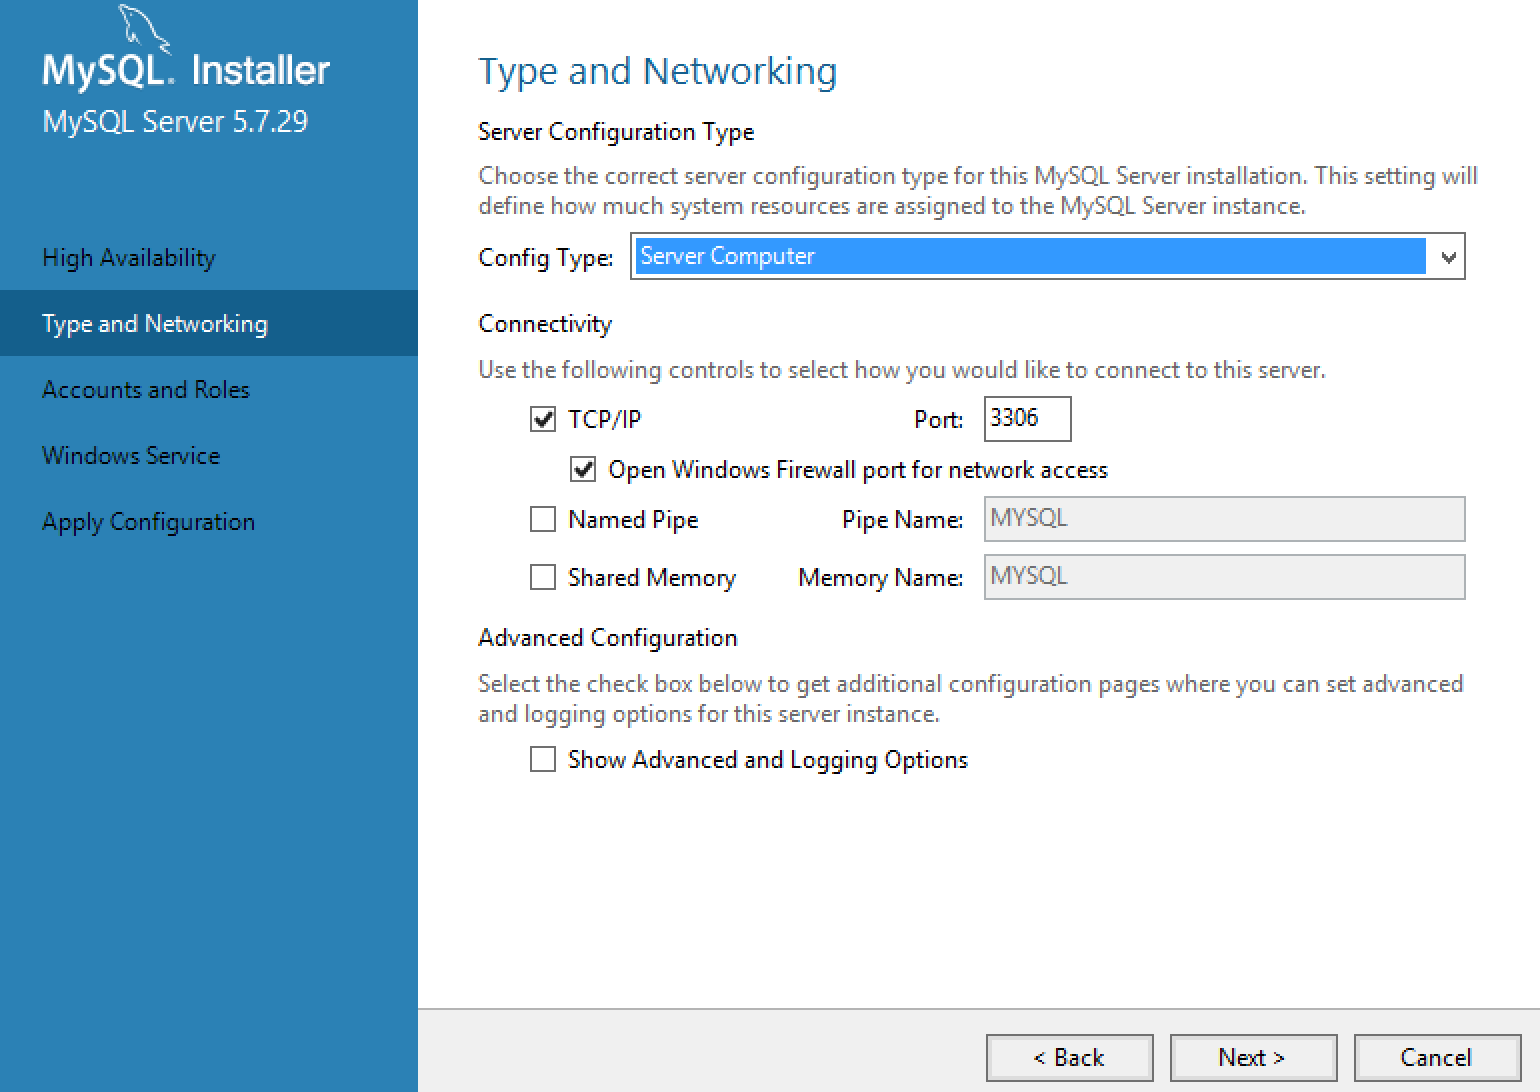
MySQL Installer Configuration

MySQL Installer Configuration

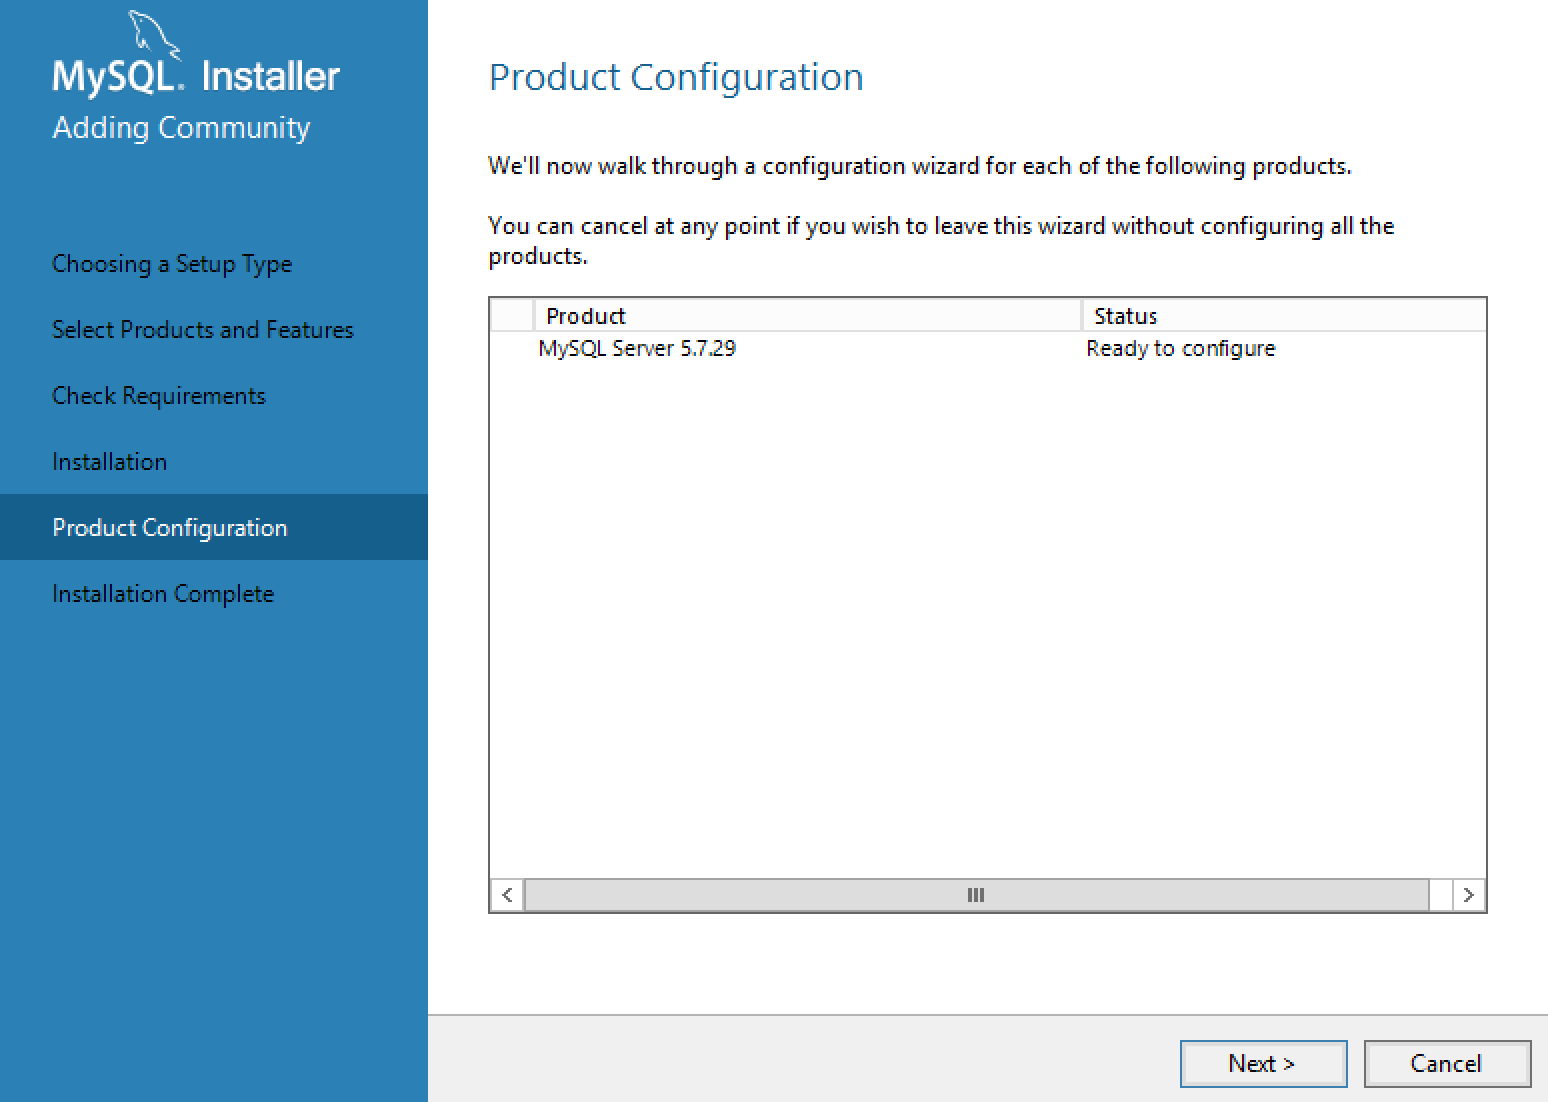
4. Along with installed MySQL in the default location I also install the connectors in the default location (e.g. C:\Program Files (x86)\MySQL\Connector J 8.0\) make note of this path as you’ll need it later.

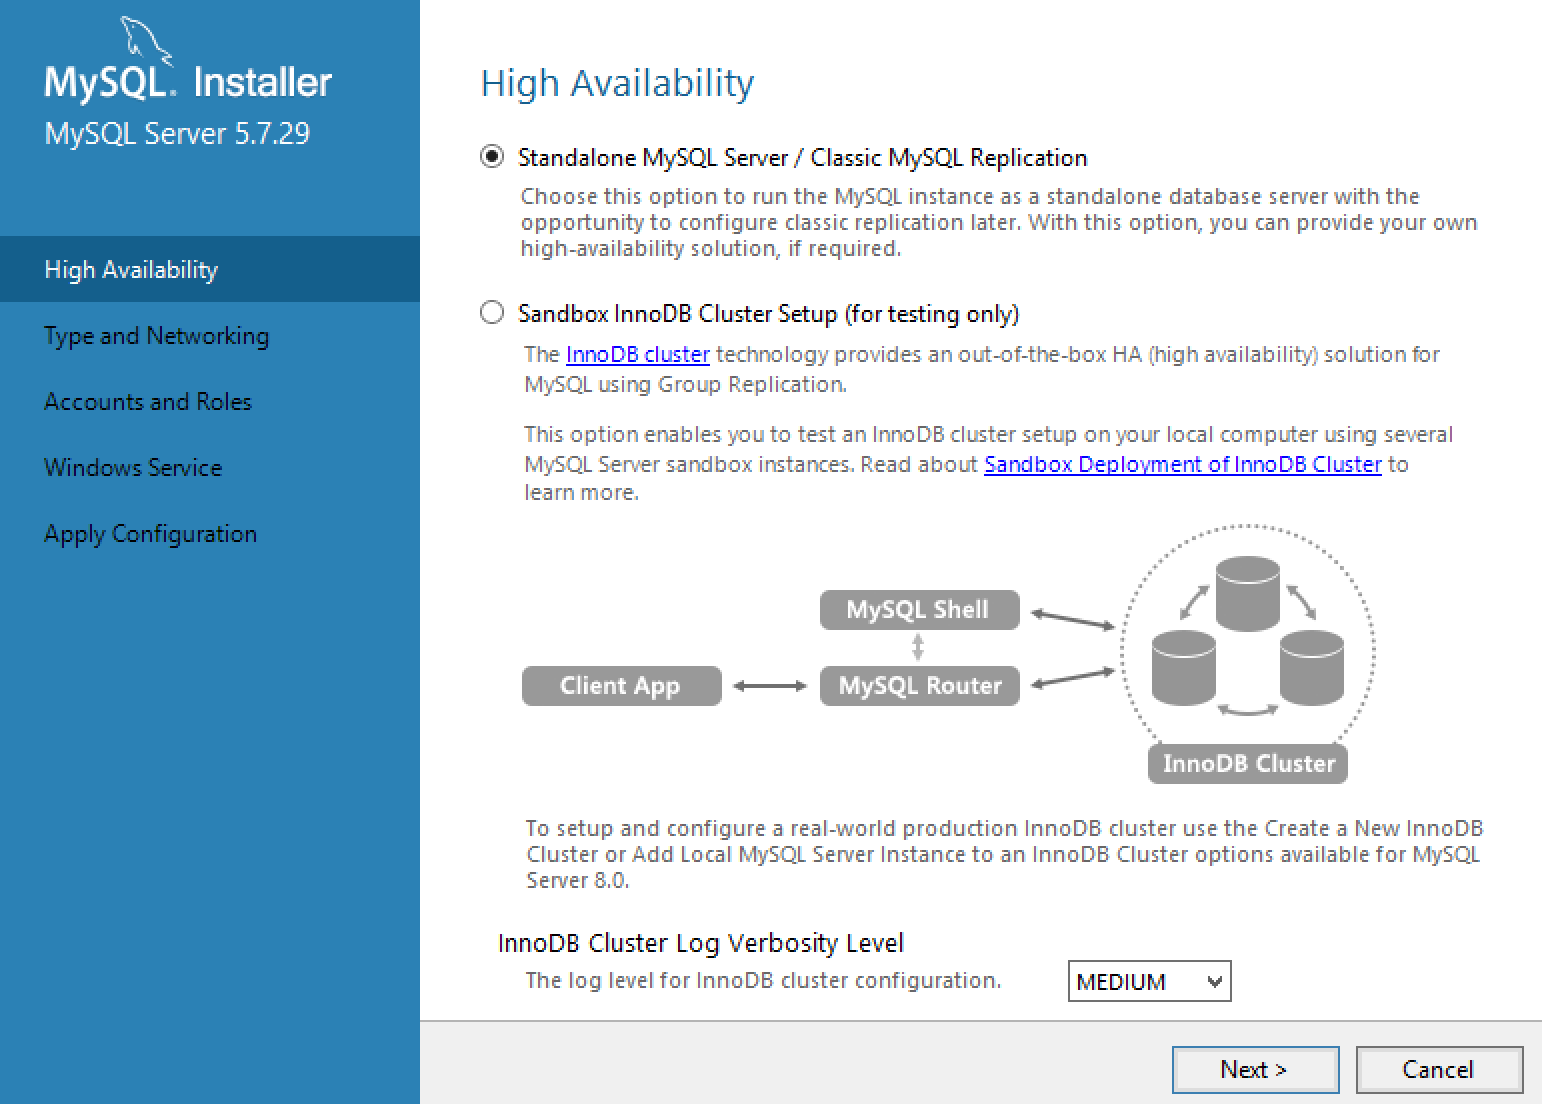
MySQL Installer Cluster Configuration

MySQL Installer Cluster Configuration

MySQL Installer Cluster Configuration

MySQL Installer Cluster Configuration

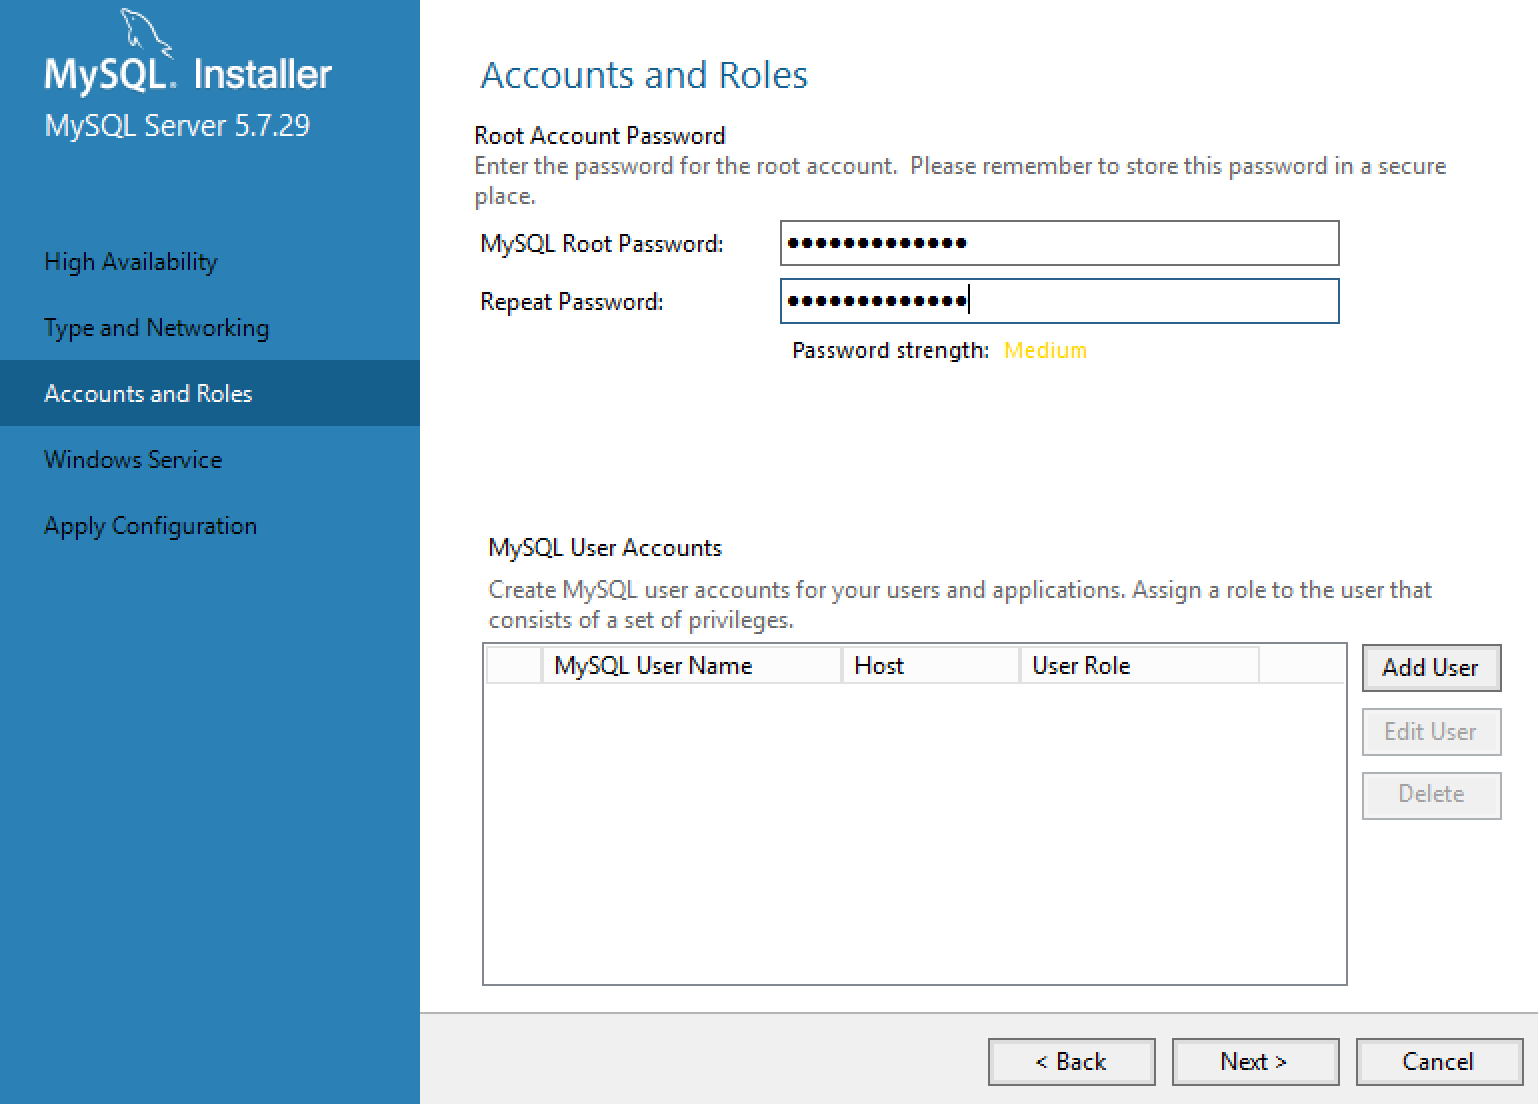
MySQL Installer User Configuration

MySQL Installer User Configuration

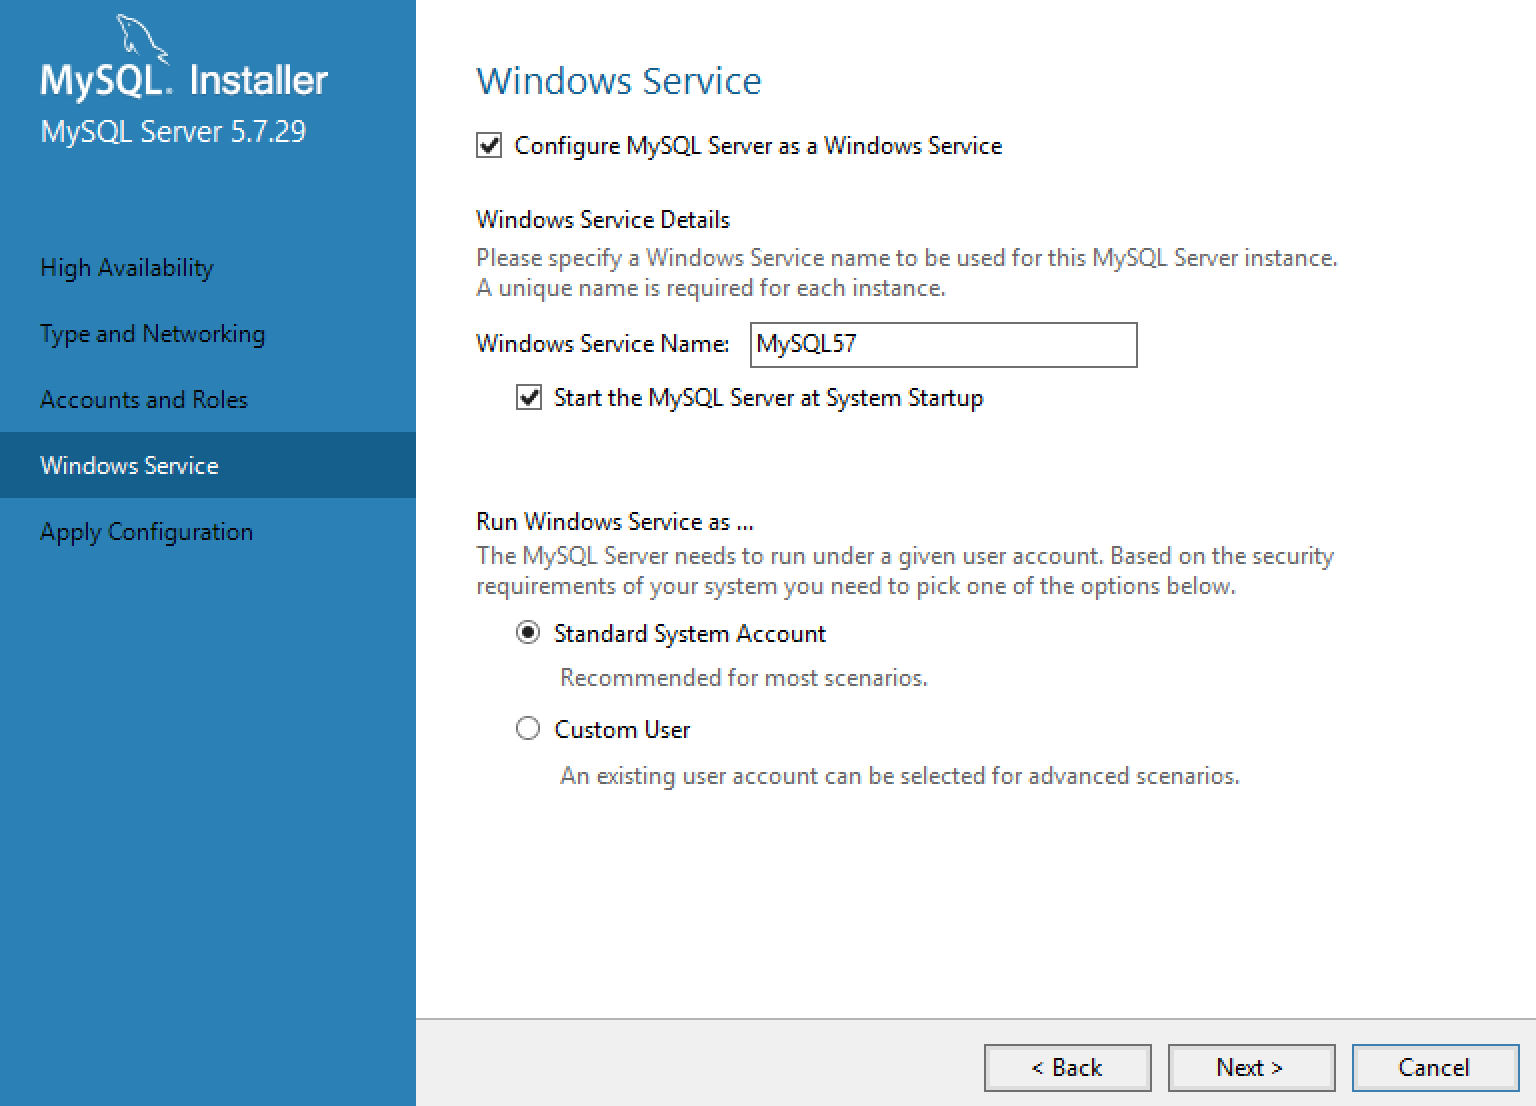
MySQL Installer Service Configuration

MySQL Installer Service Configuration

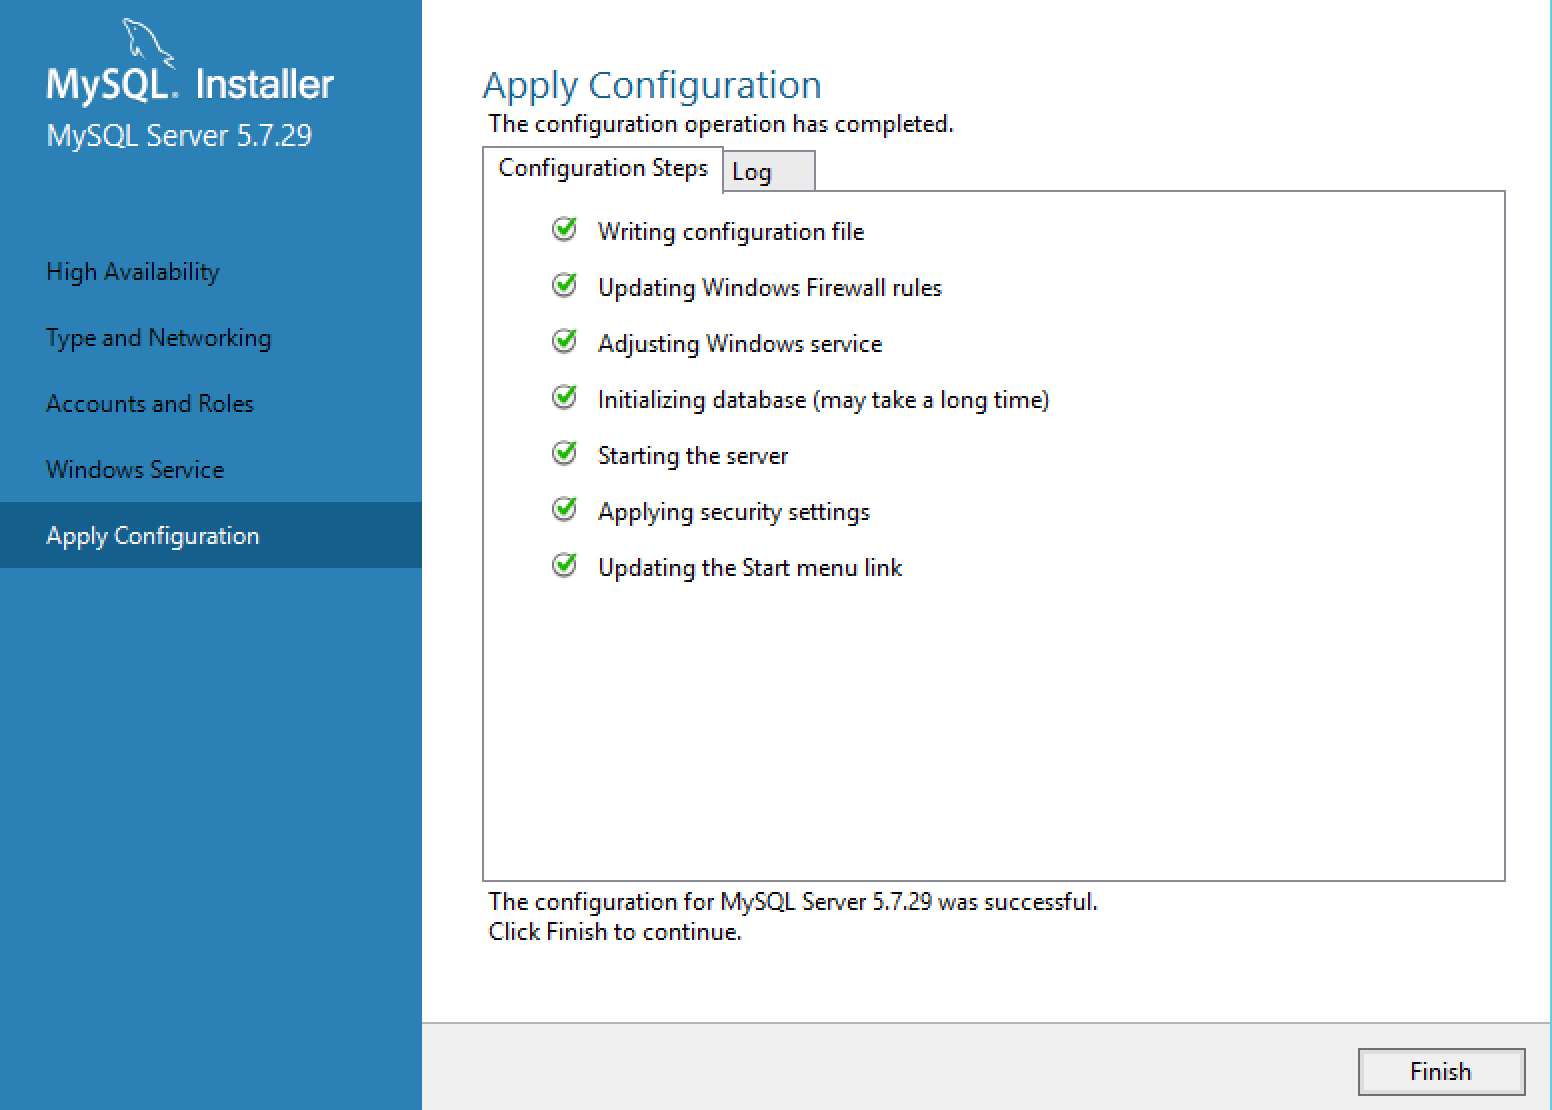
MySQL Installer Confirmation

MySQL Installer Confirmation

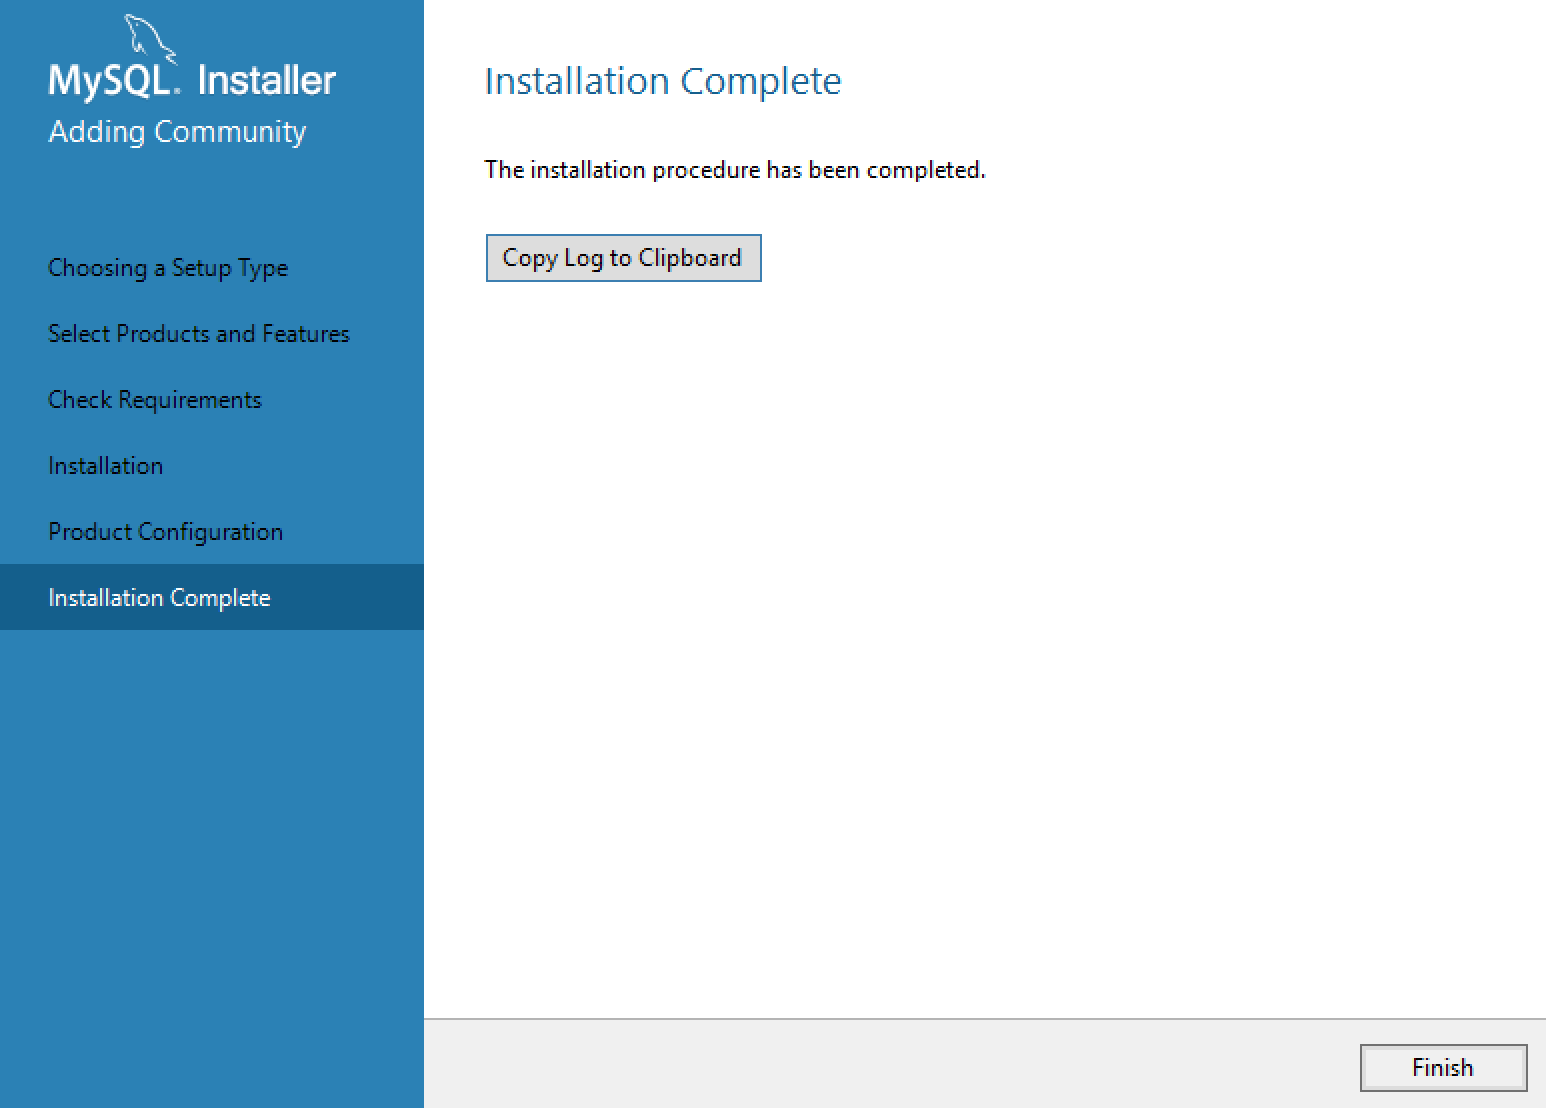
MySQL Installer Finished

MySQL Installer Finished

Verify MySQL installation:

  1. Service is running and set to automatic.
Confirm MySQL Windows Service

Confirm MySQL Windows Service

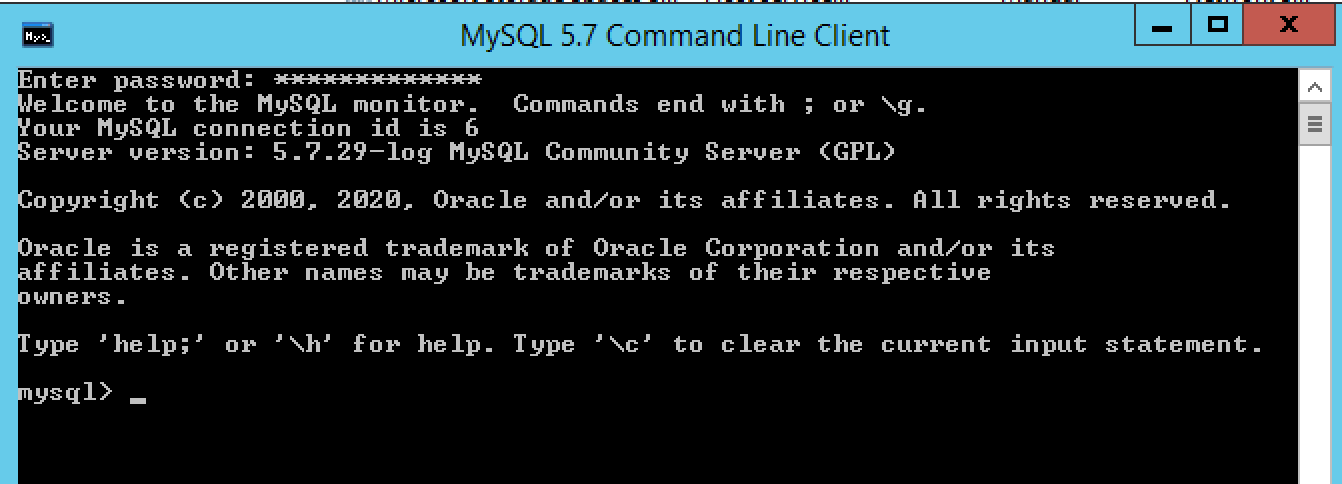
2. Start > Command Line, enter the root password.

MySQL Client

MySQL Client

Installing Nuance Speech Suite:

  1. Make sure you’re not installing the extended version. Once you do that run the installer.
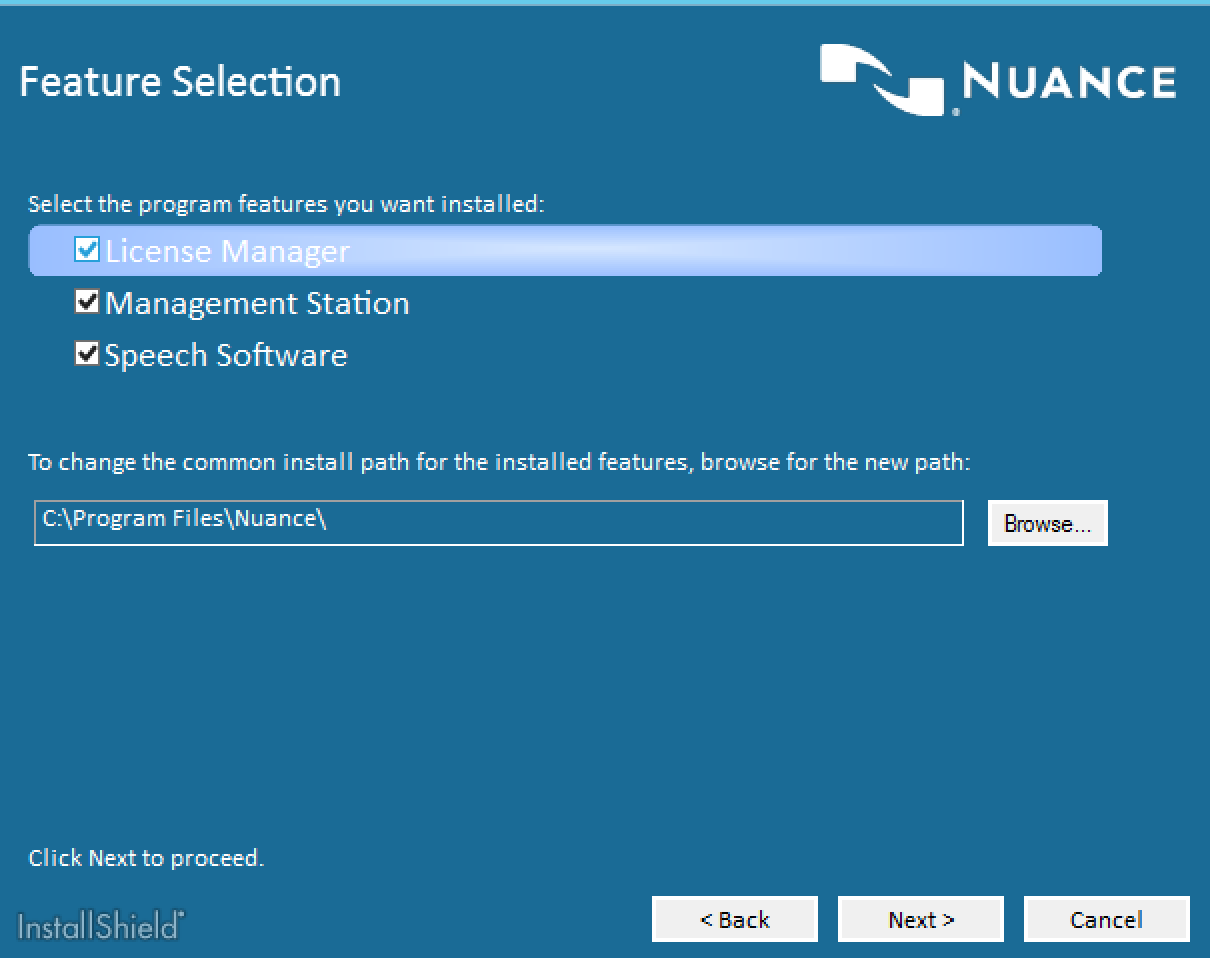
  2. Select all components as this is a one box solution.
Nuance Speech Suite Features

Nuance Speech Suite Features

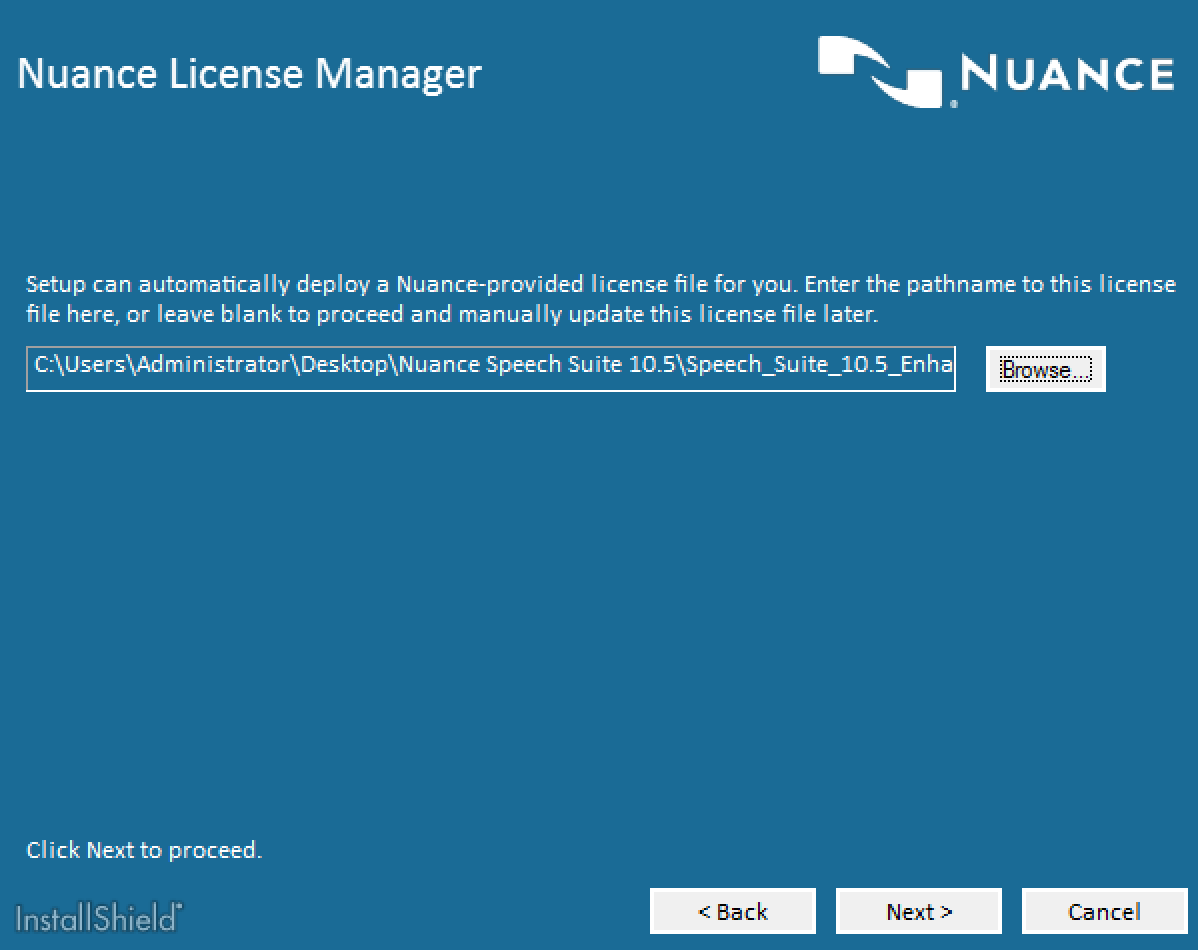
3. Choose your license file.

Nuance Speech Suite License Selection

Nuance Speech Suite License Selection

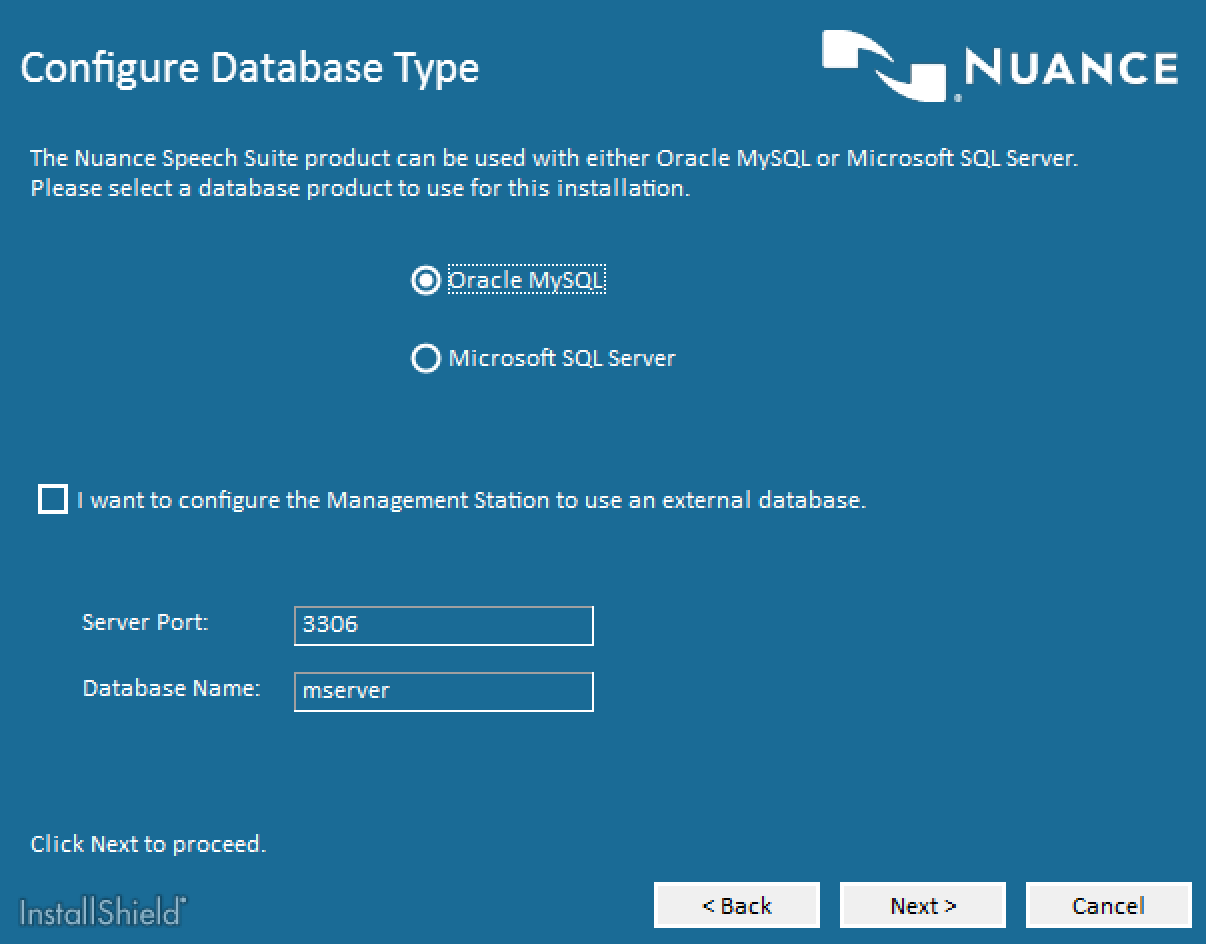
4. Select your database type.

Nuance Speech Suite Database Selection

Nuance Speech Suite Database Selection

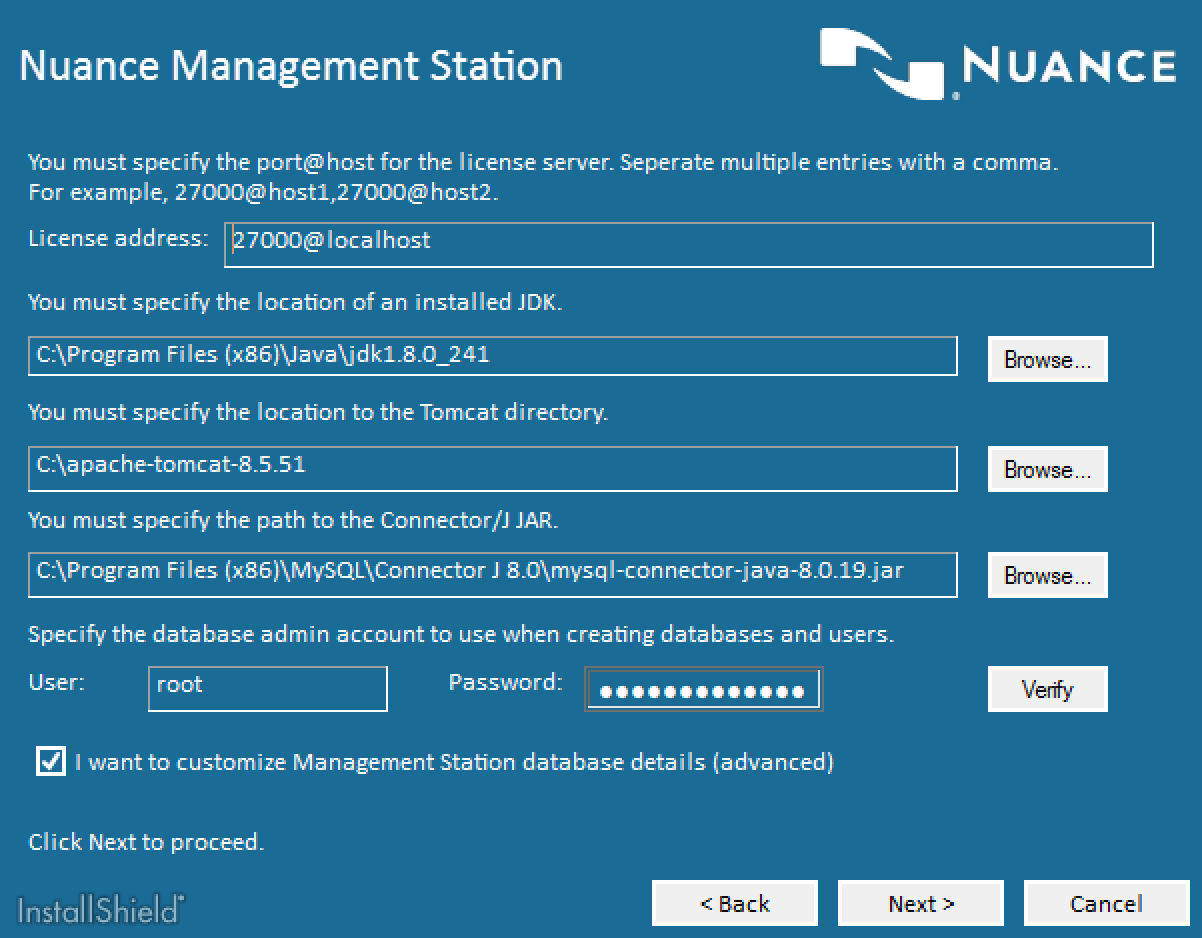
5. More than likely the installer will not find all your components automatically. So refer to your steps above to find the right path for each. Also enter your DB admin user and verify the installer can connect.

Nuance Speech Suite Component Configuration

Nuance Speech Suite Component Configuration

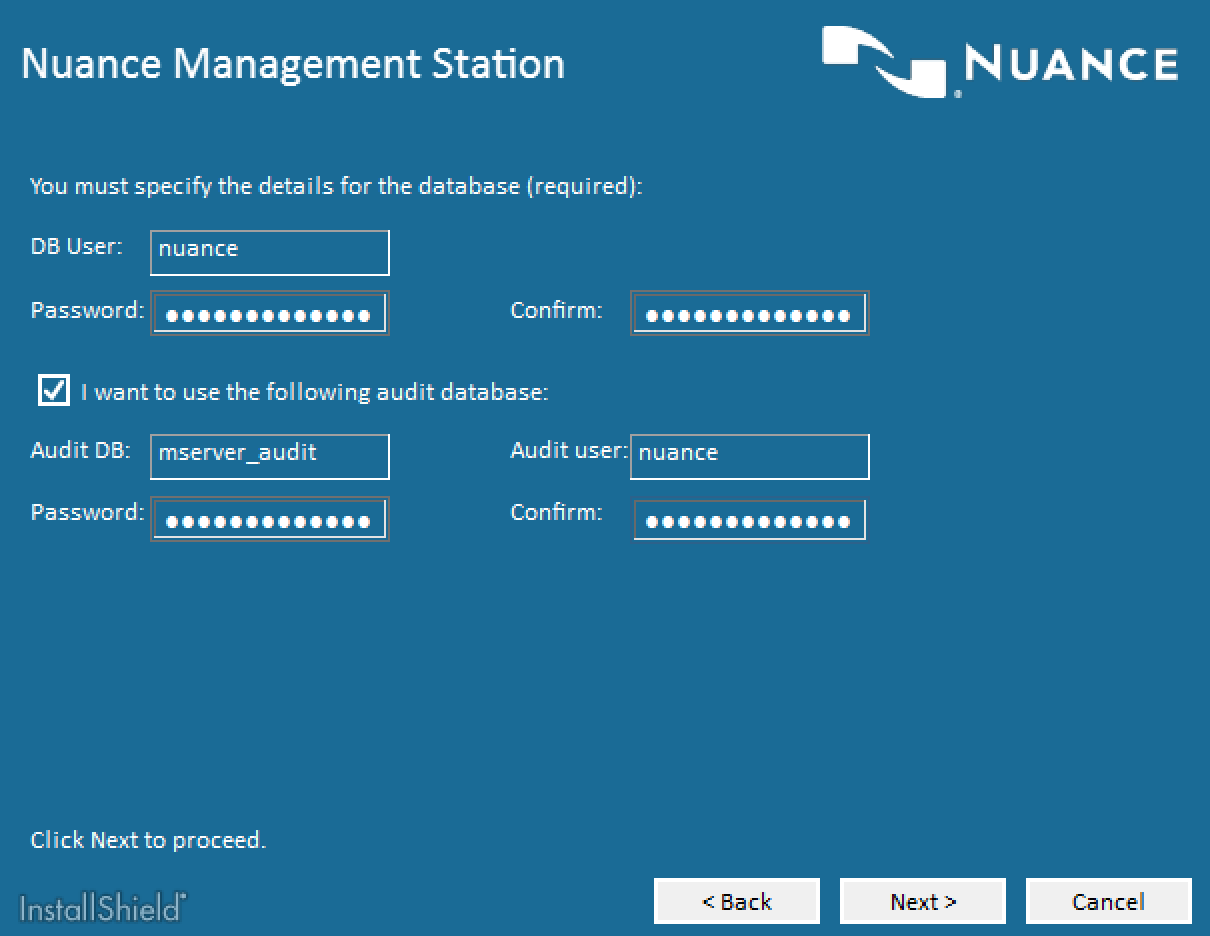
6. If you didn’t choose to customize the database details, you do not see this screen. Here’s is where you can set specific DB users as well as set your audit DB. By entering an admin account earlier you’ve chosen to either accept the default username and password (ms/msp) or you’re choosing a specific user. I use nuance as my DB user to make it clear who is accessing these DBs.

Nuance Speech Suite Database Configuration

Nuance Speech Suite Database Configuration

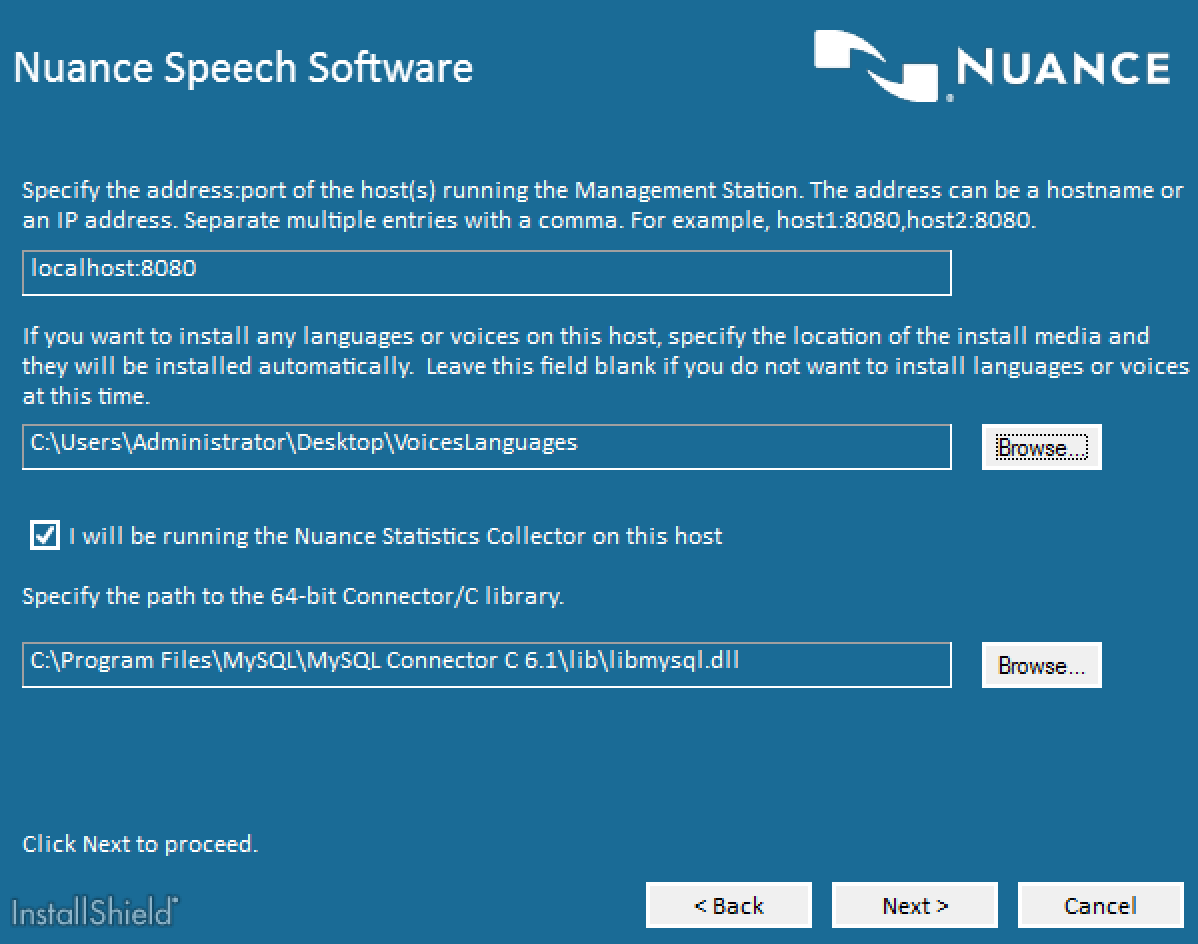
7. If you have any languages or voices you want to install choose the root directory and the installer will automatically find them. Make sure you’ve extracted the zip files to the same root folder.

Nuance Speech Suite Final Configuration

Nuance Speech Suite Final Configuration

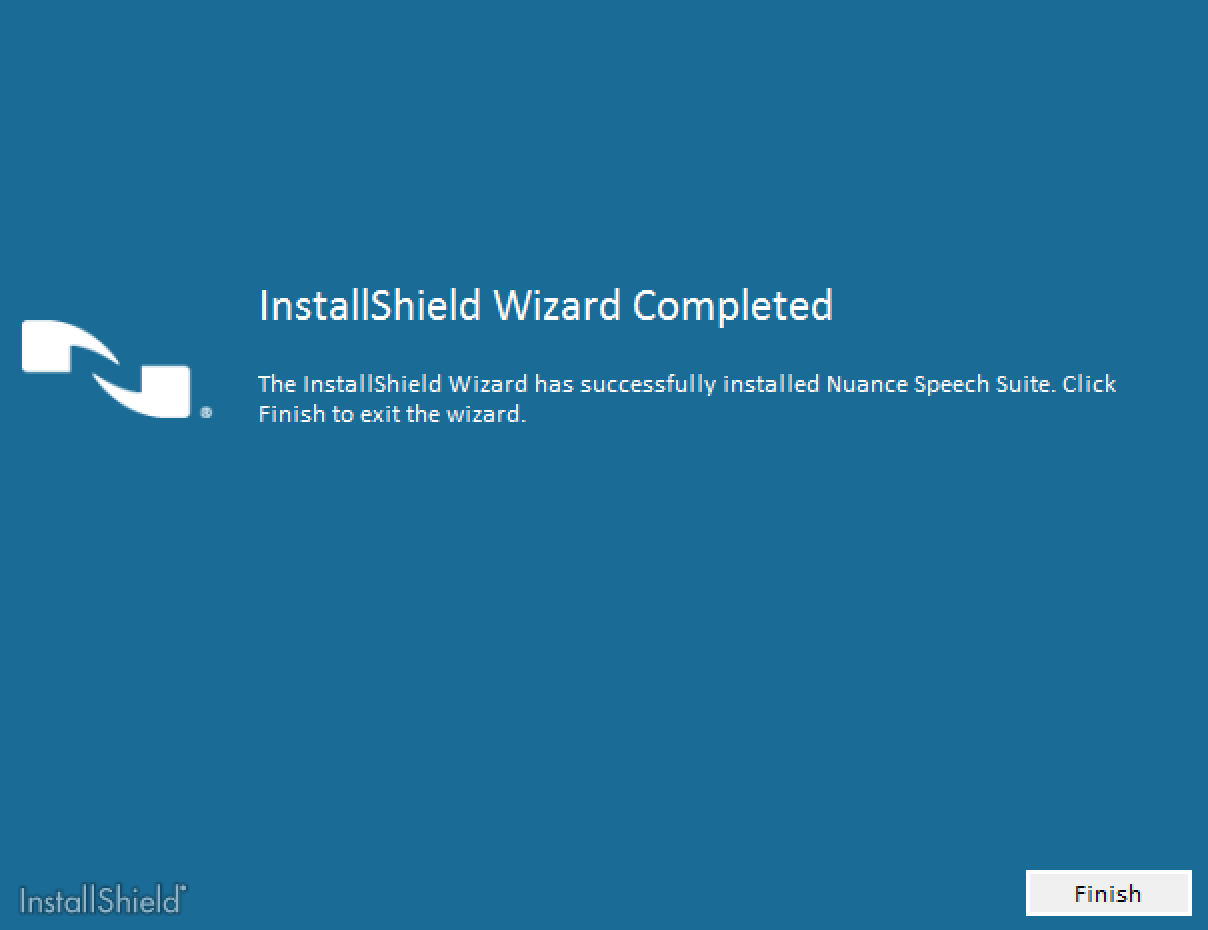
8. From here it’s just waiting for the installer to run. You should see external install windows appears specially around the language and voices being installed.

Nuance Speech Suite Finished

Nuance Speech Suite Finished

9. Do a Windows restart.

Validate Installation of Nuance Speech Suite:

  1. Take a look at the install log (C:\Program Files (x86)\Nuance\Management Station\mstation\mserver\logs) and look for any ERRORs.
  2. Open the Windows services and ensure that the following servers are started:
    • Nuance Management Station
    • Nuance Management Station Data Collection
    • Nuance Management Station Stats Analyzer

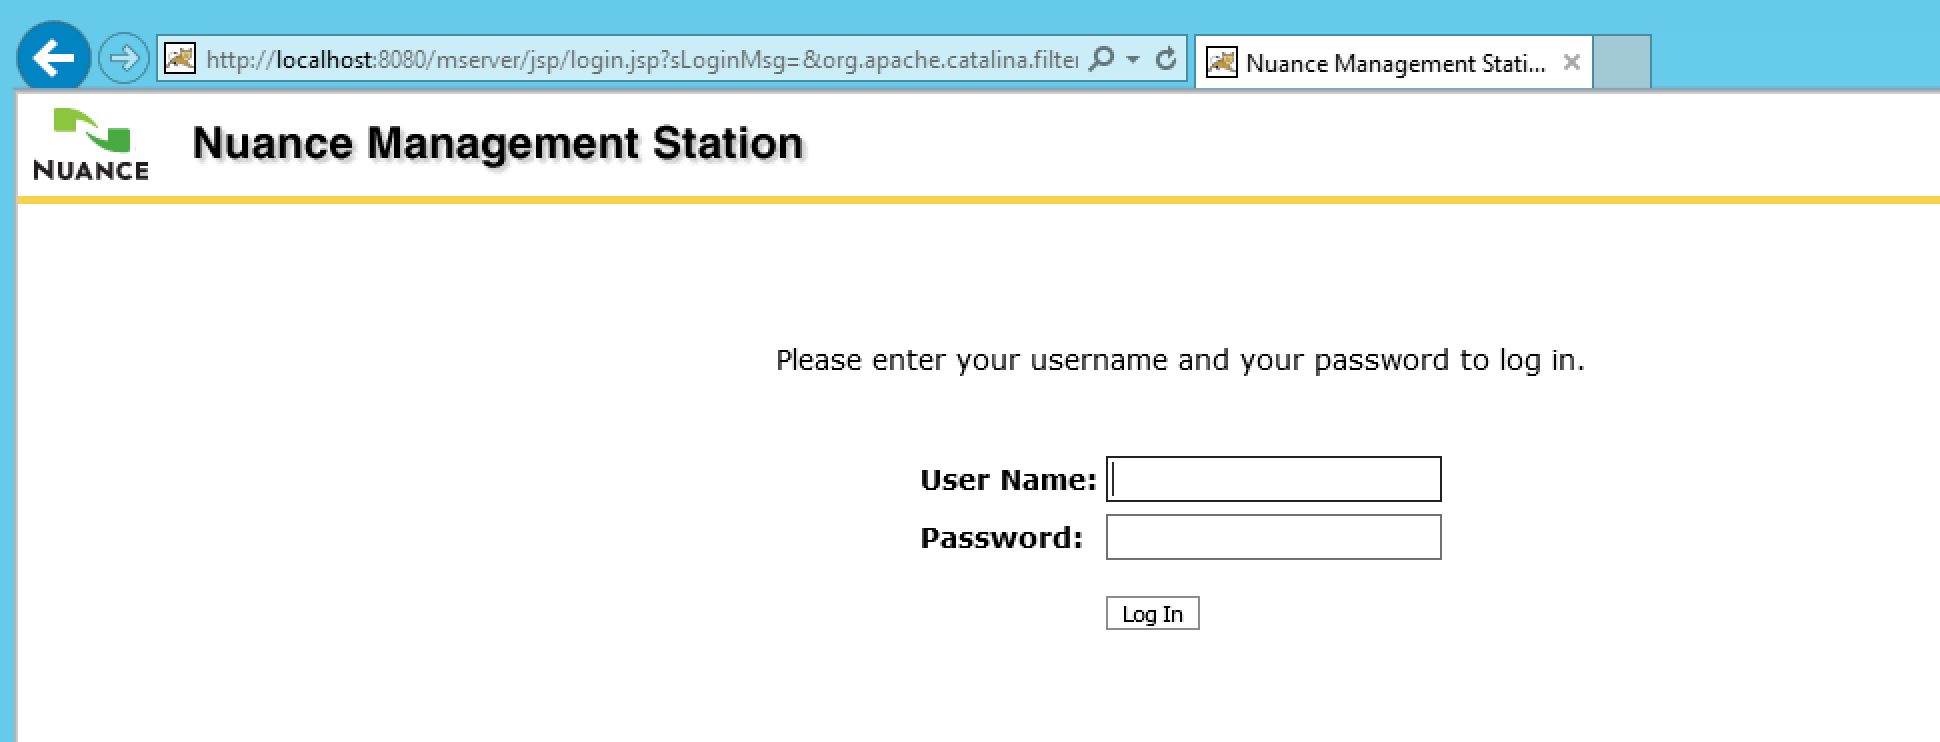
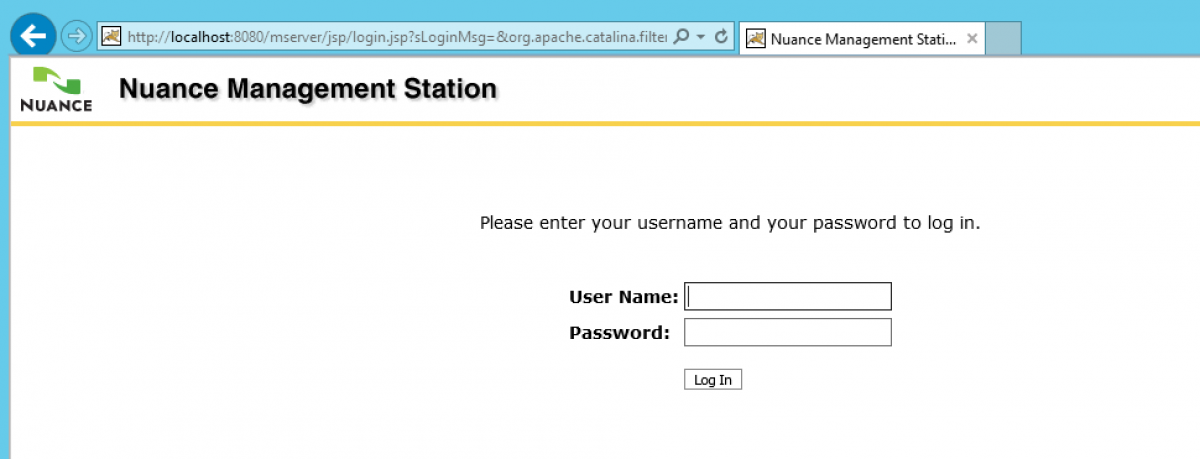
3. Go to http://localhost:8080/mserver use the default login of administrator/changeit

Nuance Speech Suite Login Screen

Nuance Speech Suite Login Screen

4. You’ll be prompted to change your password. Make sure you check out the password requirements as they are very specific. I also use my trusted old C1sc0C1sc0123! password which generally works everywhere.

There’s a lot more to go in getting this up and running, but this post is long enough. More to come.

~david


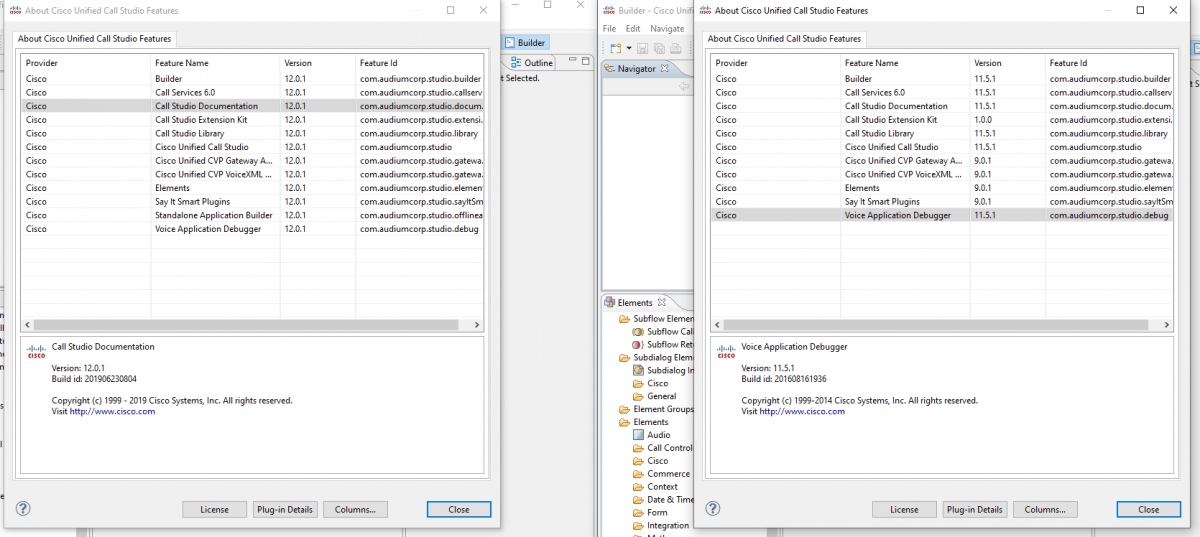
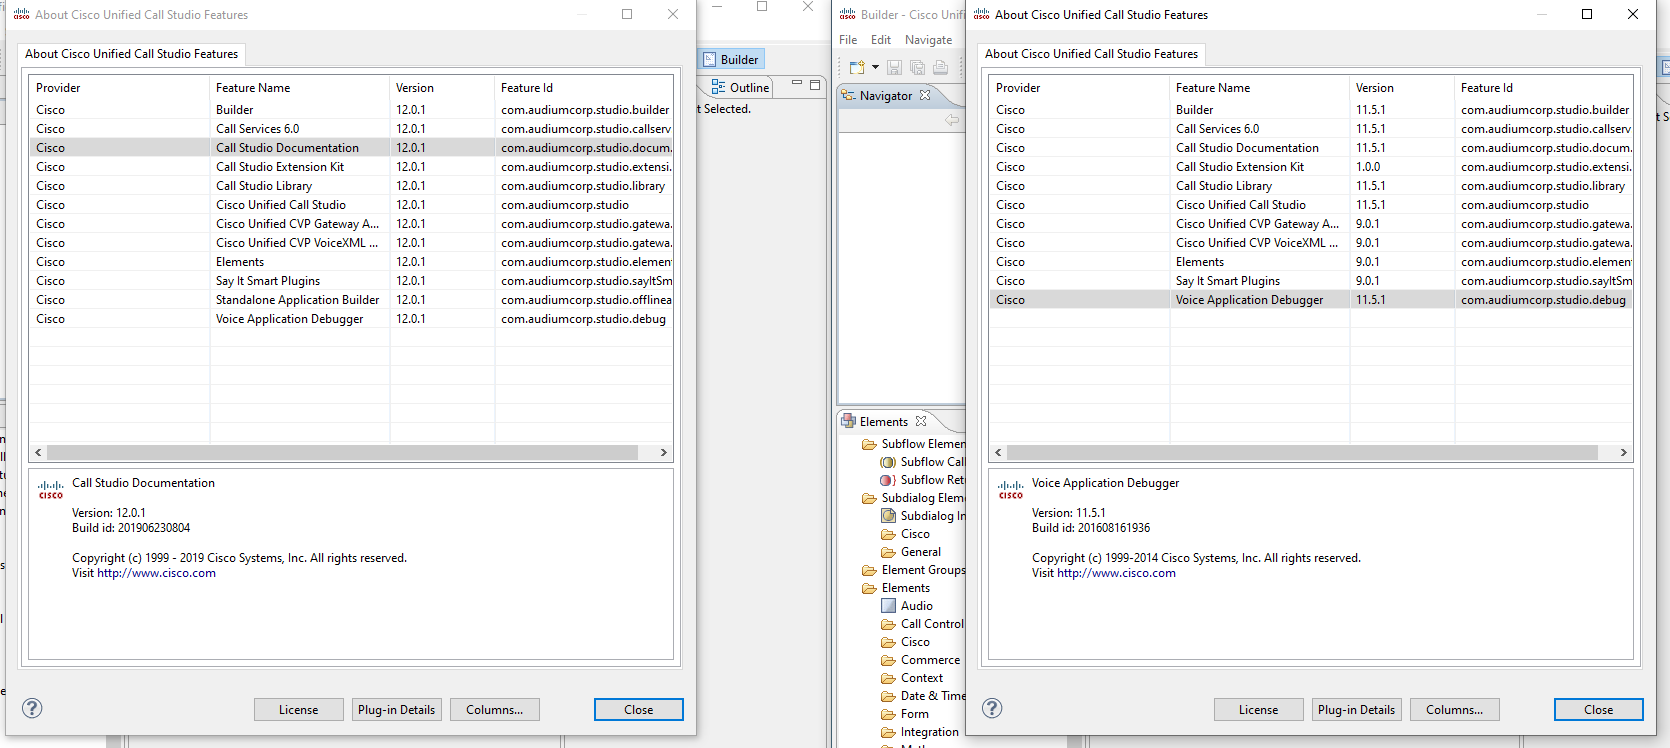
CVP Studio Features Dialog

Multiple CVP Studio Versions on the Same Machine

If you’re like me and do a fair bit of CVP work, including development, and you like to run the same version of Studio as the version you’re deploying against, then you’ve struggled with the fact that CVP Studio doesn’t play very nice with other versions of CVP Studio. Hopefully this blog helps you get all versions of CVP Studio running in harmony on your Windows machine. This method has worked well when going from CVP 12.x to 11.x to 10.x. As well as going the other way around.

  • Backup your registry.
  • If you have a 12.x version of CVP Studio installed:
    • DELETE:HKEY_LOCAL_MACHINE\SOFTWARE\Wow6432Node\Microsoft\Windows\CurrentVersion\Uninstall\{763E1DF9-41BC-4C54-9705-A0C6D1594B26}
  • If you have a 10.x or 11.x version of CVP Studio installed:
    • DELETE: [HKEY_LOCAL_MACHINE\SOFTWARE\Wow6432Node\Microsoft\Windows\CurrentVersion\Uninstall\{763E1DF9-41BC-4C54-9705-A0C6D1594B26}]
  • Install the new version of CVP Studio in a different directory. I like to install mine in c:\cisco\CallStudioxxx, where xxx is the version (e.g. 100, 115, etc).
  • Repoint and create new shortcuts for the various versions.

You will have to repoint your shortcuts, but other than that you should be all good.

CVP Studio Features Dialog

CVP 11 and 12 running side by side.

~david

Revisting Saving Host Names in Cisco AnyConnect Client

One of my most popular blog posts is this where I talk about how to set your AnyConnect VPN client to remember the addresses of the various VPN URLs you use. I figured I would be good to revisit it since it’s been 5 years since I last talked about it to ensure things still worked the same way as they did back in 2014.

First, everything still works the same way on Windows 10. You go to C:\ProgramData\Cisco\Cisco AnyConnect Secure Mobility Client\Profile create a new xml file. I call mine Profile.xml and use the following format:

<?xml version=”1.0″ encoding=”UTF-8″?>
<AnyConnectProfile xmlns=”http://schemas.xmlsoap.org/encoding/” xmlns:xsi=”http://www.w3.org/2001/XMLSchema-instance” xsi:schemaLocation=”http://schemas.xmlsoap.org/encoding/ AnyConnectProfile.xsd”>
<ServerList>
<HostEntry>
<HostName>dcloud-rtp-anyconnect.cisco.com</HostName>
<HostAddress>dcloud-rtp-anyconnect.cisco.com</HostAddress>
</HostEntry>
<HostEntry>
<HostName>2dcloud-rtp-anyconnect.cisco.com</HostName>
<HostAddress>dcloud-rtp-anyconnect.cisco.com</HostAddress>
</HostEntry>
<HostEntry>
<HostName>3dcloud-rtp-anyconnect.cisco.com</HostName>
<HostAddress>dcloud-rtp-anyconnect.cisco.com</HostAddress>
</HostEntry>
</ServerList>
</AnyConnectProfile>
Save it and restart your client and it will look like this:
VPN Client With Multiple URLs Saved
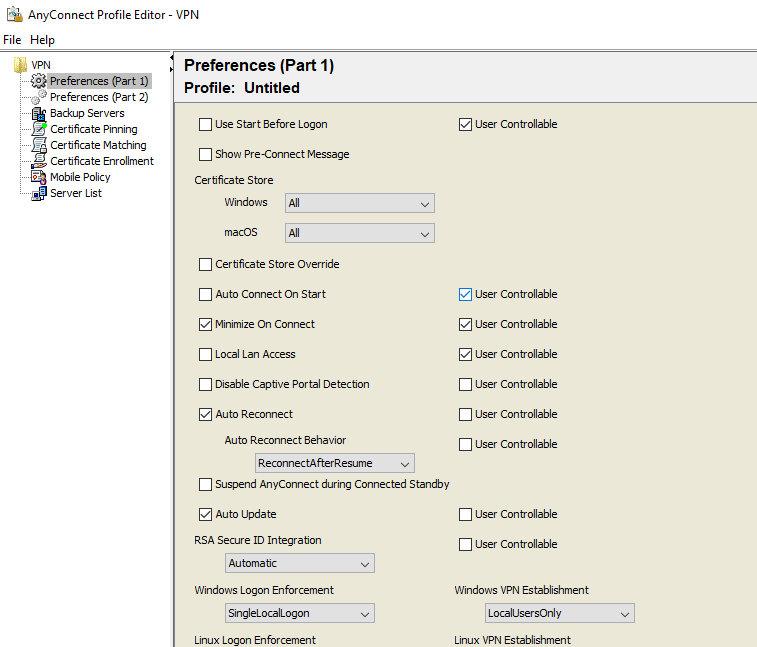
There is another method I’ve found and this involves some additional software. First, from software.cisco.com you have to install the Profile Editor (Windows), you only need to enable the Cisco AnyConnect Profile Editor. Once installed run the program.
Screen Shot 2020-01-14 at 9.38.43 AM
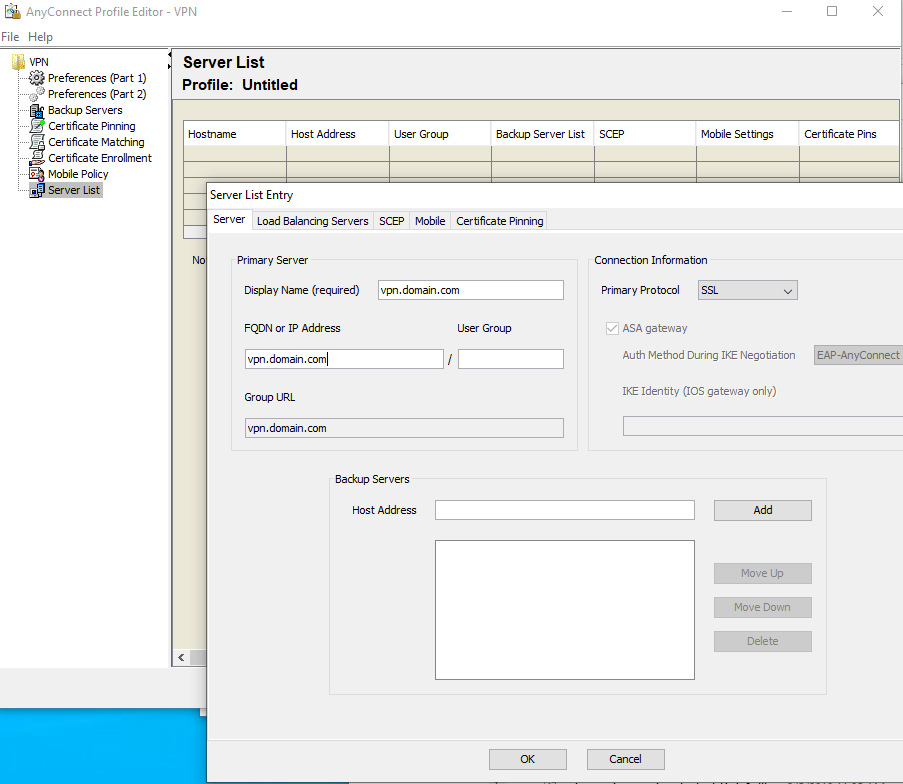
Go to Server List > Add:
Screen Shot 2020-01-14 at 9.44.24 AM
Go to File > Save As and save the XML file to same location C:\ProgramData\Cisco\Cisco AnyConnect Secure Mobility Client\Profile, restart the client and you should be all set.
~david

Connect Squirrel SQL to UCCX DB

I found a good bit of information on this, but none of it was in a single post. Figured it might help to see all the steps in a single spot. This assumes 11.x UCCX from a Windows machine.

  • Download Squirrel SQL https://sourceforge.net/projects/squirrel-sql/.
  • Open a command prompt with Administrator privileges.
  • Move to were the Squirrel jar file is found.
  • Run “java -jar squirrel-sql.XXX.jar”.
  • Besides the standard options add the Informix drivers.
  • Download the latest Informix JDBC driver from https://mvnrepository.com/artifact/com.ibm.informix/jdbc/
  • Place JDBC drive in the Squirrel SQL lib folder. You shoul be able to click on Drivers and scroll down and see a check mark next to Informix.
  • Go to UCCX Administrator > Tools > Password Managenet reset the password for uccxhruser. If you do this and you have a HA setup, make sure that you click on “Check Consistency” to validate that both nodes have the latest password. If they don’t, login to both nodes and do the previous step on each.
  • Connection URL format is: jdbc:informix-sqli://<fqdn or ip>:1504/db_cra:INFORMIXSERVER=<hostname>_uccx
  • Connect and to validate that you get some data go to SQL and run a query like “select contactType, applicationName from ContactCallDetail where ContactCallDetail.startDateTime >= ‘2019-07-01 00:00:00′”

~david

Release Nuance ASR License in Cisco Contact Center Enterprise & Virtual Voice Browser (VVB)

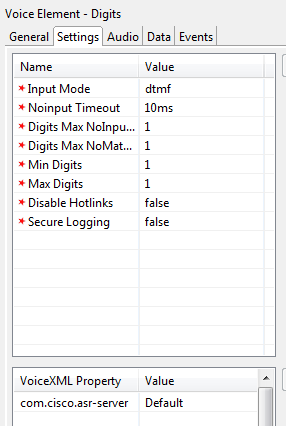
This topic seems to come up everytime I’m on an ASR project. I finally got a definetive answer out of Cisco on the “right” way to do this. The most popular approach to release the Nuance license is to have a dummy label in your ICM script. You can read all the details in this post. However, a much cleaner way of doing it involves adding a CVP collection/capture element, I like to use Digits, set the Input Mode to dtmf, all collection timers to 1, and play a very short silent prompt. Additionaly, add the following VXML property com.cisco.asr-server = Default.

CVP Studio Digits Elements for Nuance Release

How to confirm this actually works? Start Wireshark from one of your Nuance servers and and use the following filter:

(!sip.CSeq.method == "OPTIONS")&&(sip)&&frame.len in {874 504}

The above filter will only show the Invites and Byes to the Nuance service. Which will yield the following output:

"No.","Time","Source","Destination","Protocol","Length","Info"
"100","8.769243","10.10.10.16","10.10.10.17","SIP/SDP","874","Request: INVITE sip:asr@nuancesvr:5060;transport=tcp | "
"3699","95.355613","10.10.10.16","10.10.10.17","SIP","504","Request: BYE sip:mrcpserver@nuancesvr:5060;transport=TCP | "

You should confirm that the IPs in the capture are those of your VVB and Nuance box.

~david

Cisco Finesse Workflows Troubleshooting

I ran into this problem today and I had never really thought about how you could troubleshoot issues where a workflow wasn’t working. It had always been, if it worked it worked. Took a bit of time to figure out how to dig in to the right Finesse logs to see why exactly my workflow was not firing. In my particular case I have a screen pop workflow which is supposed to pop if a call variable contains a specific word. We’re going to figure out why the workflow never worked.

First, you should go to the URL below enable persistent logging and sign in to Finesse as your agent. To be safe you might want to clear the local storage, but that’s not really necessary.

https://fqdn/desktop/locallog

Second, send in a new call which is supposed to trigger the workflow.

Thrid, in a new tab open the locallog URL and let’s walk through what we see.

One of the first things you’ll see is that Finesse pulls all the workflows associated with your team:

2019-02-19T15:46:46.901 -05:00: BF8760: FQDN: Feb 19 2019 12:46:47.214 -0800: Header : [ClientServices] Workflows: requestId='undefined', Making REST request: method=GET, url='https://FQDN:/finesse/api/User/9056/Workflows?nocache=1550609206901'
2019-02-19T15:46:47.227 -05:00: BF8760: FQDN: Feb 19 2019 12:46:47.540 -0800: Header : [ClientServices] Workflows: requestId='undefined', Returned with status=200, content='&lt;Workflows&gt;&lt;Workflow&gt;&lt;name&gt;PARTICIPANT OVERVIEW WORKFLOW&lt;/name&gt;&lt;description&gt;PARTICIPANT OVERVIEW&lt;/description&gt;&lt;uri&gt;/finesse/api/Workflow/1&lt;/uri&gt;&lt;TriggerSet&gt;&lt;name&gt;CALL_ARRIVES&lt;/name&gt;&lt;type&gt;SYSTEM&lt;/type&gt;&lt;triggers&gt;&lt;Trigger&gt;&lt;comparator&gt;IS_EQUAL&lt;/comparator&gt;&lt;value&gt;Voice&lt;/value&gt;&lt;Variable&gt;&lt;name&gt;mediaType&lt;/name&gt;&lt;node&gt;//Dialog/mediaType&lt;/node&gt;&lt;type&gt;CUSTOM&lt;/type&gt;&lt;/Variable&gt;&lt;/Trigger&gt;&lt;Trigger&gt;..

Next you’ll see that Finesse will see if there’s a workflow to run if the agent has logged in or gone ready. So it will evaluate the workflow conditions based on this trigger. This happens always even if you don’t have a workflow with these trigger conditions.

2019-02-19T15:46:47.237 -05:00: BF8760: FQDN: Feb 19 2019 12:46:47.550 -0800: Header : [WorkflowEngine] Entering 'Busy' state, from: 'loggingIn'. Triggering start of queued event processing.
...
2019-02-19T15:46:47.412 -05:00: BF8760: FQDN: Feb 19 2019 12:46:47.725 -0800: Header : [WorkflowEngine] "" IS_EQUAL "Voice" evaluates to FALSE

So far so good, but we’ve not gotten to our workflow which is supposed to launch on call arrival.

2019-02-19T15:48:14.103 -05:00: BF8760: FQDN: Feb 19 2019 12:48:14.419 -0800: Header : [WorkflowEngine] Entering 'Busy' state, from: 'idle'. Triggering start of queued event processing.
...
2019-02-19T15:48:14.191 -05:00: BF8760: FQDN: Feb 19 2019 12:48:14.507 -0800: Header : [WorkflowEngine] Evaluating conditions for workflow: {"workflowName":"CASE SEARCH","eventType":"Dialog","eventUri":"/finesse/api/Dialog/33558863"}
2019-02-19T15:48:14.191 -05:00: BF8760: FQDN: Feb 19 2019 12:48:14.507 -0800: Header : [WorkflowEngine] "ATTORNEY" CONTAINS ""ATTORNEY"" evaluates to FALSE

As you can see in the last line our workflow is supposed to launch if ATTORNEY contains ATTORNEY, but we have “” arround the string which is causing it to not match. By going to Finesse adming and changing your workflow to not contain the quotes fixed the issue right up.

~david

Upgrading Cisco SG200-26 Smart Switch Firmware and Boot

This took me a bit longer than I expected mainly because the release notes were not clear. Like the title suggests there are two types of upgrades you can do to this device, the firware and the boot file. If you’re going to the latest version released by Cisco which at the time of this post is 1.4.x, you want to start with the boot file and upgrade that to 1.3.x using a TFTP server. After that you’ll want to upgrade the firmware to 1.3.x. After that you’ll be able to upgrade to 1.4.x.

One other thing to note, when reseting the device to factory defaults I could never login to 192.168.1.254 on port 1, I had to move my laptop to port 9 in order to get to the web UI.

~david

Cisco Spark Webhooks using Node.js

I’ve been trying to come up with a reason to play around with node.js. I’ve also been trying to make some time to play around with the Cisco Spark API. So I figured I would merry the two of them. My intention was to setup a webhook on a channel, then in my node application display the messages being posted in my room. Pretty simple example, but it touches a few different things.

First, you need to setup your webhook to point to your server.

Second, you need to have node installed, in this case I’m using Ubuntu 16.04.

Third, write some code. Check out my comments to follow along.

//will use these for the POST request

var express = require("express");
var myParser = require("body-parser");
var app = express();

//will use this for the GET request

var http = require(‘https’);

app.use(myParser.json());
app.post("/", function(request, response){

console.log(request.method);

//console the webhook name as well as the name of the author of the message
console.log(‘Webhook:’+request.body.name);
console.log(‘Email:’+request.body.data.personEmail);

//setup your GET request to find out the actual message posted by the author

var options = {
host: ‘api.ciscospark.com’,
path: ‘/v1/messages/’+request.body.data.id,
headers: {
  ‘User-Agent’: ‘request’,
  ‘Authorization’: ‘Bearer MyAuth’
}
}

//make the request

http.request(options, OnResponse).end();
});

//capture the request response

function OnResponse(response){
var data = ”;
response.on(‘data’, function(chunk){
  data += chunk;
});

response.on(‘end’, function(){
  data = JSON.parse(data);

//console out the actual text
  console.log(data.text);
});
}

app.listen(8080);

~david